
*** a simpler version of this blog is also available ***
I recently came across a YouTube video that did a great explanation about how to get great engravings. See Thinklaser.com video here https://www.youtube.com/watch?v=YvQ8L7Xth8k&feature=youtu.be
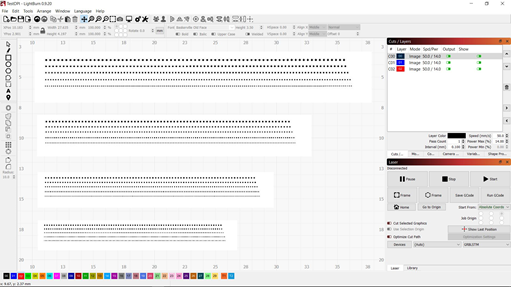
In a nutshell: you laser a test pattern of dots at different focus points with the same low speed and choose the smallest dot engraving from the set which gives you the best focal point and highest resolution. The dot pattern is set at 0.1mm, 0.2mm, 0.3mm and 0.4mm apart per row. Where the engraving is line instead of dots than that resolution is not met and look to the row above. Where you can see individual dots than that is your resolution. I used here a dot pattern in LightBurn to test the dot sizes at 50mm/sec at 14% (arbitrarily chosen values). I found that my K40 was doing 0.15mm dots although I use a better non-stock lens.
Next is to set the DPI dots per inch correctly in the laser program and calculate the engraving speed with using the ignition time of the laser tube. (see video).
The highest resolution found based on the selected dot size e.g. 0.2mm is 25.4/0.2=127 DPI (dots per inch). Surprisingly lower than expected. Use less power and the dot size becomes smaller (because of the narrower laser beam).
Speed calculation is based on tube ignition time (3 milliseconds) and dot size which goes as following (using the video values so it’s easy to go back to watching the video):
Distance of 1mm/0.2mm dot size equals 5 dots per mm.
Time of engraving based on ignition time 3mS x 5 dots/mm equals 15mS.
So the engrave speed can now be found as 1000mS/15mS per mm equals 67mm/Sec. (Note: our K40 values are probably 7 dots/mm at 2mSec giving 75mm/S at 250DPI based on my testing.)
Amazingly, the conclusion drawn in the video is that low dpi’s at low speed gives better results than high values. (The video explains in detail that high resolution puts dots together and when they overlap you get black blobs. You have to be patient with Russ since the explanation is done at a slow pace.)
Improvements can be found by increasing the brightness and contrast of the image in increments of 5% and setting the Gamma value of the picture (<1 gives a lighter picture e.g. 0.75).
It confirms my experiences with engraving that it is a slow process which depends on lens quality (stock lens is really not that great), material, speed and laser ignition time (2 to 3 milliseconds which increases by power setting). Of course numbers in the calculation are just an example to help you out. Your K40 laser tube might be a bit faster than 3mSec as I found out thru testing (using the dot patterns and a set of DPI settings ranging from 127, 250 and 350 at various speeds).
The main explanation about the low DPIs at low speed quality engraving is: less power gives you a narrower beam (smaller dot, higher resolution) and surprisingly, according to the video a faster tube ignition time (3mS). A trick that we can apply is setting the $31 minimum laser strength e.g. $31=5 which keeps the tube on but lasering is too faint to affect the work piece. Or you could do true Grayscale engraving with the Mini Gerbil since it varies the tube power continuously something that the m2Nano board cannot do (it uses a fixed reference laser power setting via the pot or digital control panel). Below are my basic test results with Dither and Grayscale engraving at various DPI and power settings without meddling too much since it’s mid night while writing this.
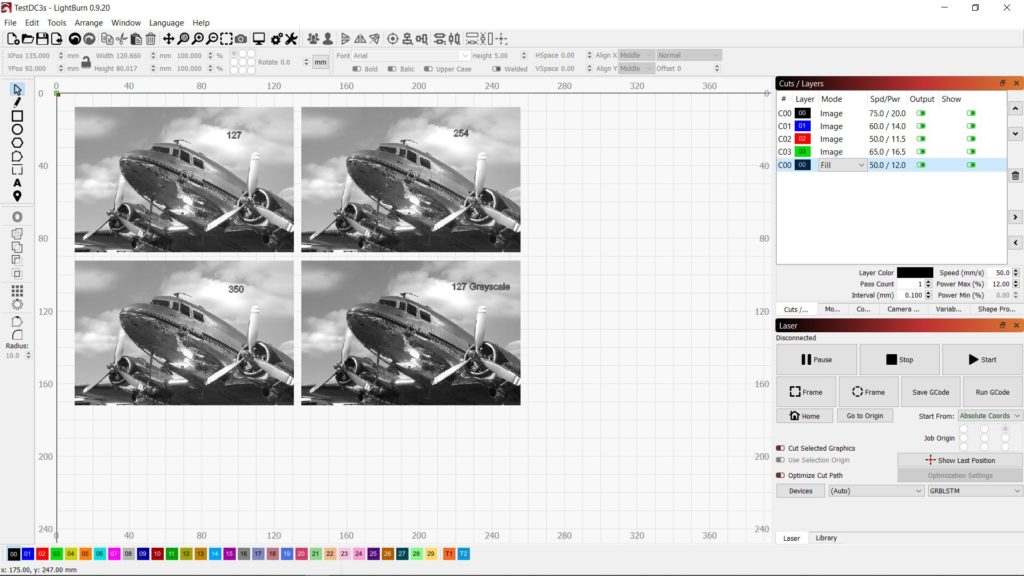
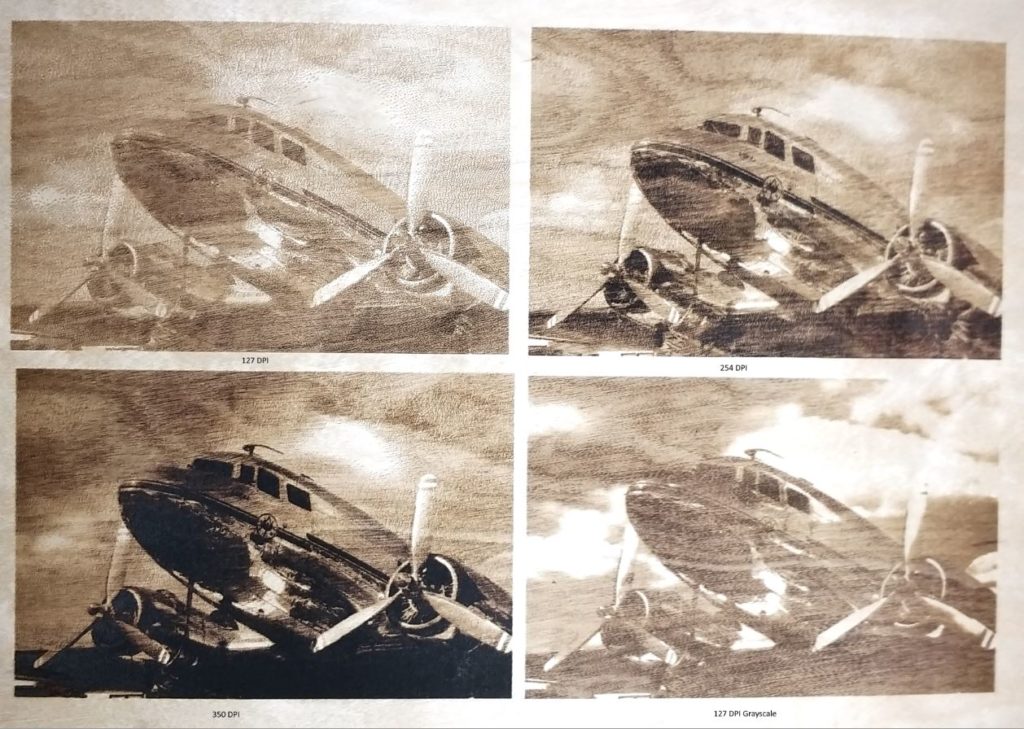
As you see the 350 DPI gets darker because of the overlapping dots. Especially on the nose of the plane, the details are lost. I guess we are here at the border of the capabilities. The 127 DPI pictures do show a slight difference between them because of the method (Dither vs Grayscale) and some settings for the grayscale picture need to be adjusted (probably the Gamma is too aggressive). The 254 DPI picture is just nice, I can read the logo on the side of the cockpit. Note how the grain of the plywood is playing with the clouds across all engravings.
Further improvements?
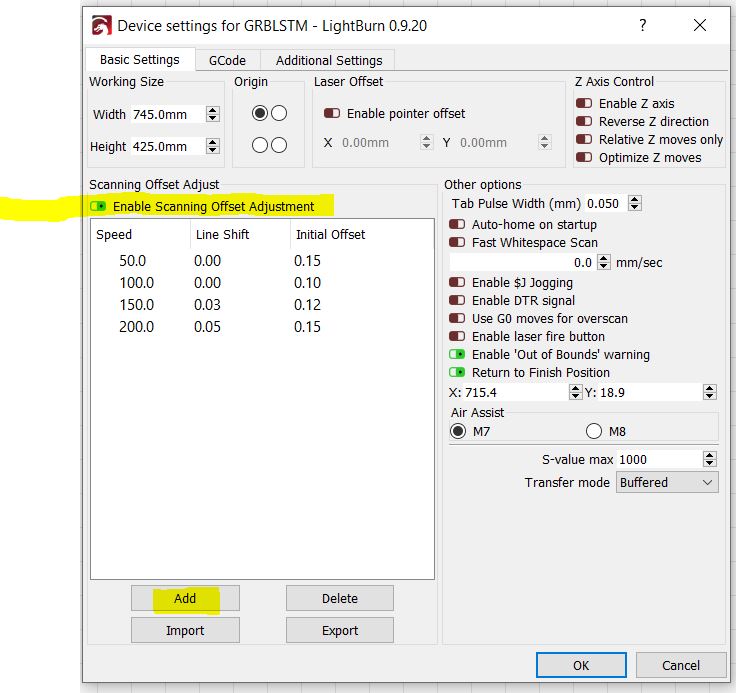
Can we make any further improvements? Well, actually we can…We came across the LightBurn blog on scan settings https://github.com/LightBurnSoftware/Documentation/blob/master/ScanningOffsetAdjustment.md
It gives a good description on fixing the backlash of the K40 gantry. Backlash is additional travel in the previous direction when the gantry changes direction. The rubber belt will give a little bit so on return the gantry overshoots. This can be seen in the jarred edges and we use over scanning to fix the image edges. However dots can still overlap also giving a skewed line when moving in the Y direction. The backlash compensation instructions tell you to draw a small rectangle and select a fill with an interval of 0.5mm so we can examine the filled lines. Run an engraving at 50, 100, 150 and 200mm/s and estimate the offsets. You might need a magnifying glass.
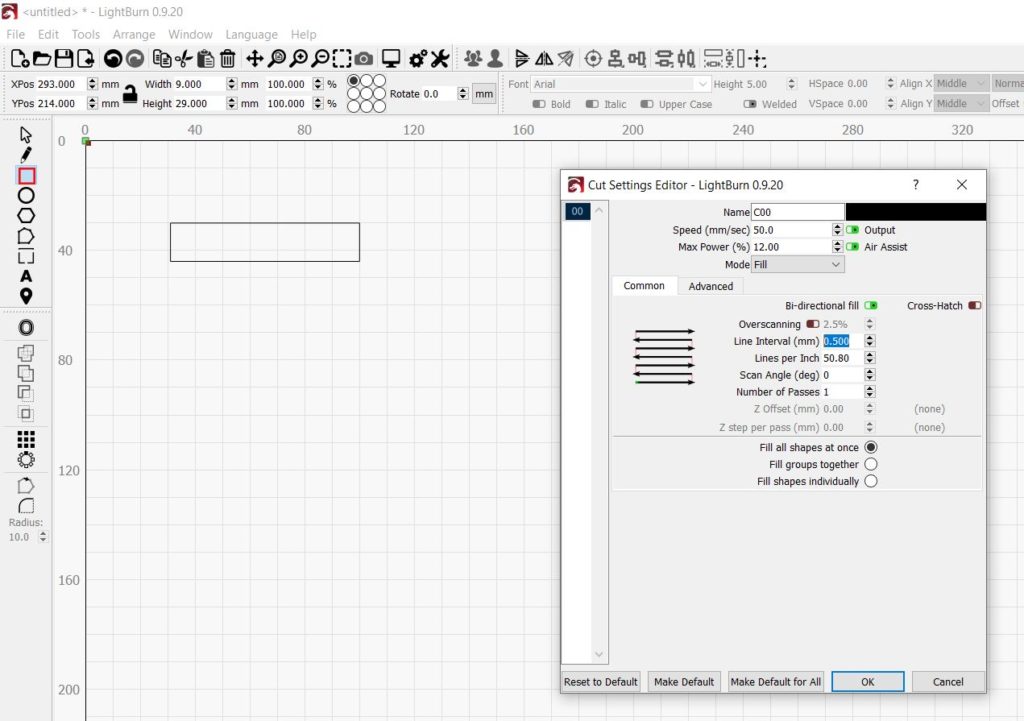
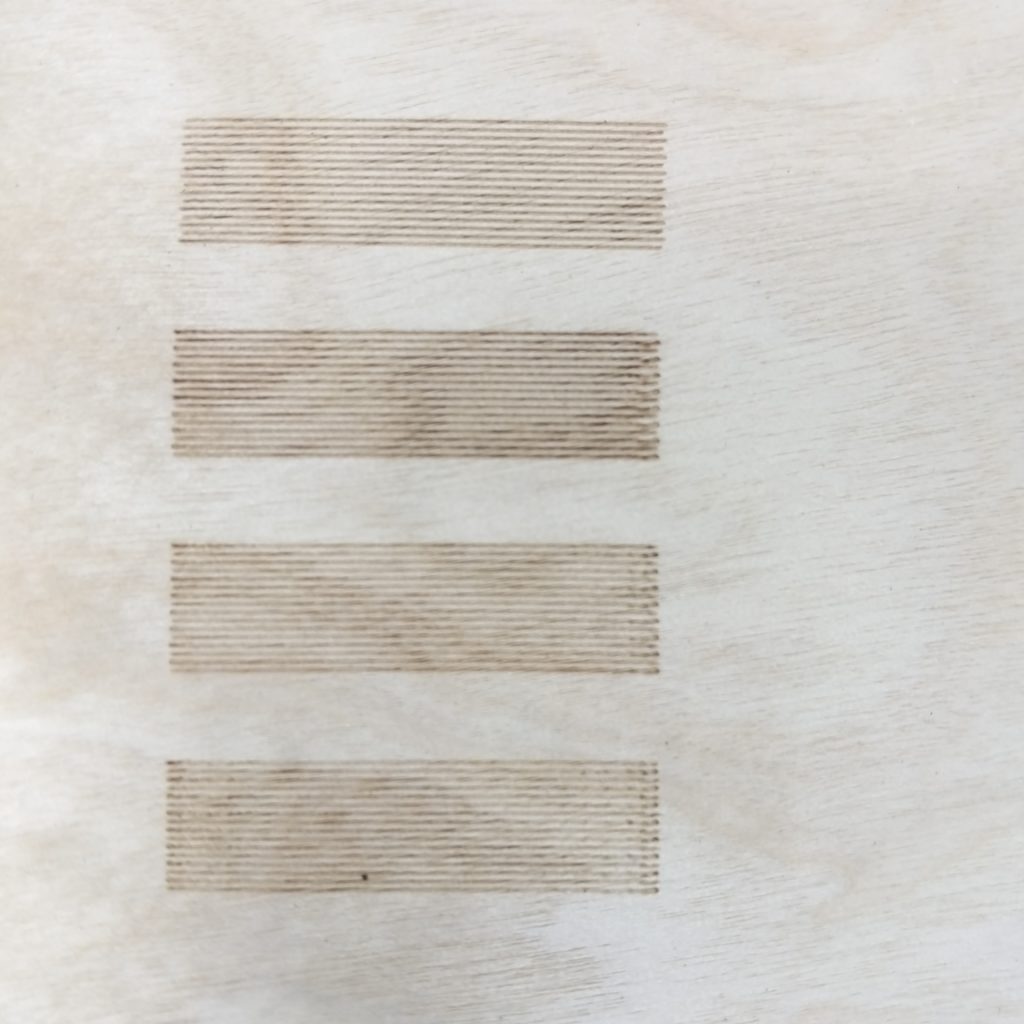
Enter the offsets per engraving speed 50, 100, 150 and 200 mm/s.
The final result can be observed below. I choose the 127 DPI picture since that engraving still required some more depth. I left over scanning off so you can see from the edges the improvement as well.
And there you have it, after enabling a few settings we obtained a very nice engraving of the DC3. I hope you enjoyed it.
Hints
The video does not show you that you can actually layer engravings by doing multiple cycles of an engraving (stacked) at different settings which gives you significant better contrast. Make sure that you home the machine between cycles so the dots are exactly at the same spot as the previous dots otherwise you might get overlaps showing up as lines or black spots. (e.g. loose belts do cause this too). Further enable the over scanning feature within your laser program so you avoid jagged edges on the engraved image.
Keep in mind that there are many variables in engraving such as wood characteristics, mechanics, optics, tube characteristics and software but I found this explanation and tips provides a good start to dialing in your laser.
Enjoy and be patient!
Paul
Dan’s blog tips:
TIP #1 – never set LightBurn DPI output higher than the physical resolution of your laser.
TIP #1b – If you really do want higher resolution, buy a better lens, and measure your resolution so you can change your DPI settings to it. We’ll soon publish a guide to measuring your resolution.
TIP #2 – SLLLOOOWWW done to 60mm/second. With correct resolution, you’ll can still be 25% faster than running at 200mm/second.
127 DPI resolution, 60mm/sec speed – seriously, check it out
Gamma – is your very best friend for getting the tones in your image right. Just select the image in LightBurn and in the bottom right hand panel.
Change gamma… just do it
Gamma doesn’t affect pure white or pure black, just grays like this:
- Setting gamma < 1 will make grays lighter.
- Setting gamma >1 will make grays darker.
TIP #3 – Use Gamma to adjust tones once you do a trial run at 127 DPI and 60mm/sec on your material. You don’t even need to trial the whole image, just a part of it that has the shade of gray you want to manage.
TIP #4 – Use Overscan!
Sources – this blog was written from:
- Years of personal experience and investigation into laser engravings
- A video from Russ at thinklaser.com https://youtu.be/YvQ8L7Xth8k.
Hi, I have done the air assist upgrade using the fault pin, however there is no change at the solenoid. Can you give me some advice please. The light on the ssr is on when I put M8 into the command centre and off when I put M9 in. Does the ground pin on the relay need to be connected for the gerbil mini? I have the red and black cable attached as shown in your wiring diagram, with the diode line on the positive side.
Hi Jon, I understand you have an MG2, but the page you’re describing was written for the MG3. Please check the following page for the most relevant diagram https://awesome.tech/air-assist/
Regards,
Dan