
This blog provides guidance on how to connect an external stepper motor driver.
Why you might need to connect an external stepper motor
The K40 has a small bed size and thus the gantry is small and light. So only small stepper motors are needed. The MG3 is designed to suit the K40 and can provide ample power for it. Its output can supply slightly larger stepper motors, but there’s no guarantee it can work for large bed sizes with heavy gantries.
How to avoid using an external stepper driver
Check this list to see if you can avoid using an external stepper driver:
A) Ensure your gantry moves as smoothly as possible, ensure it’s well lubricated and not stiff
B) Keep your laser head and other equipment light weight, because less energy is required to move a lighter load
C) Increase the A4988 current as much as you can – see here
Using external stepper motor drivers
If you’ve tried the above and you still get no motion, or inconsistent motion, then you’ll need an external stepper motor driver. For this blog we’re using a TB6600. Not because it’s amazing or anything, it’s just that it’s cheap and ubiquitous.
Understanding the TB6600
The photo below shows the TB6600. You’ll need one for the X axis, and one for the Y axis.
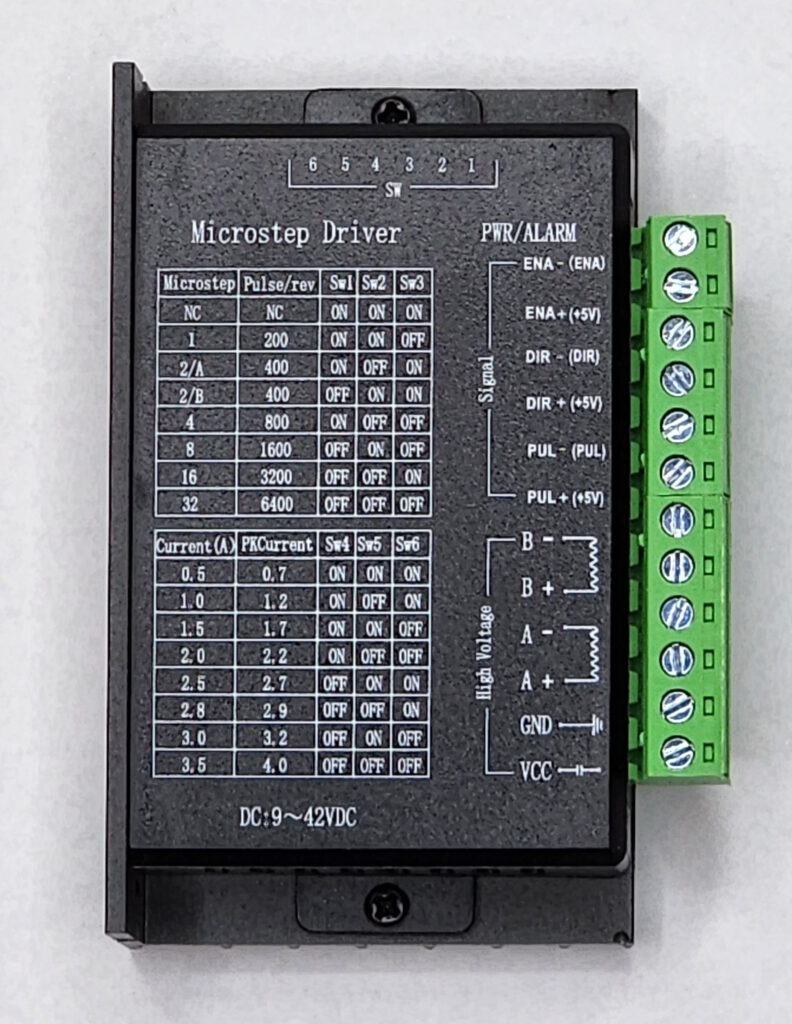
The TB6600:
- accepts control signals from the Mini Gerbil.
- accepts power from a separate power supply – you will need to provide this, you can’t use your laser’s existing power supply.
- has DIP switch settings to control microsteps
- has DIP switch settings to control the stepper motor current.
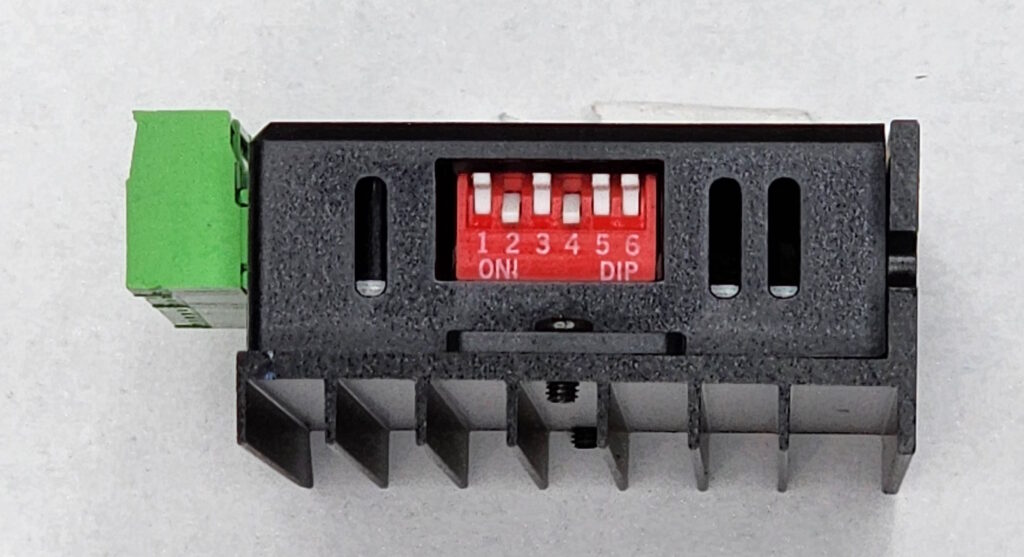
The DIP switches are located on the top surface and look like this:
Wiring diagram
The wiring diagram below shows only one TB6600 for the Y axis. You will need another TB6600 for the X axis, that not shown to keep the diagram simple.
Start by removing the red A4988 stepsticks from the Mini Gerbil. Keep them in a safe place. Remember that if you ever need to re-insert them into the Mini Gerbil, you must insert in the correct orientation – you’ll break things if you place them the wrong way around.
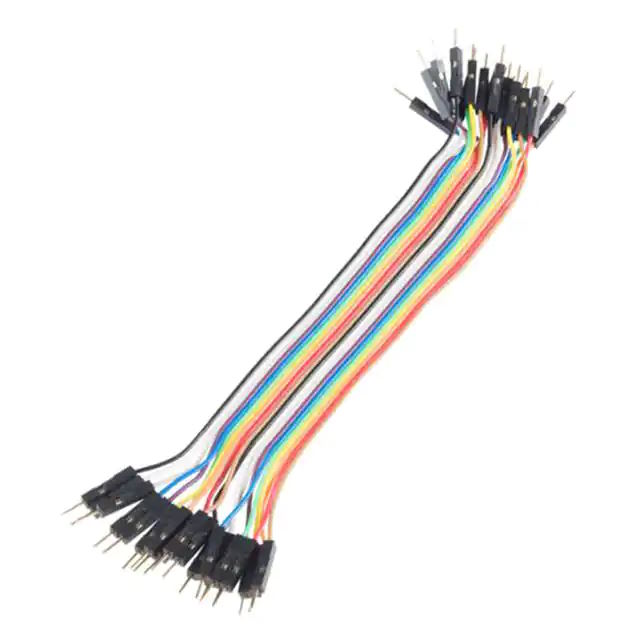
You’ll need male to male jumper leads. These can be bought from a local electronic hobbyist store, or online at suppliers like Digikey.
Connect the STEP, DIRECTION and ENABLE pins as shown. Ground is required as well, looping into all the -ve terminals at the TB6600 input.
As the TB6600 uses opto-isolators, the power side of it does not require a common ground with the Mini Gerbil.
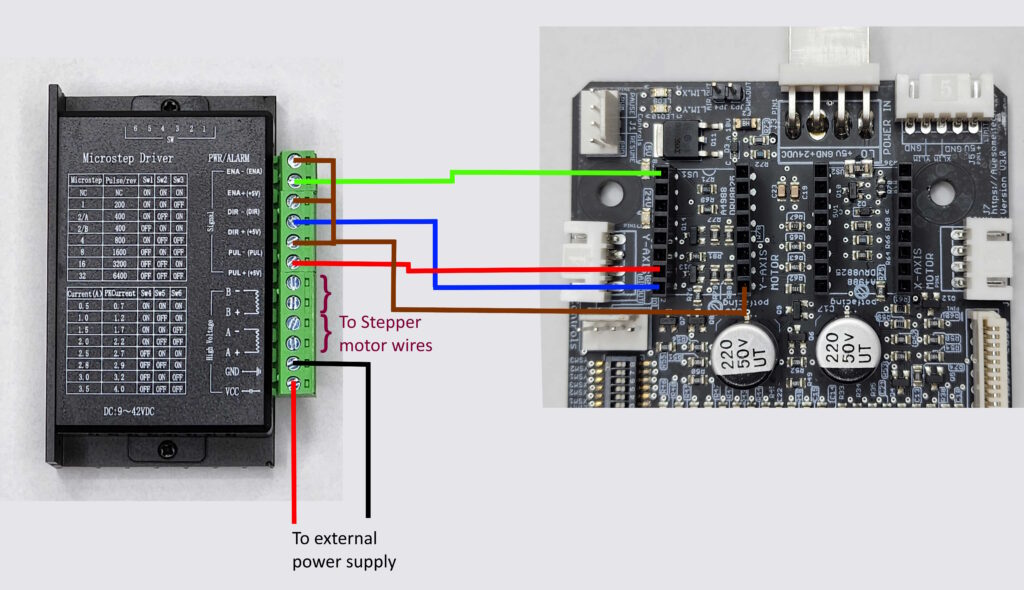
Wiring the stepper motors requires working out the wires on your motors. See these instructions. You’ll need a multimeter.
Set the TB6600 to 16 Microsteps (Up, Up, Down) for SW1, 2 and 3. Check that your TB6600 has the same configuration table as the photo above.
The TB6600 should be matched to the stepper motor current. Try looking for any information on the stepper motor, you can try googling the model number. If you can’t find any information on stepper motor current, set the TB6600 DIP switch settings to their lowest current value first, and slowly increase the power according to the printed table if needed.
Next steps
Let me know how you go with the above, this is the first version of the instructions.