
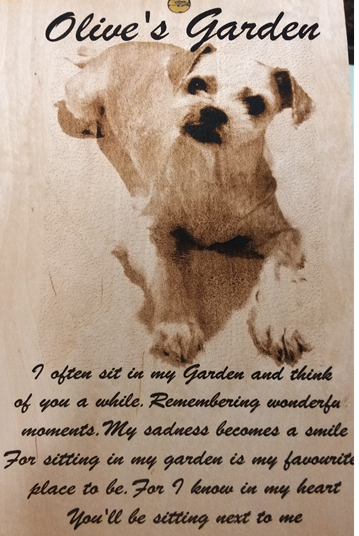
A customer was concerned that he couldn’t reach his target of high speed engraving. I showed him how he could reduce his scanning speed by 70% but finish his job 25% quicker, with a better result. Yes, 25% reduction in engraving time.
Curious? Good – let’s bust some myths about engraving:
Let’s say you want the best. Don’t blame you. That means really high DPI and really fast scanning speed, yes? Nope, not really – any setting outside what your K40 or other laser can physically achieve is going backwards.
Resolution – A typical K40 laser beam width is 0.2mm. That translates to 127 DPI – yes, that is your real resolution, and nothing you ever do in software is going to improve it. Even vector based graphics has to get converted to pixels at some point.
So, what happens when you pick a higher resolution than 127 DPI in LightBurn? LightBurn makes a vast multitude of scan instructions, each of which move the laser head very slightly, but basically on the same point over and over again. Check out the ‘Line Interval (mm)’ in LightBurn. If you used a DPI value of 500, the distance between successive scan rows would be 0.05mm, which is one quarter of the minimum size dot you can make – it just doesn’t make sense!
TIP #1 – don’t bother setting LightBurn DPI output higher than the physical resolution of your laser – to do so is just false precision.
TIP #1b – to actually achieve higher resolution, reduce your beam width by buying a better lens, and measure your resolution so you can change your DPI settings to it. We’ll soon publish a guide to measuring your resolution.
Speed – folk who set an unnecessarily high resolution, tend to aim for really high scan speeds so that their repetitive false precision job doesn’t take forever. Here are the problems with that:
- resolution-speed relationship – the faster you set scan speeds, the more the laser travels while its firing, which spreads out the pixel that’s being burnt. For example, an engraving speed of 200mm/second only gives 1millisecond to burn the relevant dot on your workpiece. That’s a crazy short amount of time, not long enough for the power supply to consistently manage power flow to the laser. Result – the pixel is a blurred average of the power supply levels of previous pixels. From everything I’m seeing on the K40, the engraving sweet spot is around 60mm/second. That might seem slow until you remember you’ve stopped wasting time with scanning, scanning, and re-scanning the same spots because of excessively (uselessly) high resolution.
- mechanics – if you talk about motor sports, it’s not the speed that kills, it’s the sudden deceleration. Similar with lasers. Asking a stepper motor to decelerate a rapidly moving laser head isn’t going to lead to quality results.
TIP #2 – SLLLOOOWWW done to 60mm/second. With correct resolution, you can still finish 25% faster than running at 200mm/second, because you’re not repetitively scanning the same location with false precision.
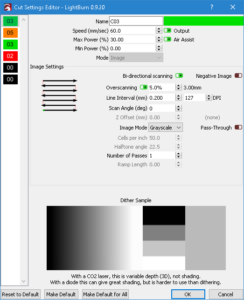
Gamma – is your very best friend for getting the tones in your image right. Just select the image in LightBurn and in the bottom right hand panel you see:
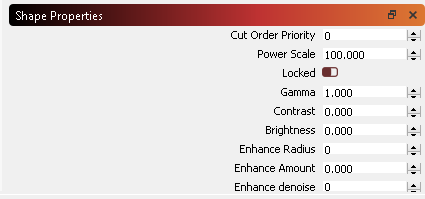
Gamma’s relevant to any image that has a gray, doesn’t matter if it’s in a photo or a graphic. Gamma doesn’t affect pure white or pure black, just grays like this:
- Setting gamma < 1 will make grays lighter.
- Setting gamma >1 will make grays darker.
TIP #3 – Use Gamma to adjust tones once you do a trial run at 127 DPI and 60mm/sec on your material. You don’t even need to trial the whole image, just a part of it that has the shade of gray you want to manage.
Overscan – remember above about the mechanics of stopping the laser head? Let’s say you’re using bi-directional scanning, and one moment, the head has to decelerate from full speed to a stop, then the next moment it has to accelerate from nothing to full speed. This can result in jagged edges as the motor can’t handle these two opposite operations with the same performance. Fortunately, the smart solution is to use the Overscan function. This simply gives a buffer space around the image (in the scan direction) so that the motors have plenty of time to stop and start. The LightBurn setting defines it as a % but shows the mm equivalent distance right next to it. Give your motors 3 mm or more to make the deceleration and acceleration and your image quality will thank you for it. Easy!
TIP #4 – Use Overscan!
Sources – this blog was written from:
- Years of personal experience and investigation into laser engravings
- Great information from Don’s laser cutter things
- A video from Russ at thinklaser.com https://youtu.be/YvQ8L7Xth8k.
good morning paul, I purchased the mini gerbil in 2019, I would need the firmware and to correctly configure the PWM parameters because the incisions are no longer the same as before, could I have help? and could we get a discount to buy the new mini gerbil? Thanks in advance
Hi, just email us via the contact page. Thanks Paul