
With some basic technical knowledge, the Mini Gerbil 2’s firmware can be updated! Read on for full instructions and relevant links. This blog does not apply to the Mini Gerbil 3.
Step 1 – Preparations:
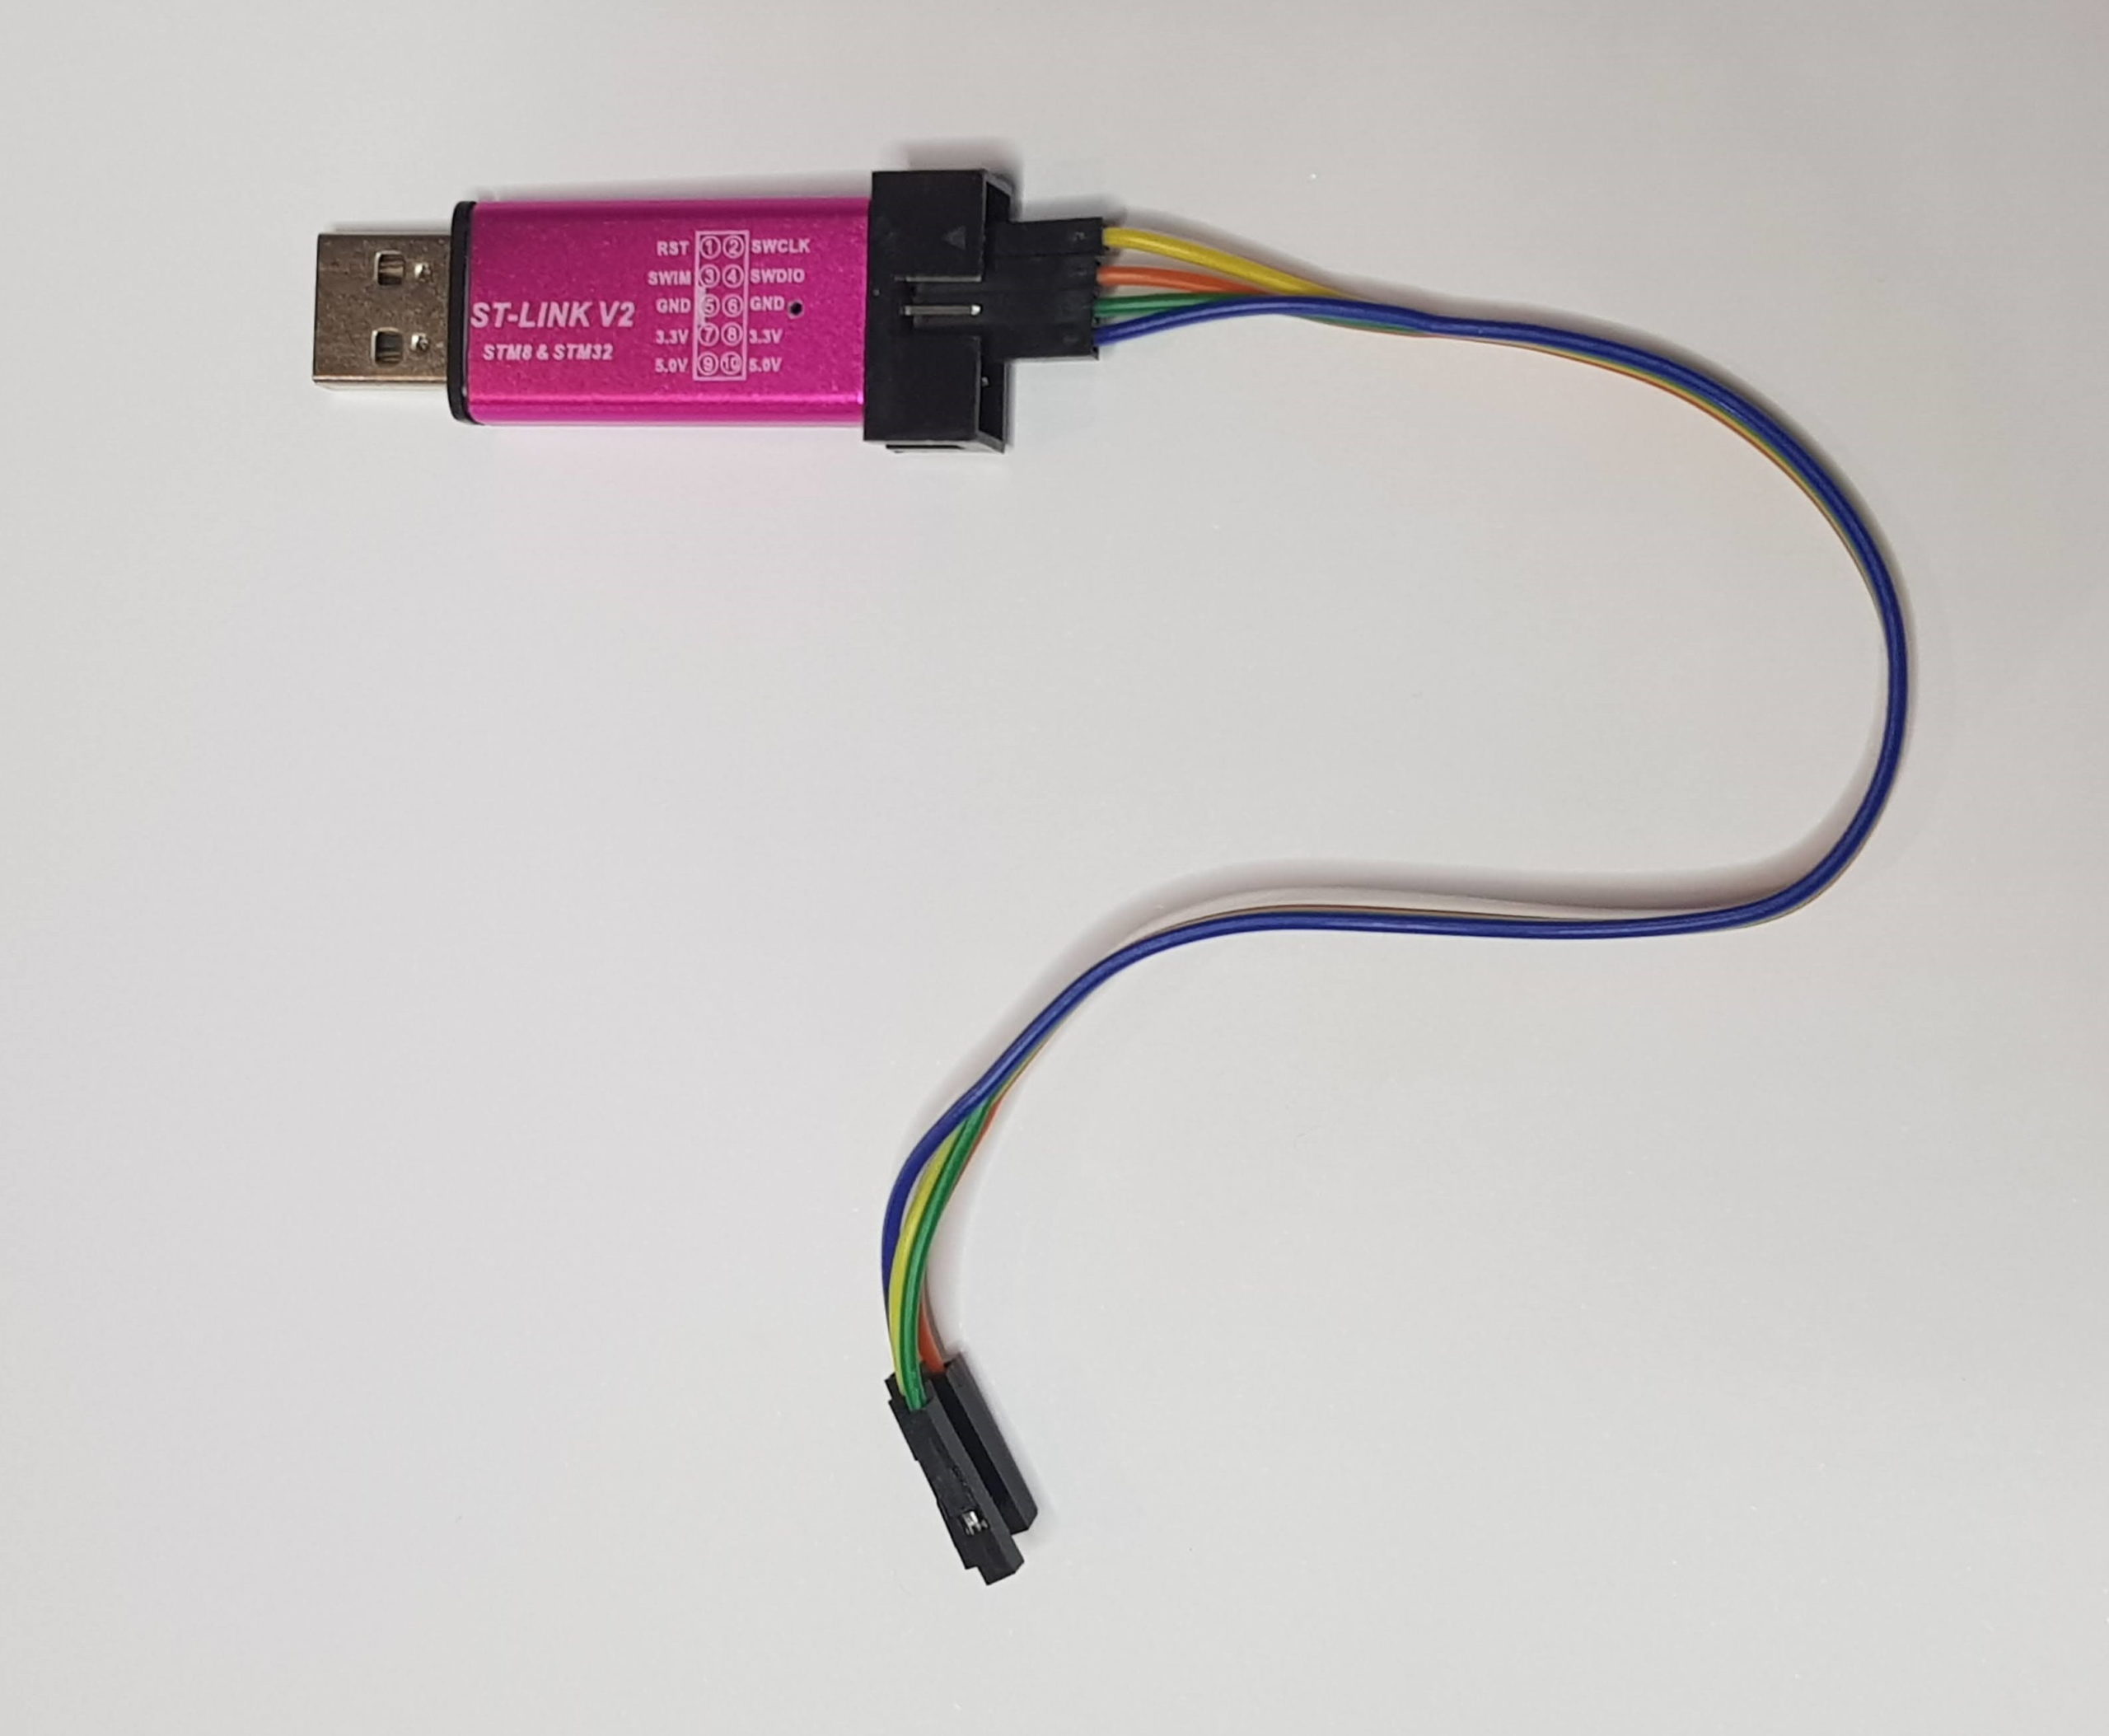
- Purchase an STM ST-Link V2 dongle from your favourite online marketplace. The look like this, the color of the unit and wires doesn’t matter
- Backup your $ settings. Simply type $$ in the console window and copy the results into a text document that you name and save in an appropriate place. Or use the Lightburn app (Machine settings, read, and save settings).
- Download the STM Link utility here.
- Download the Mini Gerbil firmware from Paul’s github page. Note: Ensure you save as plain text with a .hex or .bin extension (not as a .txt or HTML extension). The easiest way is to click on RAW, then right click Save As and edit the file ending to .hex Or, you can just download all files as a ZIP file and extract just the one you need, the .hex or .bin file.
- In preparation for programming, remove the power connections to the Mini Gerbil – you may even prefer to completely uninstall it.
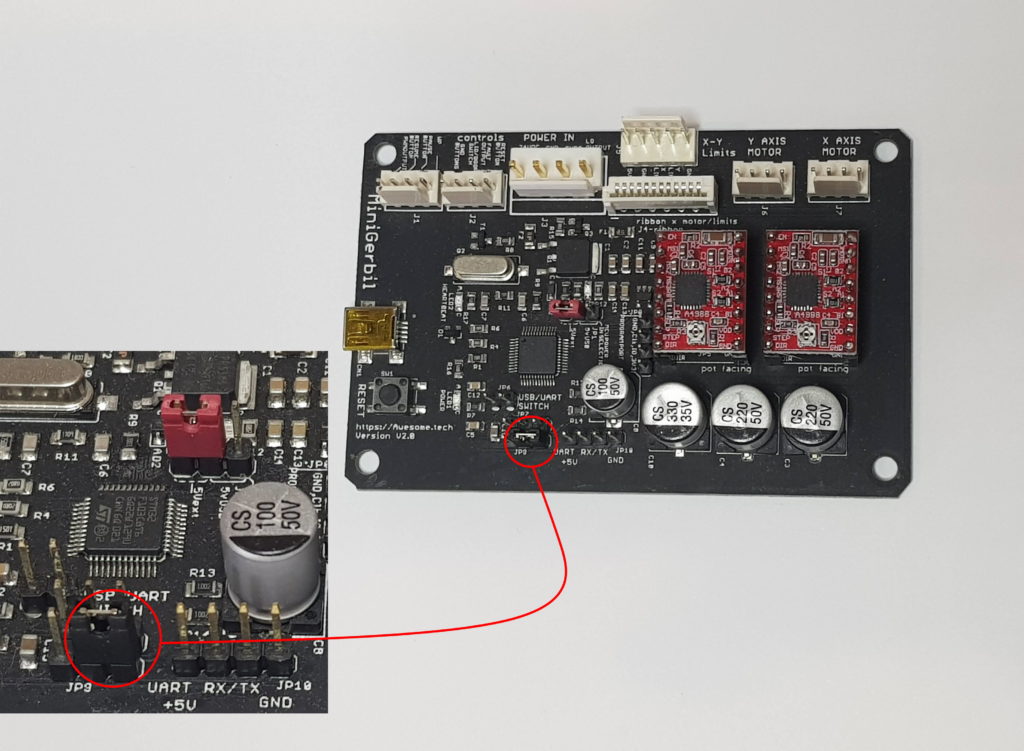
- Completely remove the JP9 jumper from the position shown. Keep it – you’ll need it afterwards. The jumper isolates the line which allows reprogramming of the microcontroller, so it must be removed to allow programming.
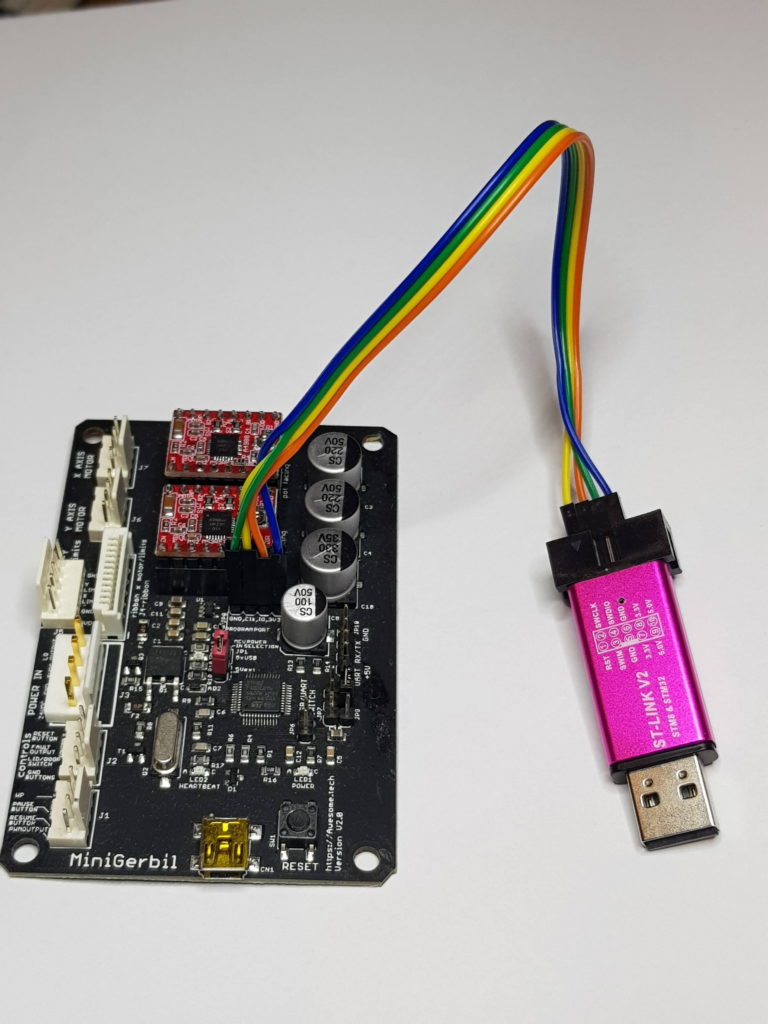
Step 2. Wire up your ST LINK V2 dongle to the Mini Gerbil according to the following controller board to dongle connections:
- 3V3 -> 3.3 Pin 8 of the dongle
- IO -> SWDIO Pin 4 of the dongle
- CLK -> SWCLK Pin 2 of the dongle
- GND -> GND Pin 6 of the dongle
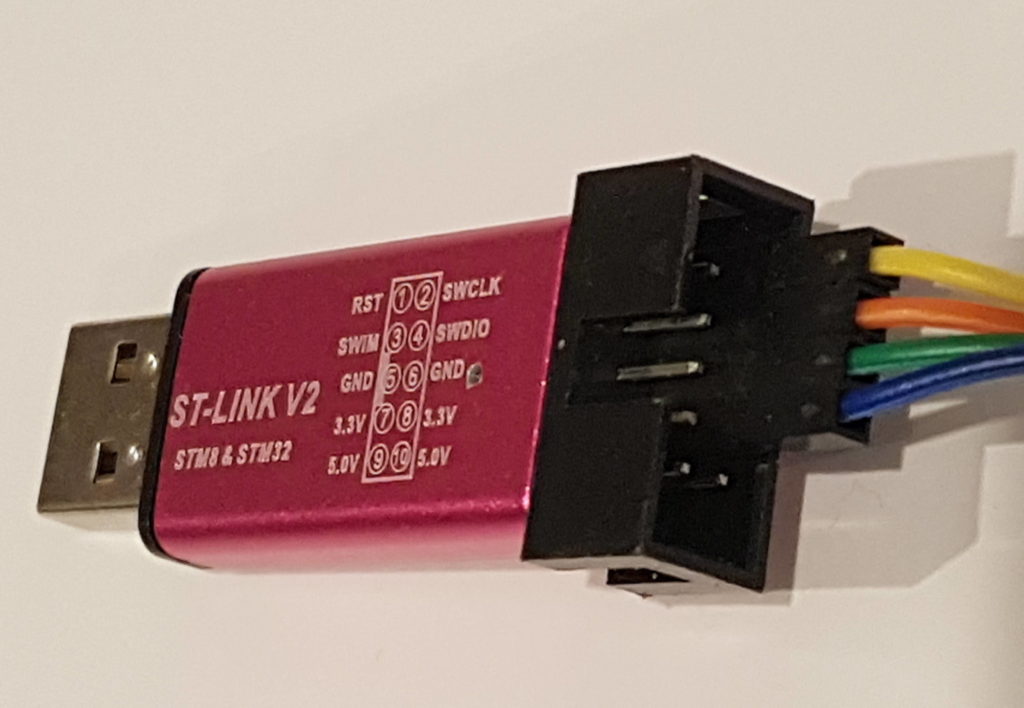
Beware that some dongles may have labelling errors and/or different pin assignments (seriously!). The error we have seen from some suppliers shows SWDIO and SWCLK labels swapped.
Insert the dongle into your PC USB.
Step 3. Install and run the STM LINK Utility software you downloaded in Step 1.
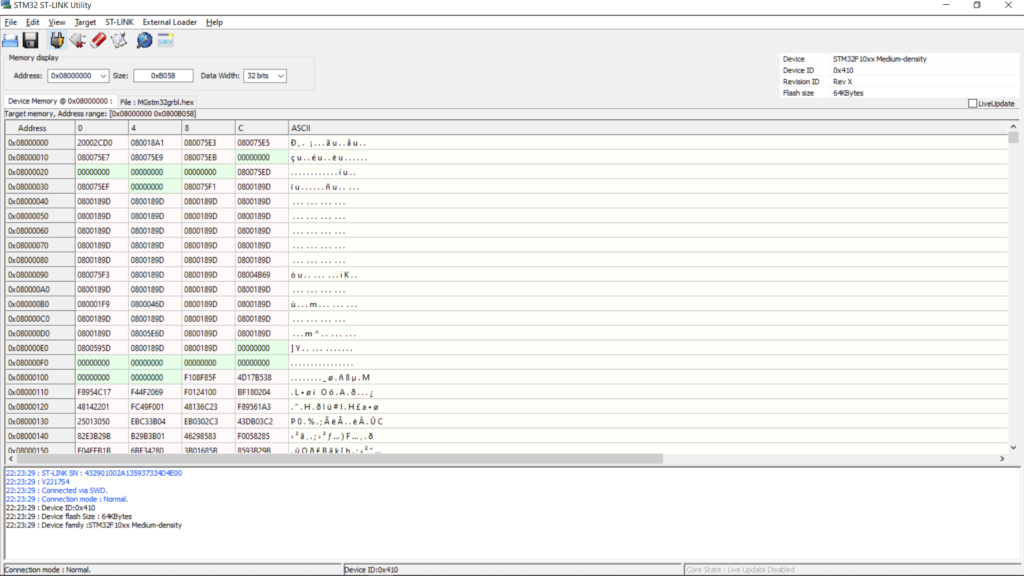
Step 4. Click on the third icon on the left – Connect to Target.
Once connected, load the relevant firmware file that you saved during Step 1, via the File/Open menu.
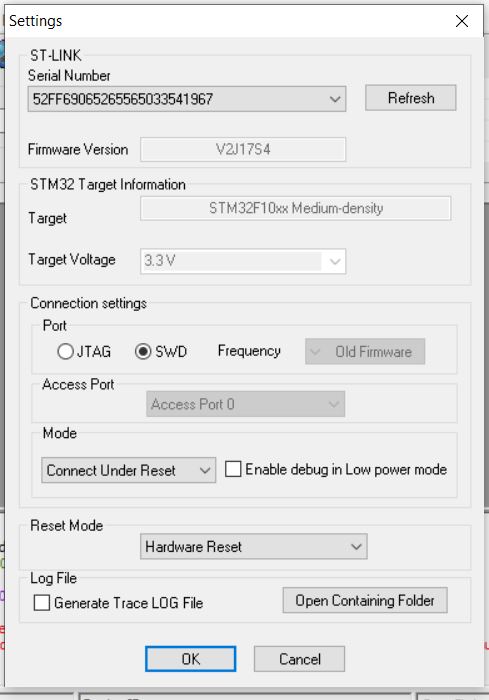
If the dongle does not connect that try to set the dongle settings via menu choice “Target>Settings”. The frequency can be lowered to 480kHz. Or try to swap the SWDIO and SWCLK leads (wrong labels on the dongle..).
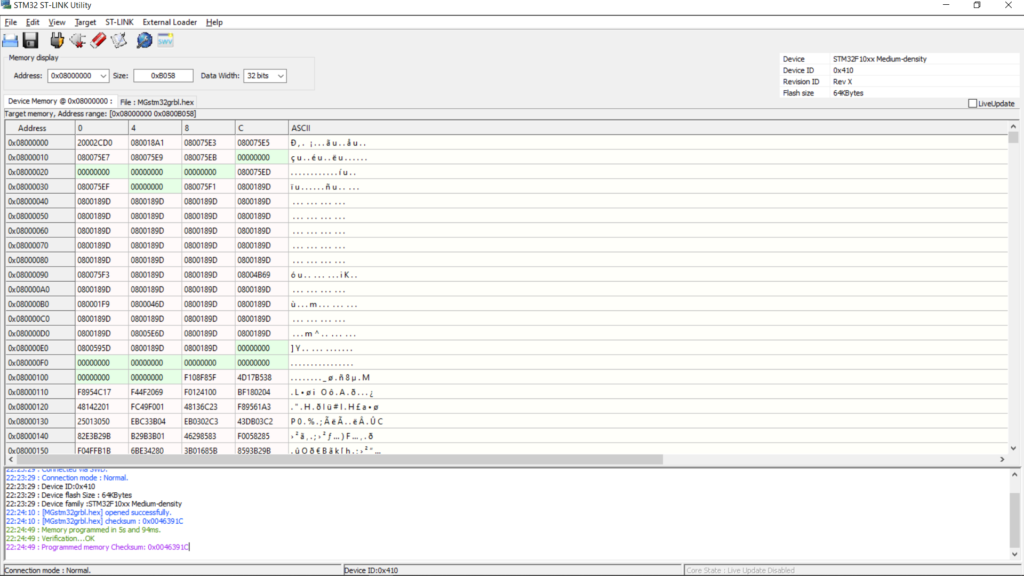
Step 5. Flash the firmware by clicking the 6th icon (book/pencil icon) on the left. The firmware is being flashed.
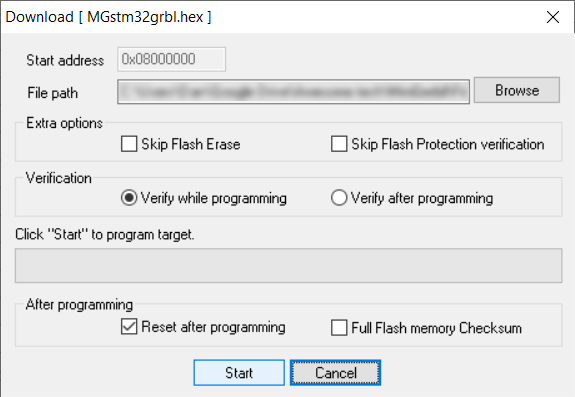
Press start, and it just takes a moment. Then you’ll expect to see something like this:
Failing to flash can be caused by:
- swapped SWDIO/SWCLK connections (we had a few of those dongles with incorrect labels),
- loose Dupont connectors,
- you forgot to remove the JP9 jumper,
- (rarely) you might need to erase the existing flashed firmware first via the 5th icon on the left (eraser icon).
- incorrect dongle settings (use settings ‘connect under reset’, ‘hardware reset’, or incorrect frequency above 4MHz just lower it till it connects)
Step 6. Once you’ve succesfully flashed the new firmware, carefully reinstall jumper lead JP9 in original position to avoid memory erasure (see photo in Step 1).
Step 7. Check your controllers $ settings by comparing to the backup of $ settings that you took in Step 1. Read the release note to understand the implications of the relevant settings before deciding to revert or keep them changed.
Congratulations, your Mini Gerbil has its new firmware and you’re ready to try it out. Keep in mind that any misconfiguration or firmware bug could result in unpredictable behaviour, so observe safe practice when testing it out. Do not leave your laser unsupervised.
So is this firmware update a fix?
This is an instruction page to advise how to update firmware in general. It does not describe a particular firmware update. We have recently released a firmware update that details various features, fixes etc. See https://awesome.tech/release-note-mg-firmware-update-12353/
I have checked my firmware on a board purchased a few months ago and it looks like I may have an older version of the firmware. I do not see a release number that syncs with what is at the top of this article. Do you have a full firmware release list so I can look at previous releases and determine if issues I am having are related?
Currently I am experiencing an issue with communication dropping while the machine is running. It generally stops at almost the exact same spot, so I suspect I have an issue with the baud rate, buffer or something similar. I am using a good quality powered USB extension. I have run multiple serial tests with the cable to ensure that it is not the cause of the issue. I also swapped out the cable and brought the computer closer to the machine and it still stops. The issue is very frustrating.
I have read through all of the forums about using the correct driver. Unfortunately, as noted the baudrate cannot be changed with the suggested driver, so I am at a loss as to what I should do.
Here is the output of the $I command:
[VER:1.1f.20190214:]
[OEM:Awesome.tech . MiniGerbil:]
[SER:0x000007.Date:20190214:]
[OPT:VMZL,15,254]
The latest release is https://github.com/paulusjacobus/awesome.tech/blob/master/MGfirmwareV8_1_1build12353.hex which has a small improvement with a G code status reply. I think your issue is related to the shutdown of the step stick drivers or electrical noise of the laser. Best way to find out is to run the job again without the laser fire button on top of the k40 engaged. If it runs now until completion then it’s definitely electrical noise from the k40 HT power supply component. You can set JP1 from 5Vext (5v from k40) to 5Vusb (5V from computer). This solves it but ideally you should look into the grounding of the k40. If the job still cuts out then it’s likely that the step sticks are supplying too much current to the motors and their thermal protect kicks in. You should reduce the current by adjusting the pots on the step sticks or add cooling via a mini fan.
Got a question, just bought a couple days ago a mini Gerbil, which will still take a few days to arrive, bought it from the European warehouse. Will it come already with the last firmware update, or should I go ahead and buy a ST link V2 so I can update it once it arrives.
Thanks!
Hi, we’ve recently transitioned to the new firmware, so sorry I can’t guarantee which version you’ll get. Once you have it installed, run $i to see which version.