This page describes how you can get started with cutting and engraving. We assume you have installed the Gerbil hardware and are ready for your first project. The first project is cutting a circle out of acrylic or plywood. The second project is to engrave a picture on wood. The best way to get results is to start with small simple pictures and move up from there.
Inkscape can be downloaded from here
There are two Plugins for Inkscape:
- K40 laser cutting gcode generator
- K40 laser engaving gcode generator
Here is the user procedure:
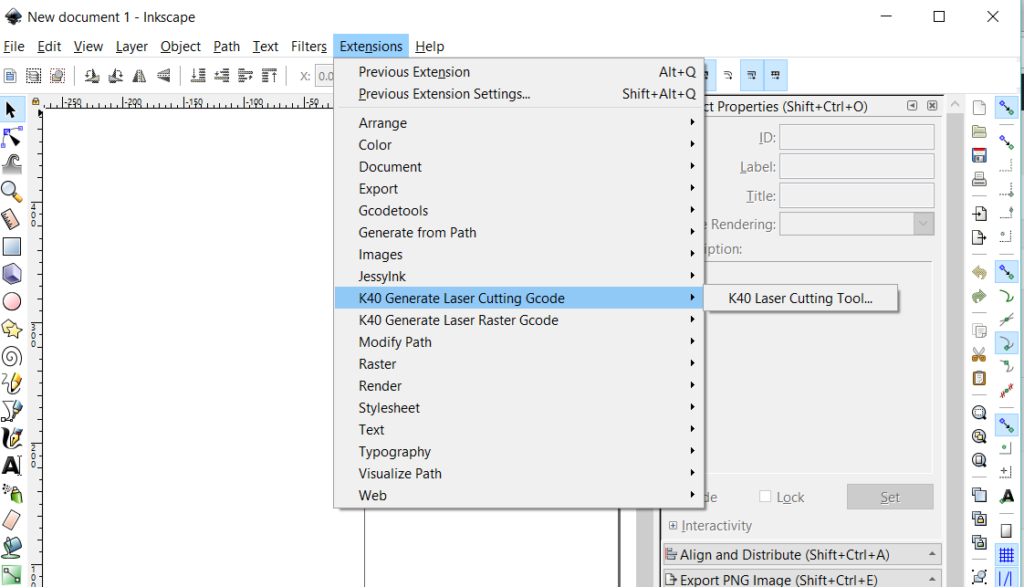
Laser Cutting
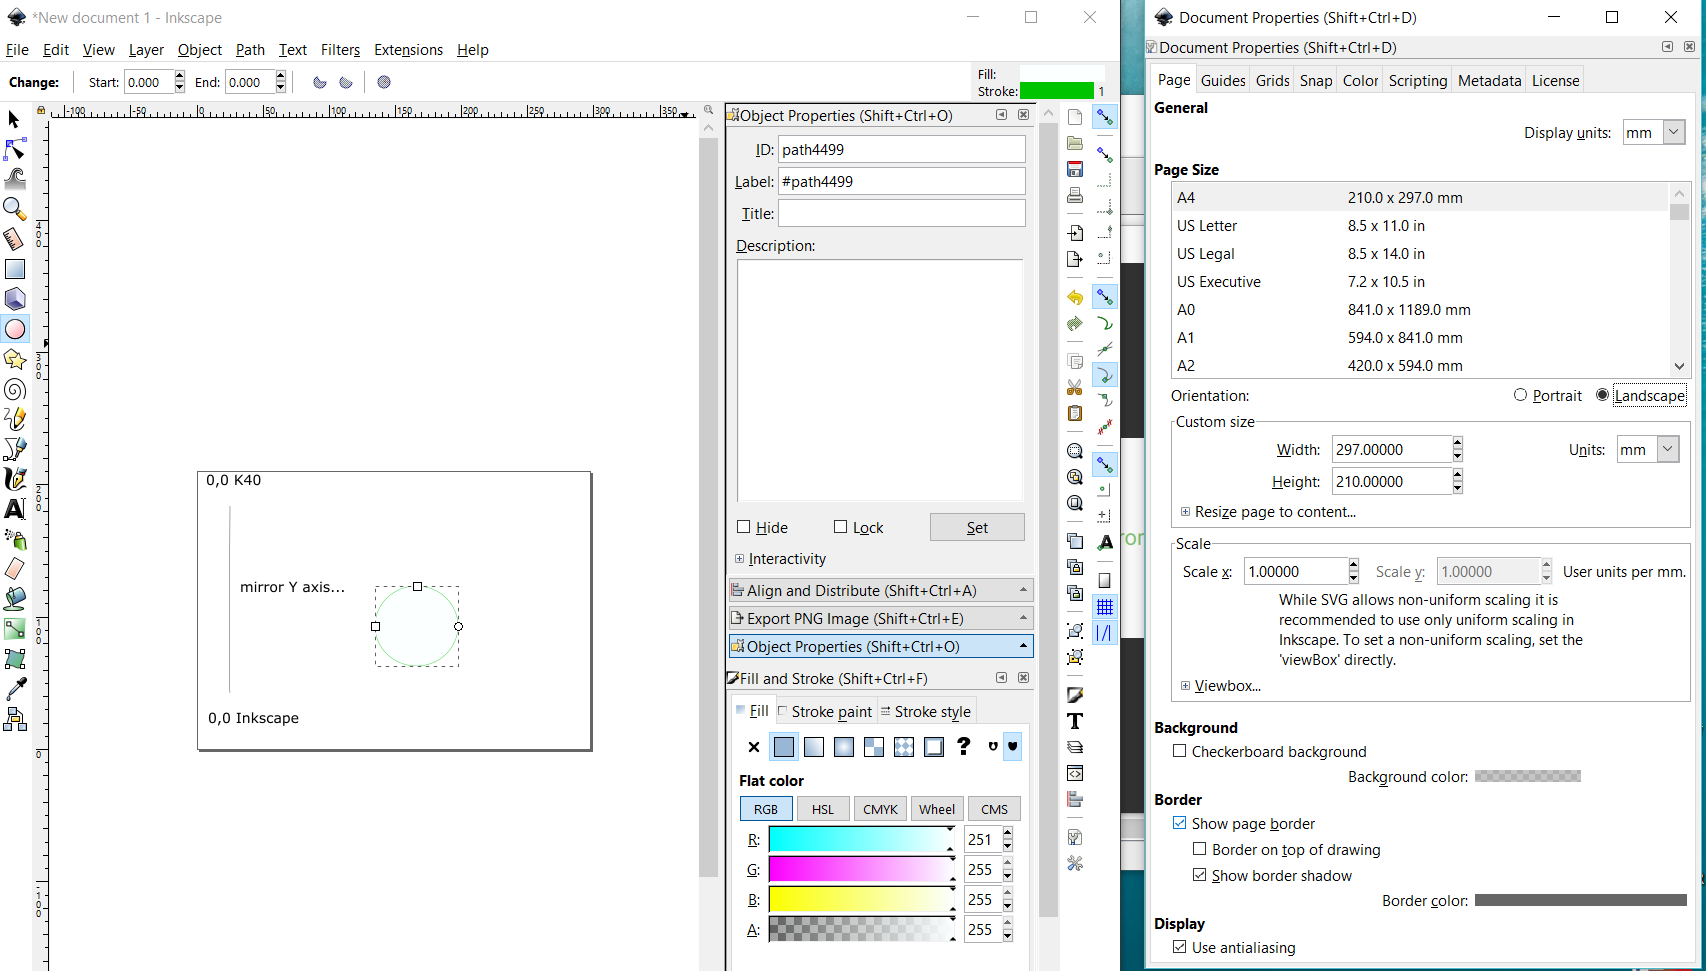
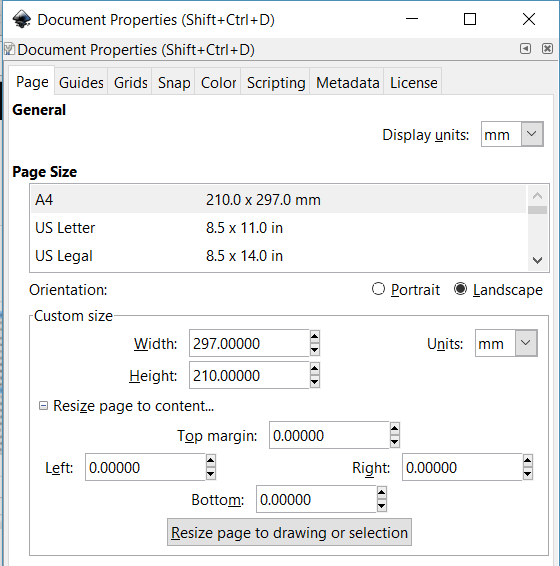
Draw a square or circle on the canvas where the canvas represent the workspace. The work space for the K40 is A4 or slightly bigger. So for K40, set the document properties to A4 landscape. The 0,0 coordinates in inkscape are left down corner while in the K40 they are left upper corner as depicted below. To draw a circle select the circle from the toolbar on the left. To set the document size to A4 use shift+Ctrl+D.
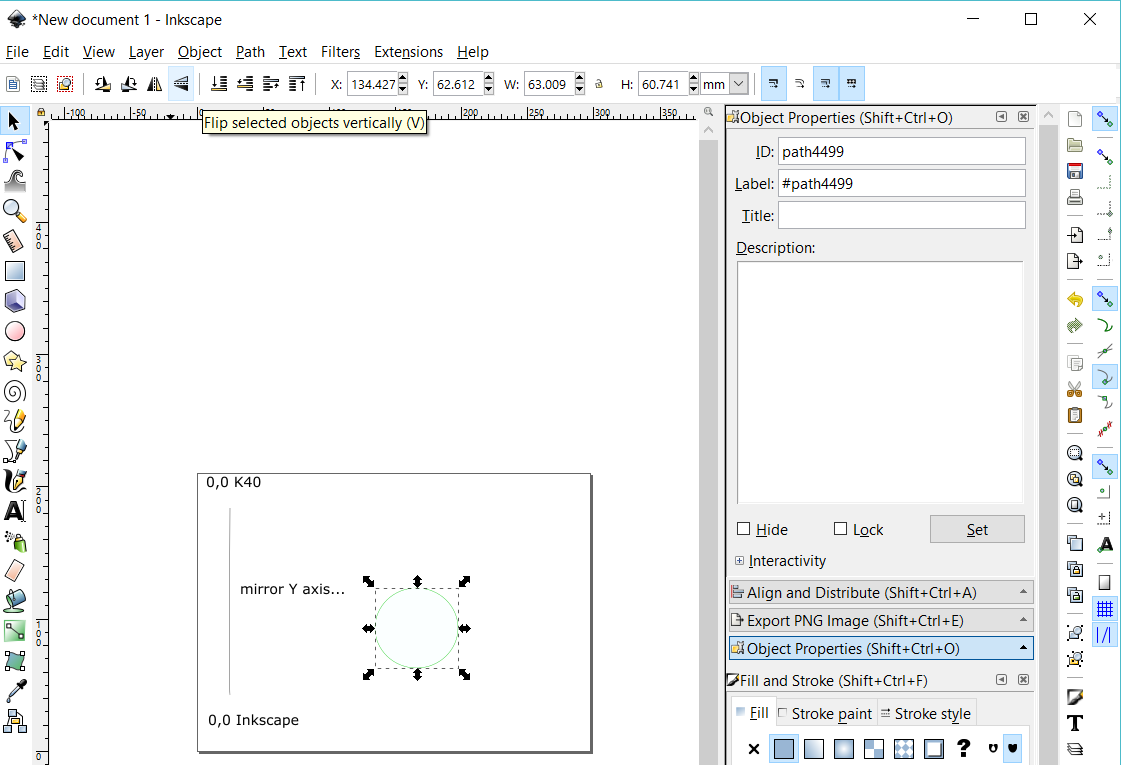
It’s not relevant for cutting a circle, but when you move to more exotic shapes – if the shape you need to laser-cut is not symmetrical and cannot be a mirror image (turn it over after cutting) then you need to mirror it using Inkscape. Use the tool bar ribbon and select the icon with the two triangles as depicted below.
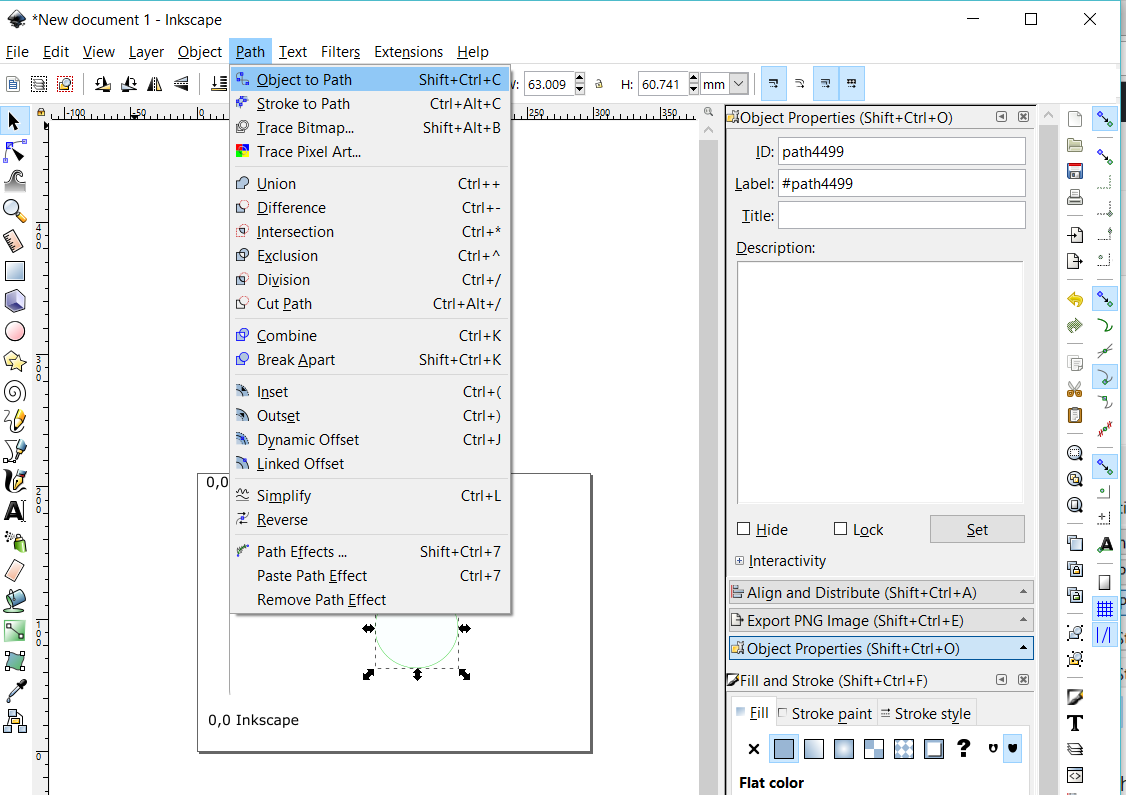
You can use the ‘Fill and Stroke” menu (Shift +Ctrl+F) to set the stroke style /pen size to 0.15mm (the laser kerf) and set ‘Fill’ to none (x) so you only cut the circle outline. After selecting the circle for cutting as depicted above (dotted square appears), you need to obtain the path of the vector drawing (here a our circle we draw before) so Inkscape can convert that path (segments of the circle with coordinates) into G-code. You can use Shift+Ctrl+C to convert the Object to Path.
Now you can select the K40 Laser cutting tool via the top menu (extension, k40 laser cutting tool) and generate the g-code file and/or stream it to Gerbil.
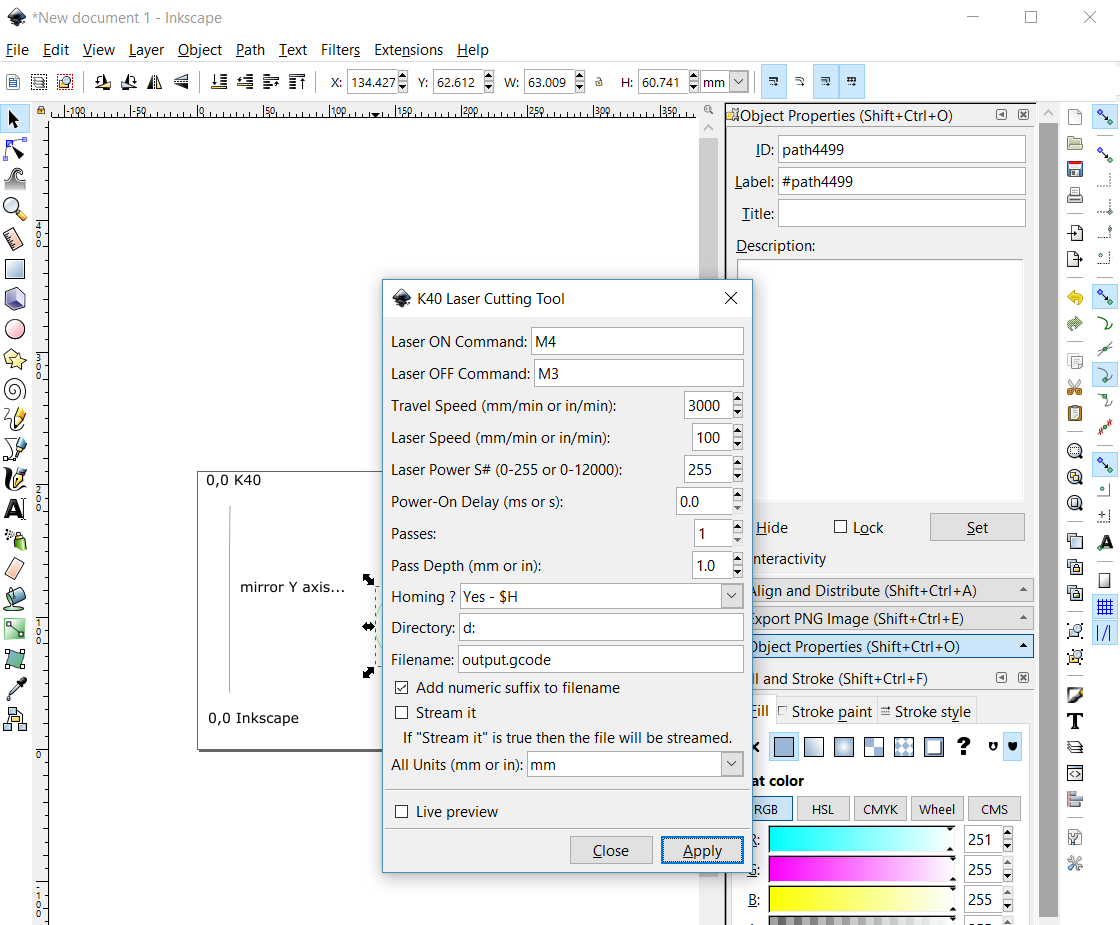
Most options within the cutting extension are self explanatory.
- Homing: The Homing option lets you start from a homed zero (the laser head goes to the K40 zero position and limit switches are activated) so Gerbil knows its absolute zero point.
- Stream it: If you don’t check the ‘Stream it’ option then just a file output will produced which you can stream later via a separate G-code sender i.e. CNCjs.
Engraving
The first step is to import the picture that you want to engrave onto an object. Start with a simple and small picture or resize it to a small size like 40x30mm to test the end result quick. Use the Import option from the File menu (Crtl+I).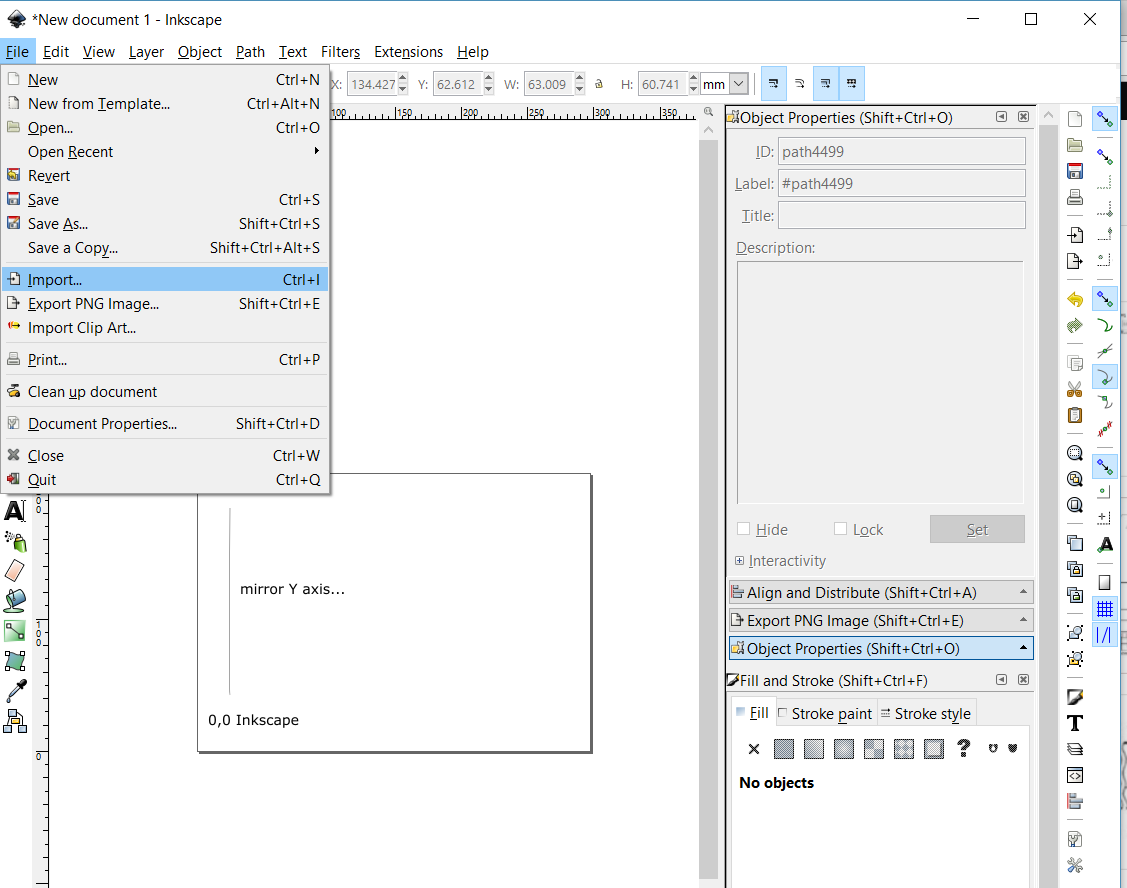
Make sure you select the image resolution from the file when the import menu pops up and not the default from Inkscape (it’s just 90dpi, so you will loose resolution when default is selected). You can alter this default from 90dpi to any setting in the Inkscape preferences (see edit menu last item preferences).
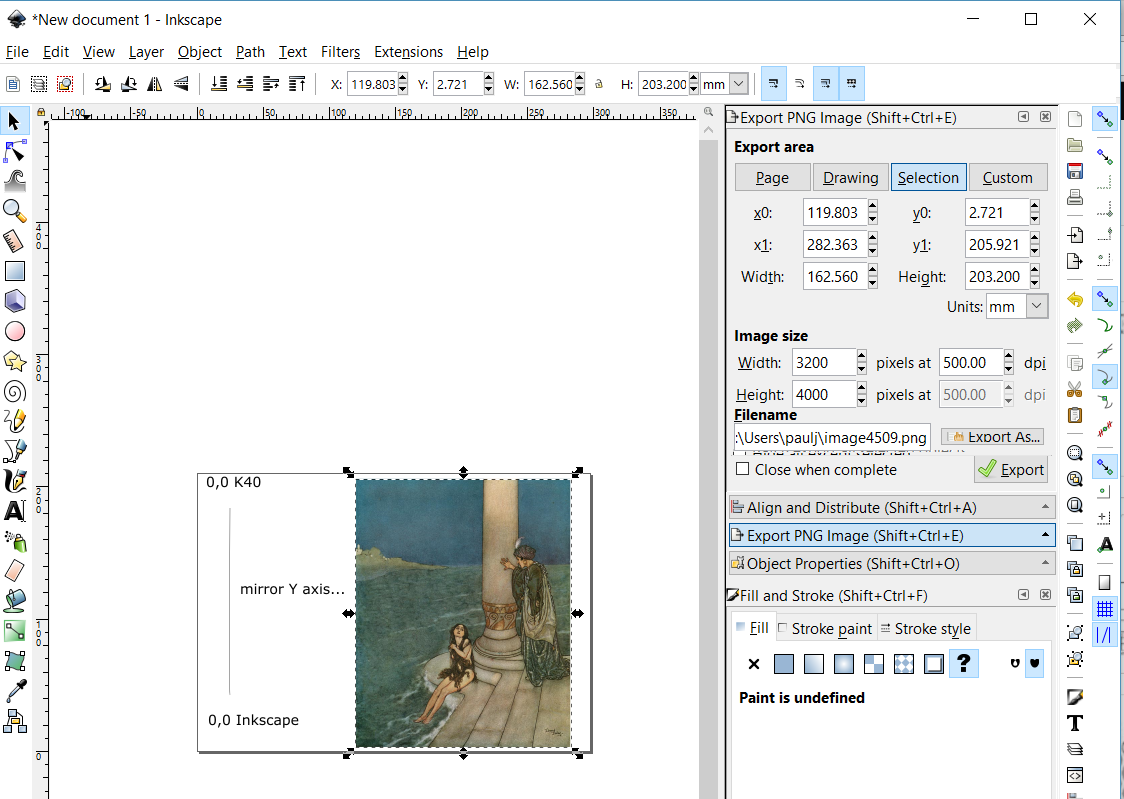
Scale or resize the image to the desired size for engraving by selecting the image and grabbing the corner and drag and drop it. Alternatively you can set the Width W and Height H in the top ribbon bar. You can lock in the X-Y ratio via the padlock next to the width properties on the tool bar ribbon (top) to prevent distortion when adjusting its size.

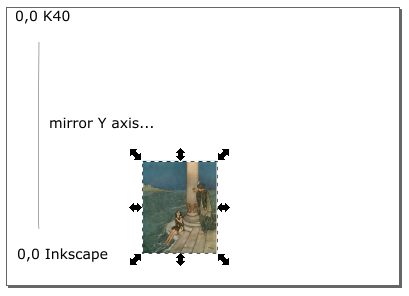
Now you need to resize the canvas (document) to match the engraving area. If you make the canvas smaller than the picture then only a part of the picture is engraved. If the canvas is larger then the picture then the whole picture is engrave plus a white border (takes more time since the header is rastering with no output, so you want to avoid that). You set the size via the Document properties Shift+Ctrl+D, and click on the button “resize page to drawing or selection”. That sizes the image and canvas automatically.
Next action is to open the raster Gerbil plugin and select the appropriate options. Select the extension menu and select the K40 Raster 2 Laser Gcode generator.
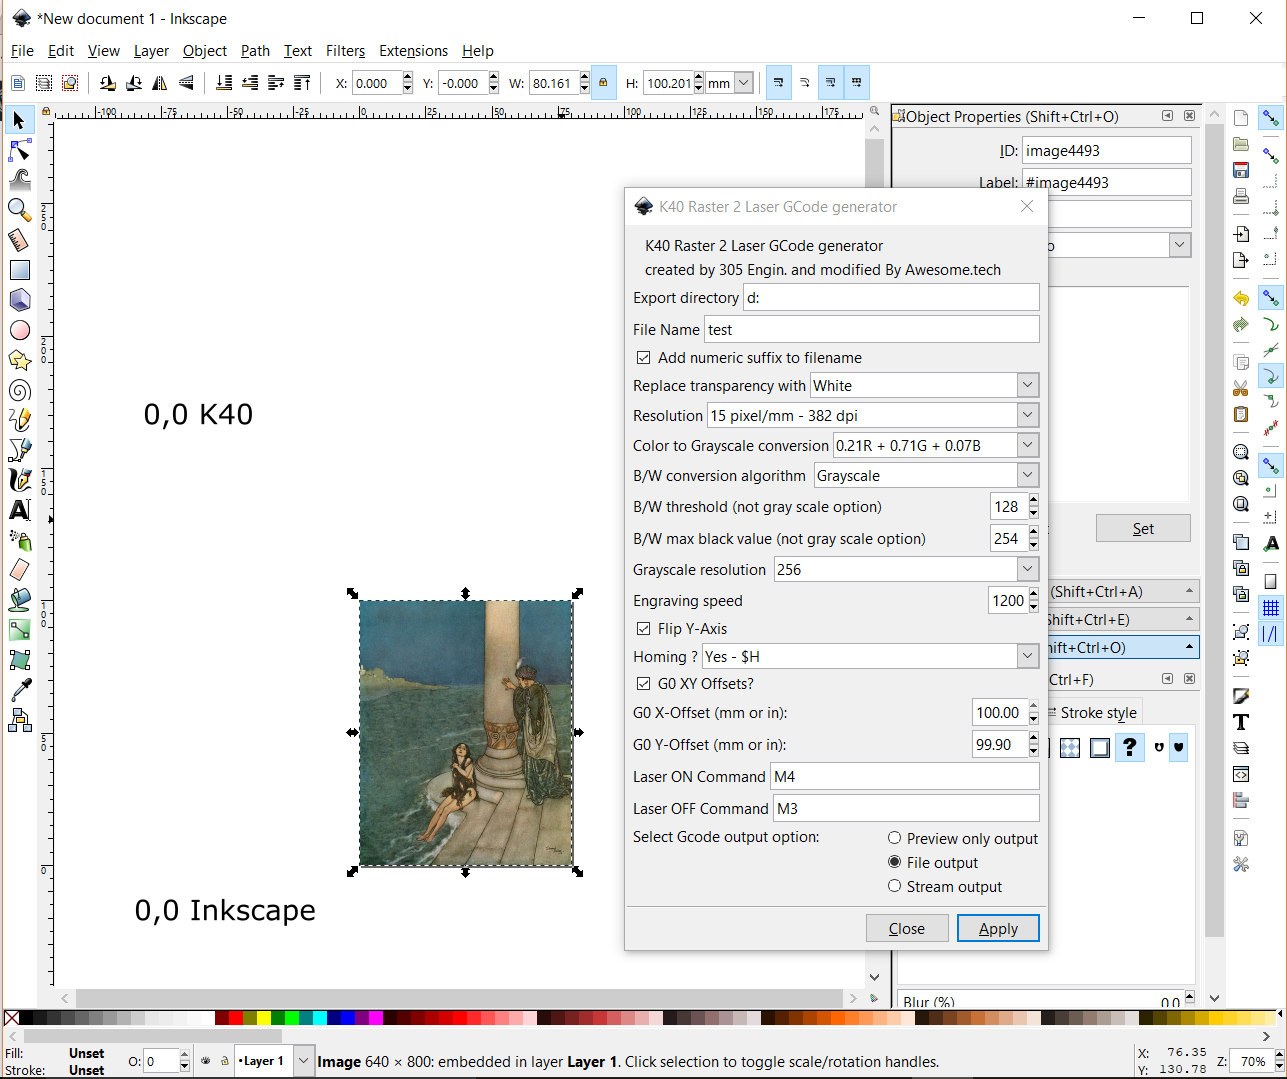
Most are self explanatory.
- B/W: B/W stands for just Black and White engraving where you select the black colour to match the output of the laser (B/W max black value).
- Gray resolution only applies to grayscale engraving.
- Flip Y-axis should be check by default otherwise your Y axis is mirrored.
- Homing: Homing applies whether you want the machine start from zero (limit switches are activated) or not (you can position the head in powerless state at a spot where you want it to start engraving or jog it first with CNCjs – optional gcode sender).
- Engraving speed: The engraving speed should be 1200 for the highest resolution and grayscale. In other modes you can increase the speed above this (limit is based on the laser tubes ability to respond fast enough for the laser grayscales).
- Stream it: As above you can stream the output to Gerbil or to File and stream it later via a g-code sender.
Tip : Start with small circles and little images to get the hang of it. Try out the other modes like black and white and different resolutions.
Cut and Engrave
you can combine cutting and engraving via layers in Inkscape. You use layer 0 to draw the cutting patterns and the next layer for the engraving. Size the canvas to an appropriate size that engraving can happen but does not take too much area and time. Make sure both plugins home before their actions so they are aligned. Now generate the engraving and cutting outputs. You can stream them or use the files and load them into cncjs. First engrave and then cut.
Advanced :
Https://github.com/paulusjacobus/ This page describes the grbl firmware and the gerbil specifc laser modes $28. Note: these settings can be only changed via a gcode sender like cncjs.
K40 engraving calibration instructions
The Kerf: Making a Dinosaur 3 D Puzzle

Can you provide any insight into the RGB settings for gerbil? my reds are showing up as too dark and I am wondering if the RGB setting can be adjusted to give me a grey’er result.
Yes, you can if you are keen to alter the plugin code. See raster2laser_gcode.py or https://github.com/paulusjacobus/Gerbil
line 236:
if self.options.grayscale_type == 1:
#0.21R + 0.71G + 0.07B
for y in range(h): # y varia da 0 a h-1
for x in range(w): # x varia da 0 a w-1
pixel_position = (x + y * w)*4 if metadata[‘alpha’] else (x + y * w)*3
matrice[y][x] = int(pixels[pixel_position]*0.21 + pixels[(pixel_position+1)]*0.71 + pixels[(pixel_position+2)]*0.07)
Slightly alter the above transformation or use one of the other grey scale transformations in the selection list box (plugin UI)