
Engraving calibration by trial and error can be tricky – let’s cover how a reliable process to get your K40 in the right range. While I was at the Makerfaire in San Mateo, I realised during the conversion of Nick’s K40 machine that I hadn’t written instructions on engraving calibration. Nick kindly lent me his machine so I didn’t have to bring one from Australia or buy one online in the US.
Iterate the following three simple steps until you get the desired end result.
Step One: Set the laser power in the Controller.
The laser power value is set in the controller by setting $30. I normally start with a value of 1024. The $30 setting value depends on the quality and age of your CO2 laser tube. The standard laser tube that came with my K40 worked beautifully with a value of 1024.
Step Two: Engrave a gray scale picture.
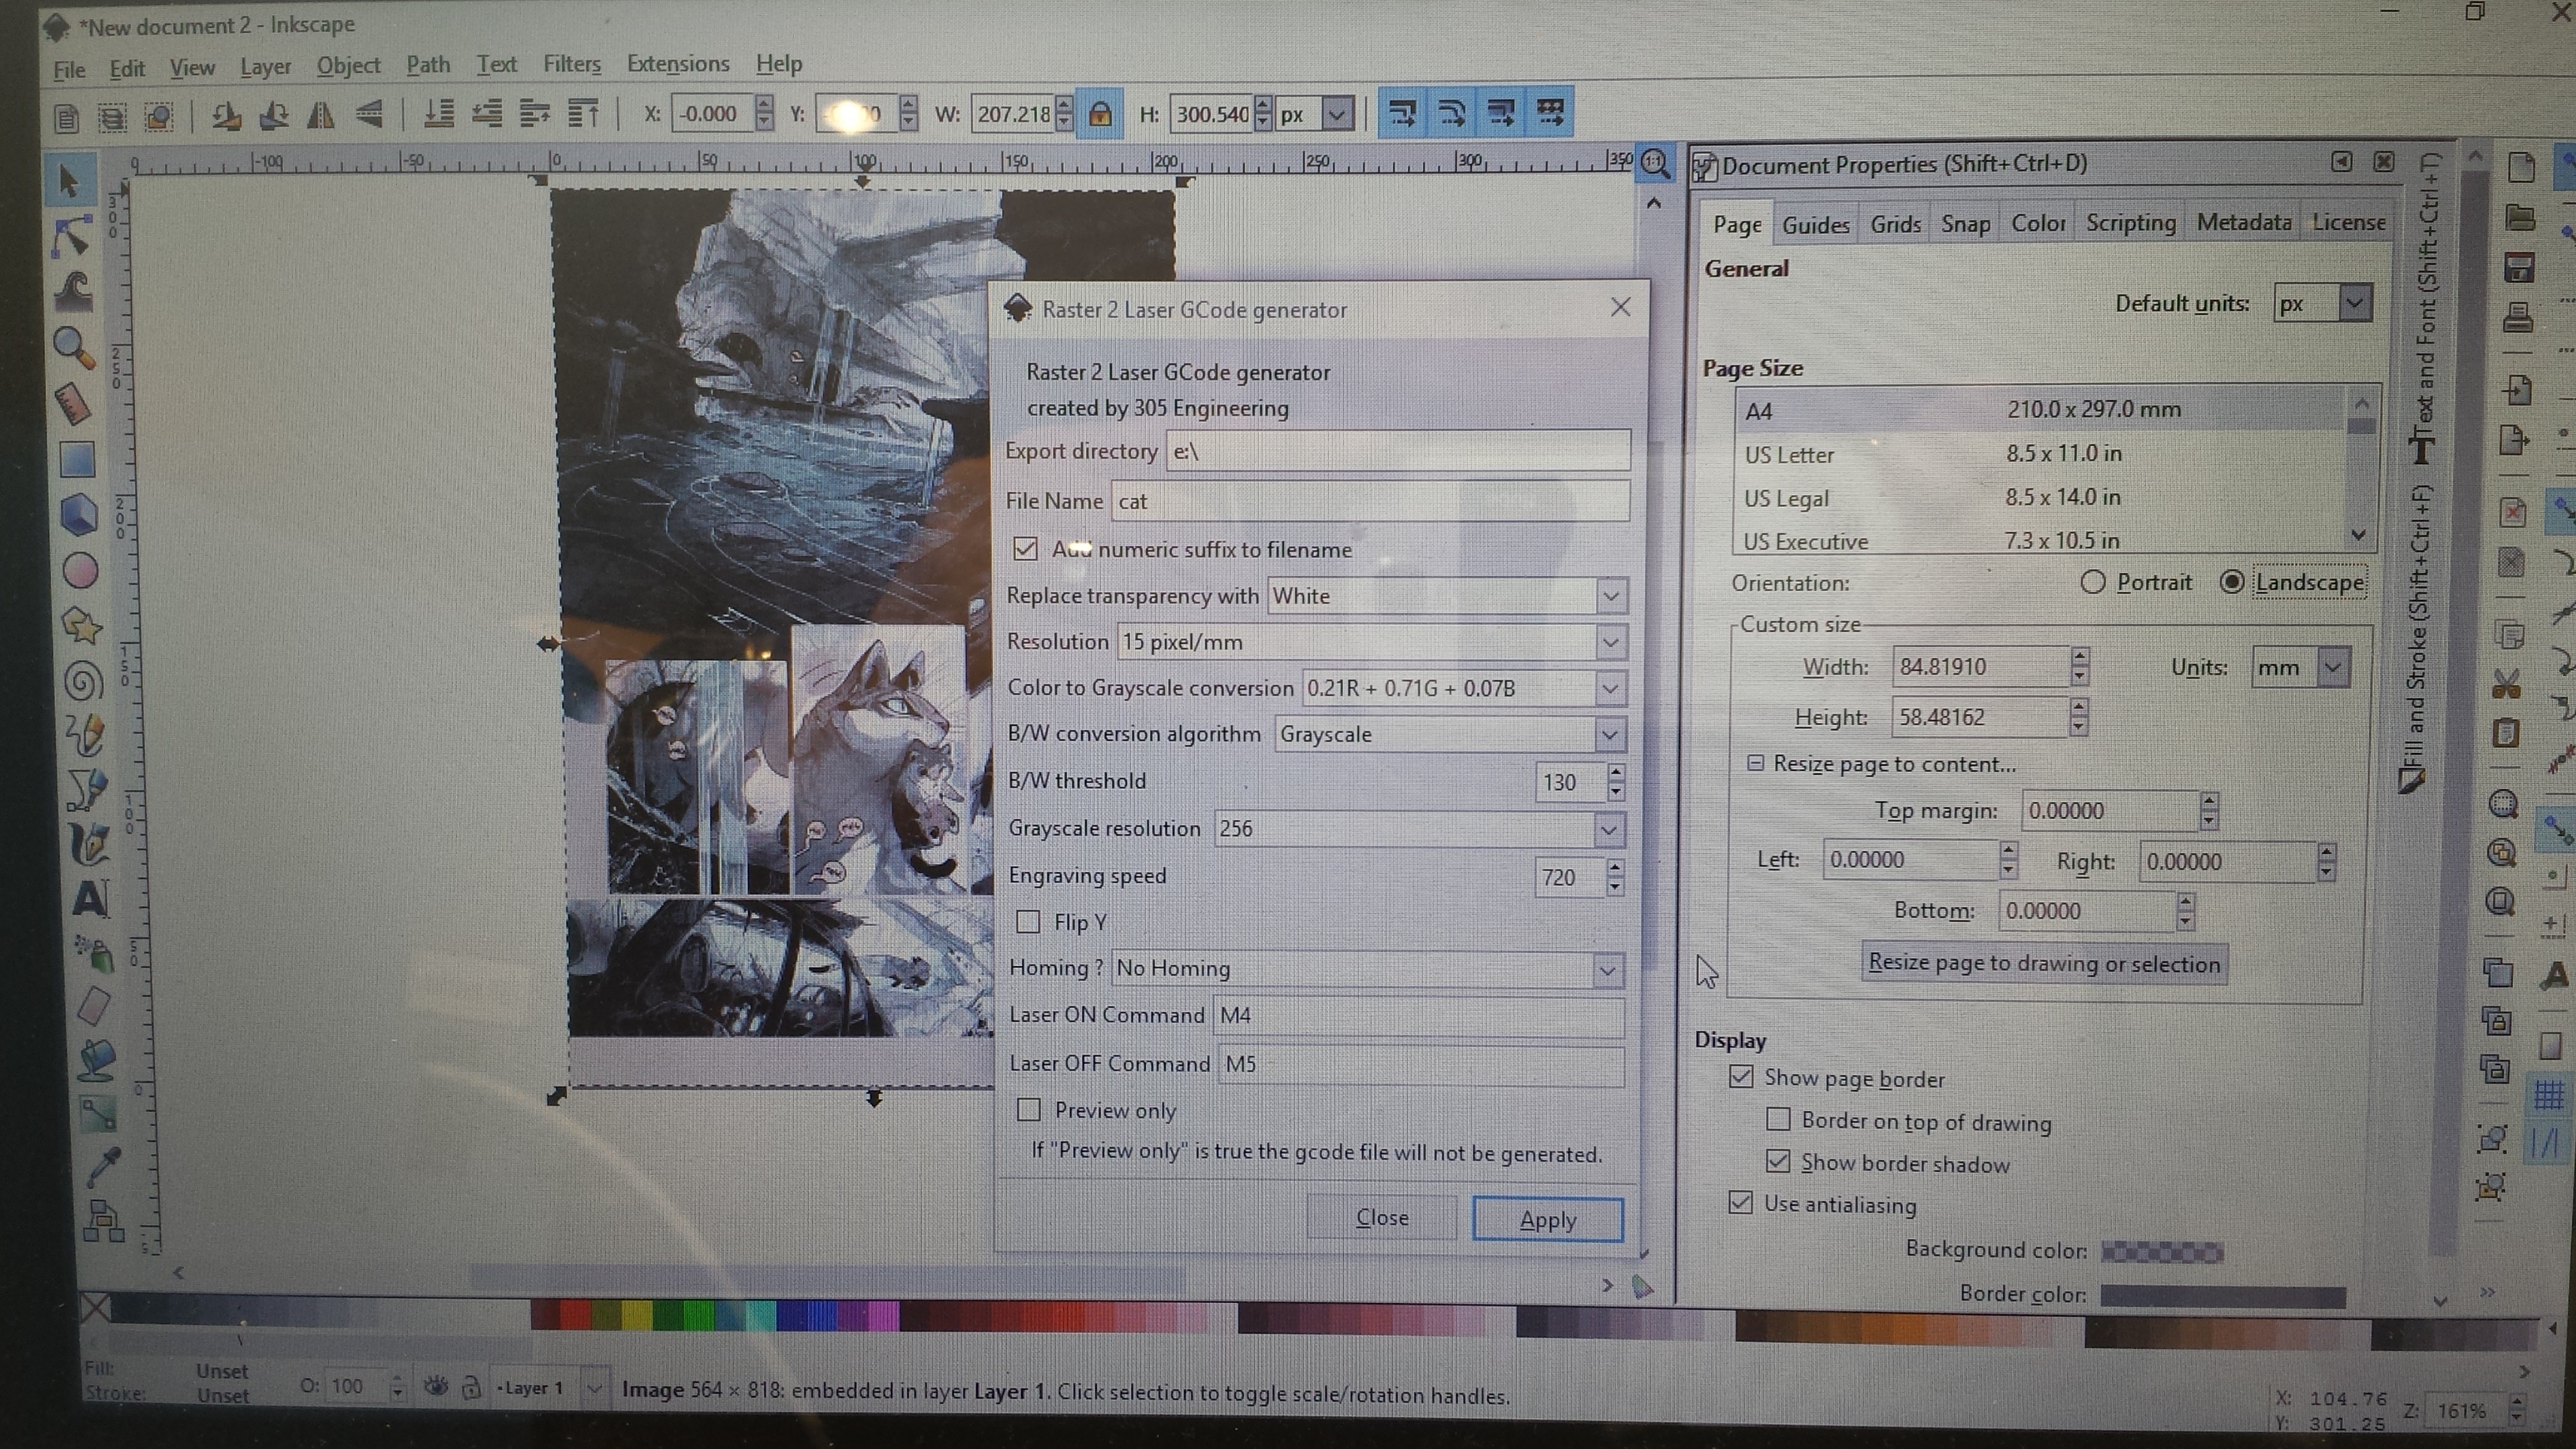
Load a picture into Inkscape and generate an engraving file from the extensions menu. I set a Gray scale of 256 and a resolution of 15 pixel (380 dpi). The engraving speed setting is between 700 and 1000 mm/s for that grayscale and resolution (highest quality and slowest of all settings, others allow you to go faster). Then we load that generated file into the G-code sender (any will do) and run an engraving.
Tip: engravings can take a long time so start with a small picture. I tend to use a picture of an object like an animal rather than a grayscale chart since it gives me a better result. Just a personal thing I guess. The Inkscape engraving settings are shown below.
Step Three: Review and adjust the darkness and focus.
If the engraving is out of focus then position the work piece (plywood) higher or lower. Typical lens focus on these machines is 50.2 mm.
To lighten the engraving, increase the $ setting $30 to 1700. To darken the engraving, decrease the $30 setting.
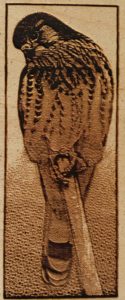
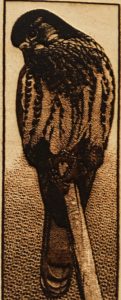
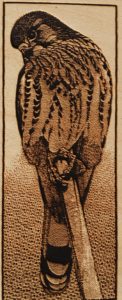
The picture above shows the engraving being out of focus, notice the faint tree stump details with the pictures below.

Some G-code senders like cncjs allow you to change the laser intensity and speed on the fly, so you can play around with it until you’re happy.
It takes me around two hours to engrave this kestrel bird. Reducing the gray scales or lowering engraving resolution allows you to run the controller faster than 1000 mm/s. If you see stutter then it means you’re driving the controller a bit too fast!
The above instructions have focussed on traditional maximise-the-dynamic-range-of-gray-scale style of engraving. Of course there other styles of engraving, as a young lady showed me her works during the Maker Faire. Thanks for your gift, Liliana!
More information about the Inkscape Plugins can be found here
To get the best engraving performance, check out our latest Mini Gerbil K40 controller.
Hi
How can I make the resultion 15 pixel (380 dpi).
The highest I can set is 10 pixel.
Hi Jon, I will post the Inkscape plugins on my github account paulusjacobus these can be installed by dropping the files into the inkscape/share/extension folder. Also the g code generation has been adapted to suit the grbl firmware.
Hi. When i draw a circel it is not round.
A circel of 50mm is horizontal 50mm and vertikal 48mm. Do i have to modify the steps/mm for the Y Axis? I have the gerbel control board installed on my k40 laser. How do i do that? Bart.
Hi Bart you can adjust the Y axis steps via $101. The adjustment is 50/48*157 = 163 just enter $101=163 into the console of lightburn or any g-code sender. When it is bigger than 50mm then again adjust via the same formula e.g 50.1/50*163 etc.
Excellent write-up! Thanks! You mentioned it takes around 2 hours to engrave that kestrel; out of curiosity, how big is it?
Thanks Greg, there were about 4 or 5 next to each other and each is 20 x 5 cm. This was done with the legacy Gerbil. The Mini is much faster (7x) so the write up is a bit old. Great to see people still reading my older blogs!