
16mm momentary and latching push Button switch wiring help
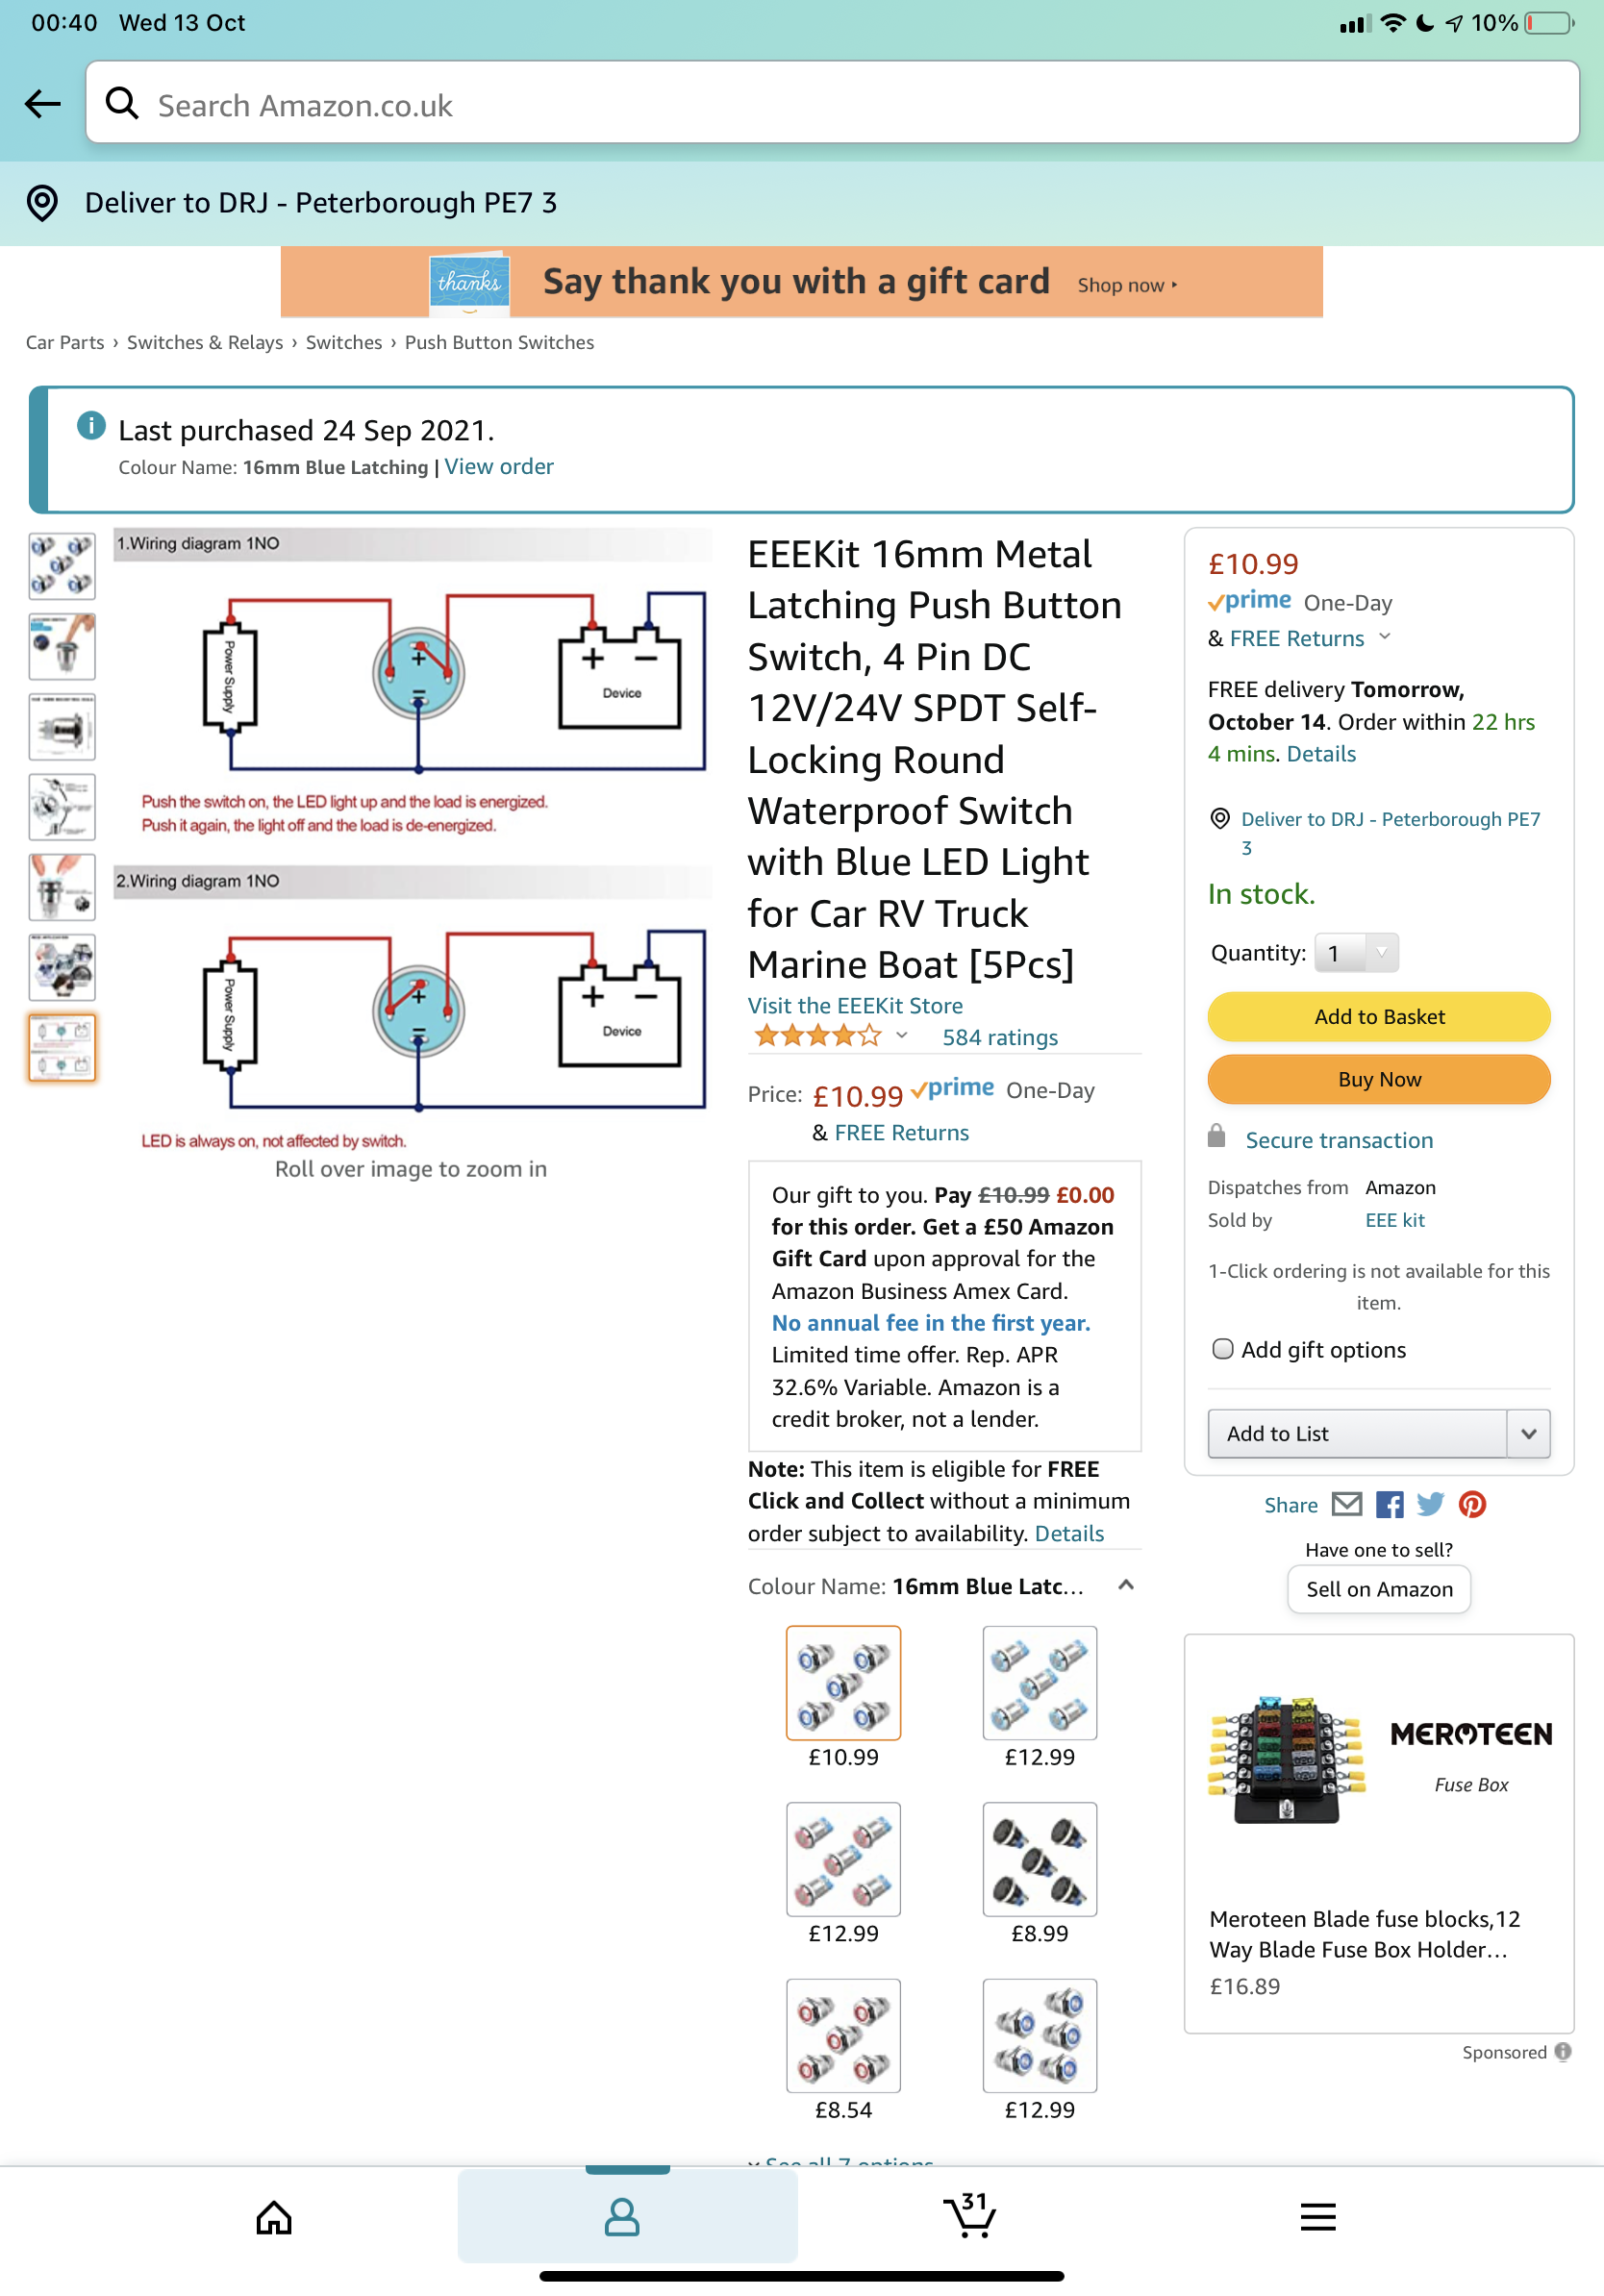
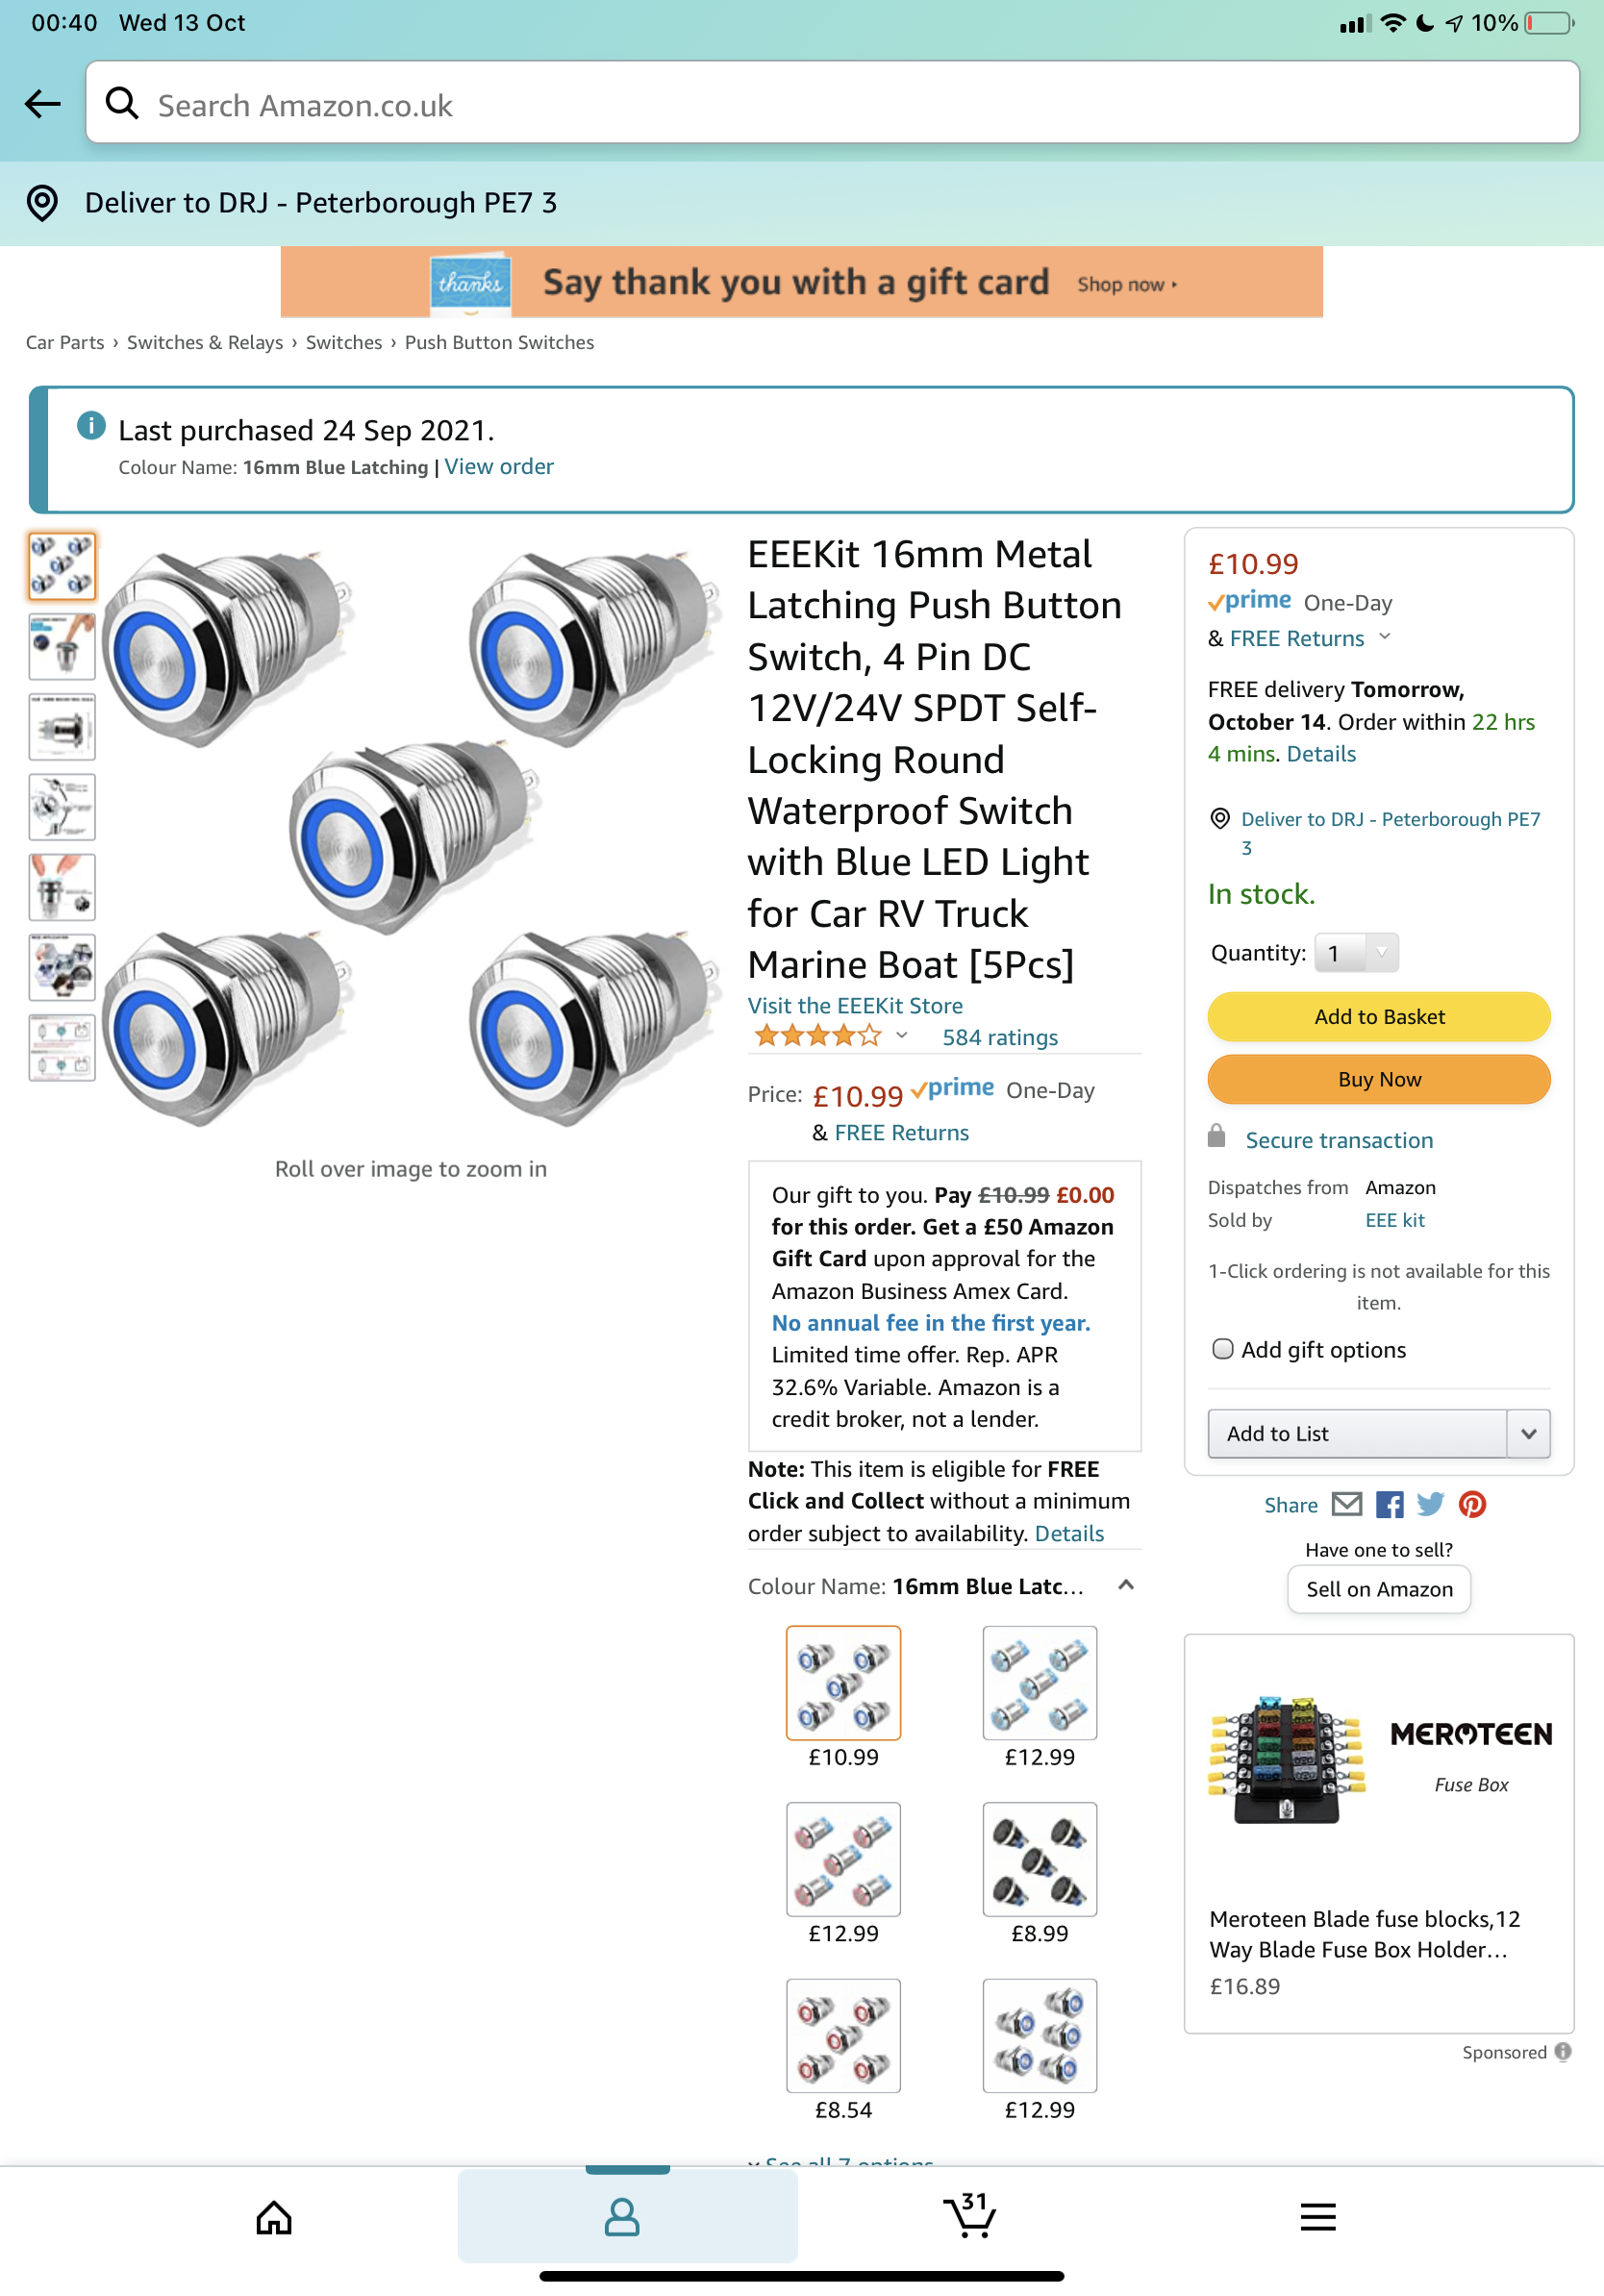
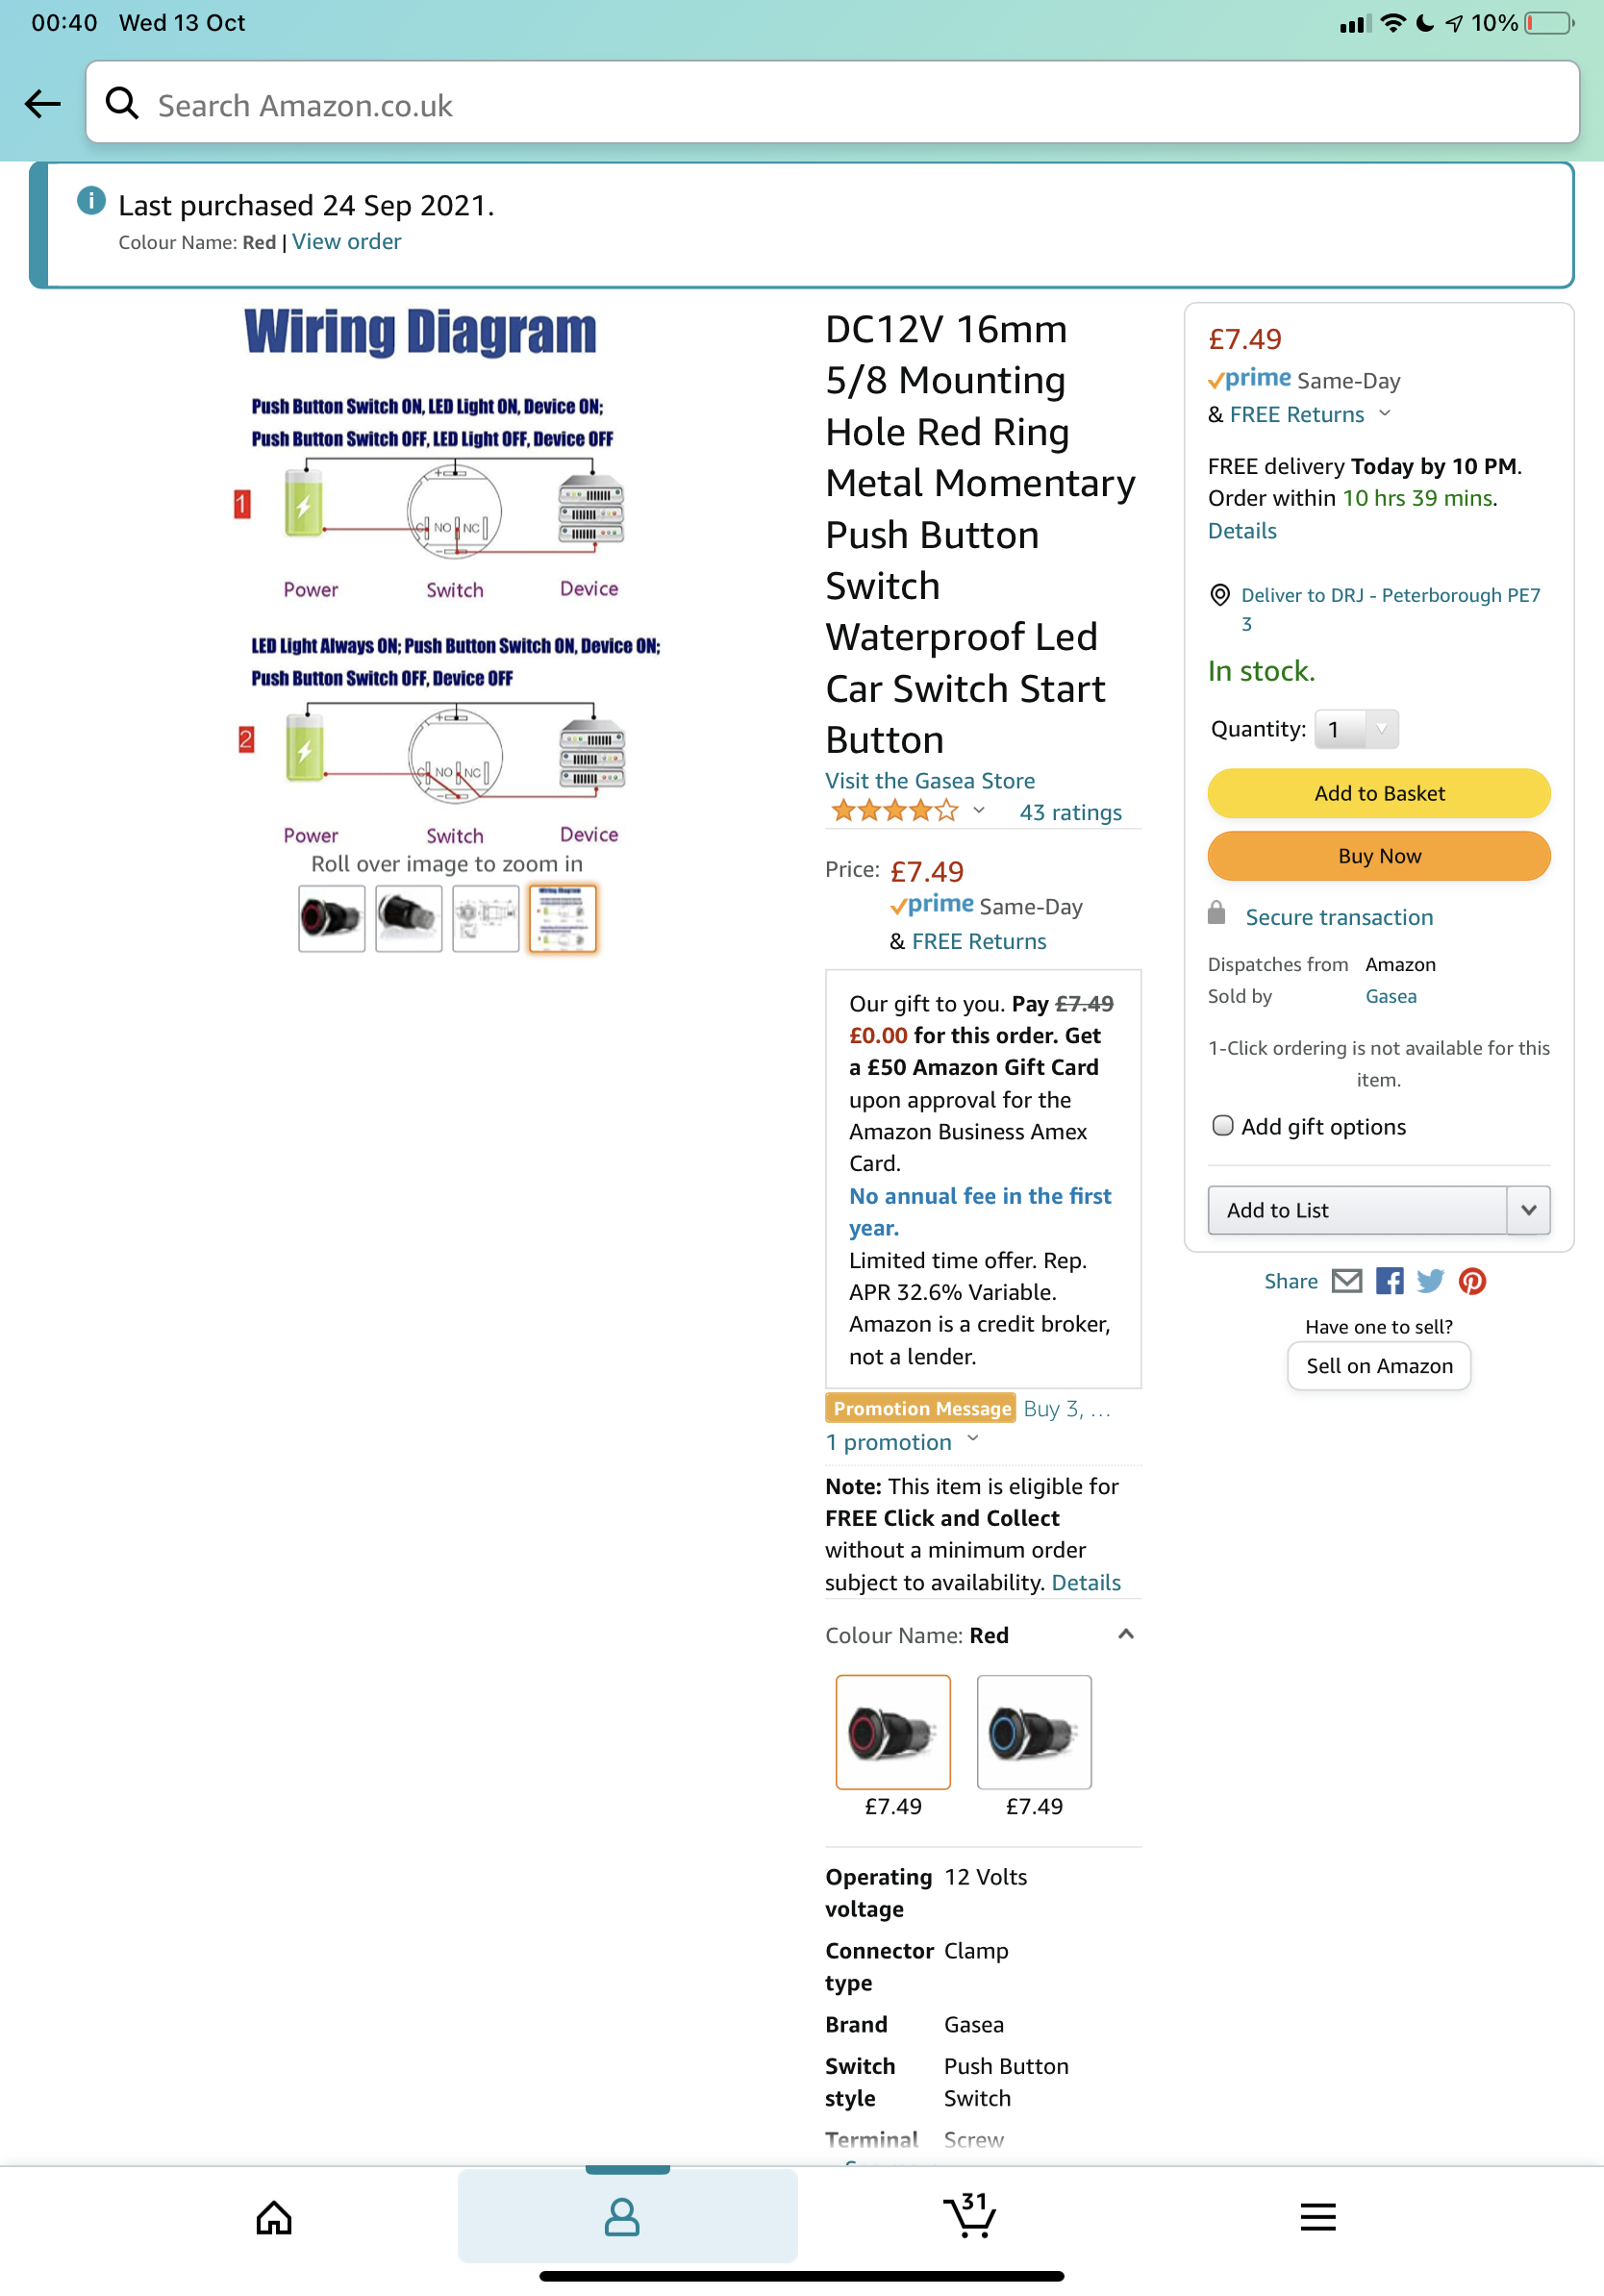
Quote from Dale Parsons on October 13, 2021, 10:56 amHello all. This has probably been asked numerous times but I cant find the answer, I've completely ripped out my digital panel and gone with mah meter and pot, going to install a three way switch for pwm control if needed. Nearly done but stuck and at my witts end with searching, what I want to do is install a 12v red halo led momentary push switch for my laser test, I want the led to either stay on or light up when pressed, I also want to install the same switch but latching for the laser on, I can't work out how to wire the led power as it's 12v,I have a separate 12v supply but unsure of what voltage goes into the laser test and what goes into the laser on I know one cable is to ground but totally confused I've attached pics of the two switches and my power supply,
If I power the switches with 12v it obviously pushes 12v out, I have DC to DC buck converters that I could use , would this work and what voltage does the 12v need to be dropped to for laser fire and laser on.
I just cannot work out how to wire this, I'm happy worrying the switches in different configurations no / nc but can't work out that I need a power in to the switches and this pushes power out.
Please help.
Hello all. This has probably been asked numerous times but I cant find the answer, I've completely ripped out my digital panel and gone with mah meter and pot, going to install a three way switch for pwm control if needed. Nearly done but stuck and at my witts end with searching, what I want to do is install a 12v red halo led momentary push switch for my laser test, I want the led to either stay on or light up when pressed, I also want to install the same switch but latching for the laser on, I can't work out how to wire the led power as it's 12v,I have a separate 12v supply but unsure of what voltage goes into the laser test and what goes into the laser on I know one cable is to ground but totally confused I've attached pics of the two switches and my power supply,
If I power the switches with 12v it obviously pushes 12v out, I have DC to DC buck converters that I could use , would this work and what voltage does the 12v need to be dropped to for laser fire and laser on.
I just cannot work out how to wire this, I'm happy worrying the switches in different configurations no / nc but can't work out that I need a power in to the switches and this pushes power out.
Please help.
Uploaded files:


Quote from dancolwp1974 on October 16, 2021, 11:38 pmHi Dale,
I'm getting my head around your goal, I haven't seen anyone attempt that... Agree that illuminated buttons look great. I installed an illuminated button on a CNC mill rather than a K40 laser, so will share some thoughts with you.
Regarding the Test fire button
The front panel test fire button does not work with the Mini Gerbil in place - this is deliberate! The Mini Gerbil outputs gcode and so you need to use your PC software to get a test fire.
https://awesome.tech/test-fire-button-in-lightburn/
Note that you should NOT hook up the front panel test button and the PWM wire together - this could cause damage. Perhaps this relates to your reference to installing a three way switch, so you can choose between a test button mode and gcode control? What would the third position on the switch be? If you can explain in words I'll do all I can.
If you could help me a little please? I do occasionally read of customers seeking a manual test fire button even though they've upgraded to a gcode controller, but I'm unclear why. Is that because you want to use the test fire as you're leaning over the laser (between shifting the workpiece)? I'll need some time to think of a solution - it's basically going in 180' opposite direction to the whole philosophy of a gcode controller.
Latching
When you say you want to install a latching switch for the laser on, please confirm by 'laser' you mean 'the system overall' rather than the actual laser beam. I can't imagine you want to force/latch the beam to stay on? That would also be contrary to typical safety arrangement whereby the beam should only operate when the gantry is moving in order to avoid causing the workpiece to catch fire. Assuming you mean the system overall, there's a few ways to achieve this. I'll wait for your answer above on Test fire and answer in one message.
Can you also please confirm you have your Mini Gerbil working ok, and that all of the above is 'icing on the cake' as opposed to doing it before you've confirmed your standard setup is working?
Thanks
Dan
Hi Dale,
I'm getting my head around your goal, I haven't seen anyone attempt that... Agree that illuminated buttons look great. I installed an illuminated button on a CNC mill rather than a K40 laser, so will share some thoughts with you.
Regarding the Test fire button
The front panel test fire button does not work with the Mini Gerbil in place - this is deliberate! The Mini Gerbil outputs gcode and so you need to use your PC software to get a test fire.
https://awesome.tech/test-fire-button-in-lightburn/
Note that you should NOT hook up the front panel test button and the PWM wire together - this could cause damage. Perhaps this relates to your reference to installing a three way switch, so you can choose between a test button mode and gcode control? What would the third position on the switch be? If you can explain in words I'll do all I can.
If you could help me a little please? I do occasionally read of customers seeking a manual test fire button even though they've upgraded to a gcode controller, but I'm unclear why. Is that because you want to use the test fire as you're leaning over the laser (between shifting the workpiece)? I'll need some time to think of a solution - it's basically going in 180' opposite direction to the whole philosophy of a gcode controller.
Latching
When you say you want to install a latching switch for the laser on, please confirm by 'laser' you mean 'the system overall' rather than the actual laser beam. I can't imagine you want to force/latch the beam to stay on? That would also be contrary to typical safety arrangement whereby the beam should only operate when the gantry is moving in order to avoid causing the workpiece to catch fire. Assuming you mean the system overall, there's a few ways to achieve this. I'll wait for your answer above on Test fire and answer in one message.
Can you also please confirm you have your Mini Gerbil working ok, and that all of the above is 'icing on the cake' as opposed to doing it before you've confirmed your standard setup is working?
Thanks
Dan