
Here are the Mini Gerbil connections.
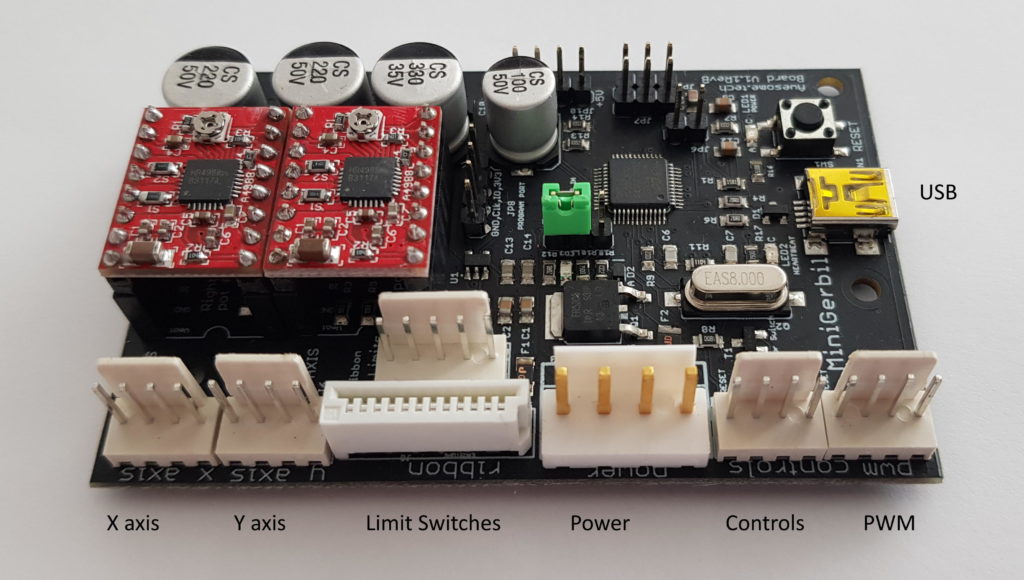
Powering the Mini Gerbil
The Mini Gerbil is supplied via 5V pin on the large power connector. The stepper motor supply (typically 24V) and the 5V share a common ground.
Stepper Motors and endstops
Laser systems which use stepper motors can be connected via the X and Y axis motor outputs. You can power the stepper motors with 35V maximum on the large power connector.
Next to the power input connector are the X- and Y-end stop or limit switch inputs. For a DIY machine, it’s easier to use the 5 pin connector rather than the ribbon cable connector. Limit switches are Normally Closed (NC), meaning that when when activated, they will stop conducting between their C (common) and NC (normally closed) contacts.
Enabling the laser
The Mini Gerbil’s laser fire output is valid when its:
- the LO (“Laser On”) is low, and,
- the PWM is a non-zero value.
So you need to work out how to utilise these two outputs to drive your laser system.
For example, the LO pin could be used to switch on the laser (e.g. laser diode power module’s CS or EN enable pin), while the PWM output is used to modulate the laser strength.
Example project 1 – DIY Laser Diode engravers
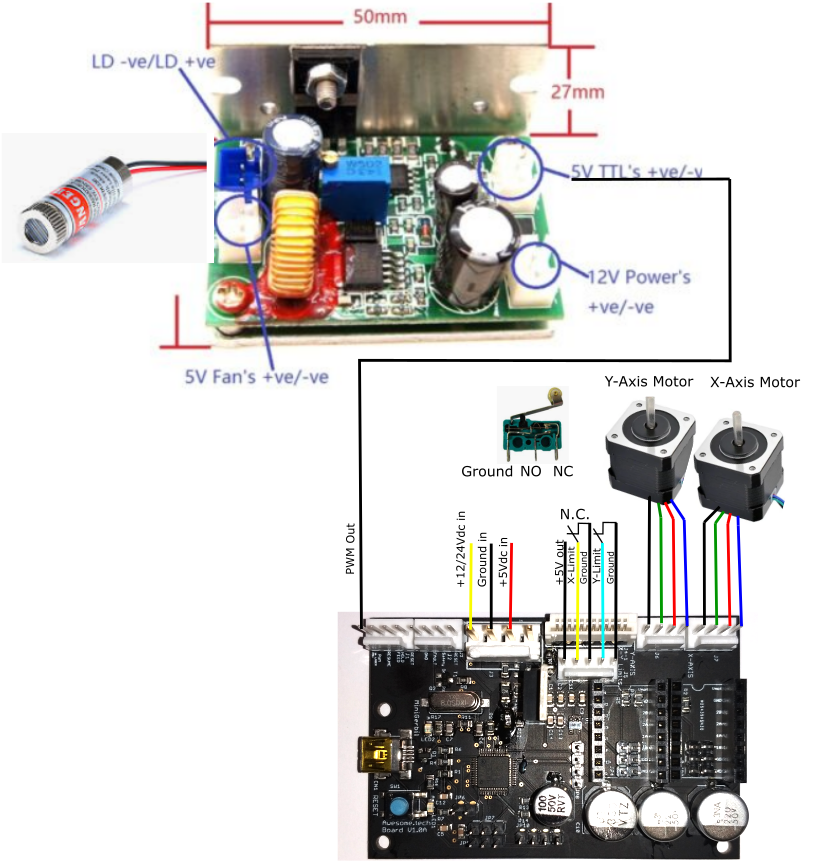
To interface to the Mini Gerbil, the laser diode must have a TTL level PWM input.
The image below is from a small 500mW diode laser.
Example project 2 – CO2 laser
This Trotec laser came with brush motors with rotor encoder feedback. Paul customised the motor mounts and replaced them with standard NEMA17 stepper motors.
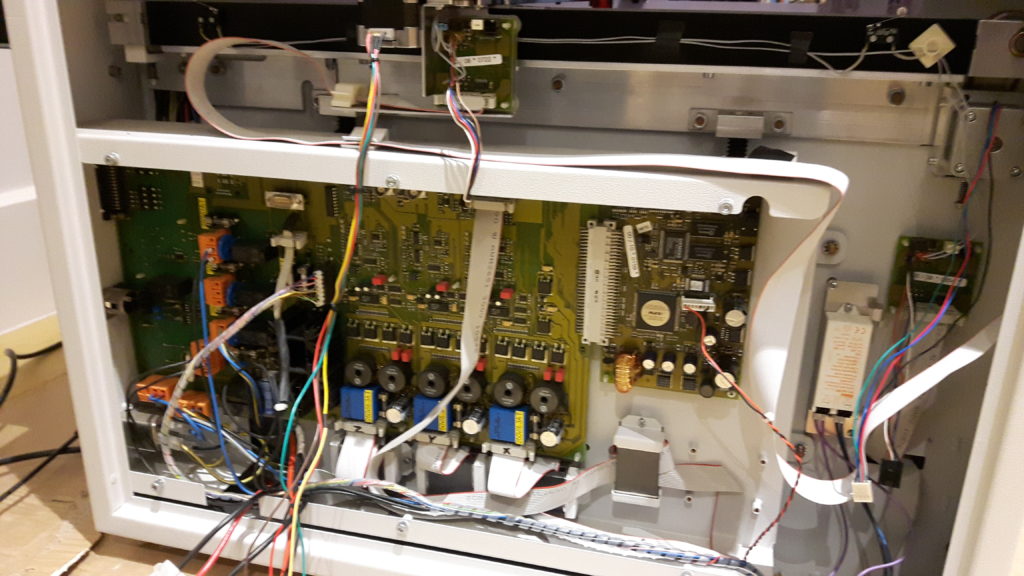
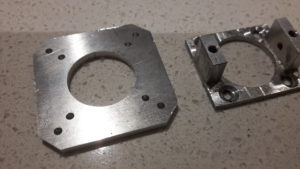
Above is the new replacement bracket for the NEMA17 motor and the old bracket for the brushless motor.
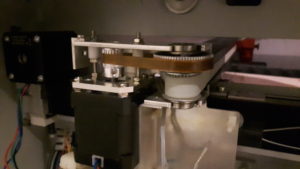
The installed NEMA17 replacement stepper motor driving the X-Axis.
The project used an RF excited laser which is driven by a 1.9kHz PWM – mode 2 (see the customised $28 – link: parameter in Grbl)
| PWM Laser freq | Value | PWM mode | Remarks |
|---|---|---|---|
| 244 Hz | 0 | fast pwm | great engraving |
| 61 Hz | 1 | fast pwm | dither effects |
| 1.9 kHz | 2 | fast pwm | just b/w |
| 15 kHz | 3 | fast pwm | just b/w |
| Default | 0 | fast pwm | Default mode |
| 122 Hz | 4 | phase-freq correct | great engraving |
| 1 kHz | 5 | phase-freq correct | just b/w |
| 7.5 kHz | 6 | phase-freq correct | just b/w |
Is there any news regarding the delivery
Hi Gabriel, all the tracking ids have been posted on a tracking database. See Online tracking
could work with a board type b1?
The Mini gerbil I’m using with my K40 works beautifully. No problems what so ever. Now I’d like to get another to use with my Diy diode laser, But my laser uses three motors while the Mini Gerbil only has two X and Y-axis pins. So does this mean that I would have to splice two motor connections together? Then there is the power supply. It currently plugs into a standard 12v plug 5v. Would there be any problem the USB as the main power? Please reply asap. Thanks
Hi KP,
the Mini Gerbil can only control 2 axes at a time.
If two of your motors are on the same axis, you could splice the wires together (you’d have to be careful to do the right wires, and the total power usage of the two motors combined would have to be under the 1.8A capacity of the stepstick). I haven’t seen people do this before, so please regard it as experimental rather than guaranteed.
If you actually need 3 axis control, then sorry the Mini Gerbil is not the right product. We’re working on a 3 axis version but it won’t be available for some time.
Regards,
Dan