
How do you get the best possible K40 laser engravings ? The secret is using ‘gamma correction’ and a quality laser controller with 16 bit PWM.
Background – my test settings
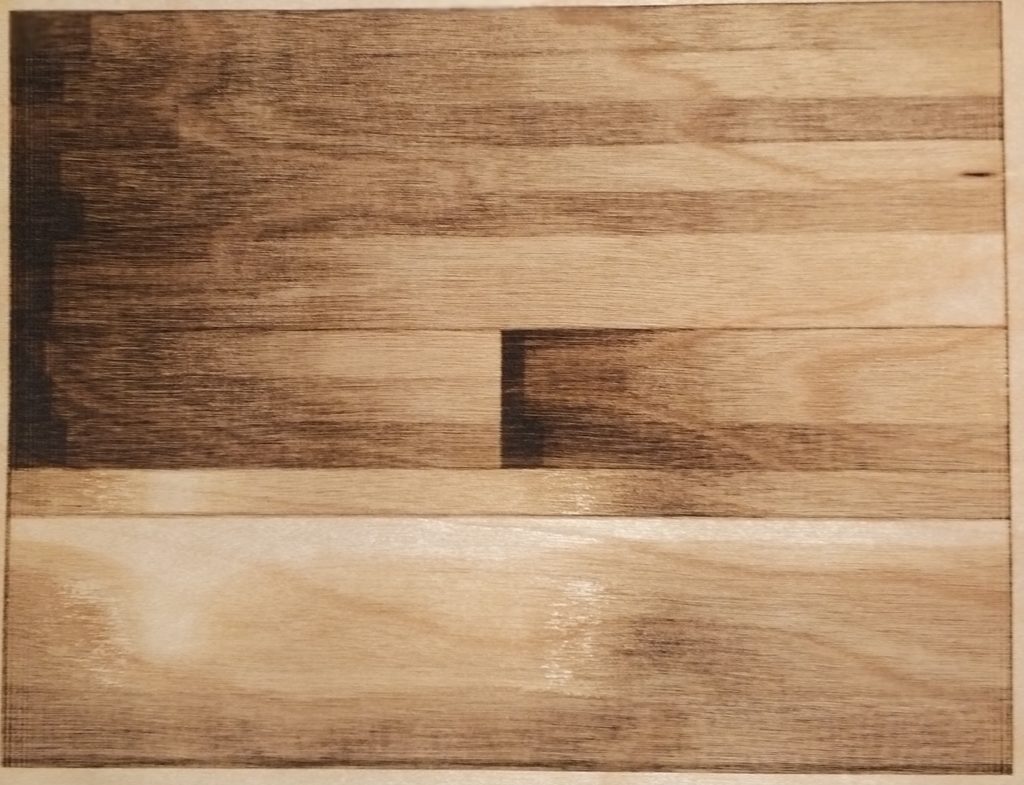
In this blog, I’m engraving on Birch plywood sheet, but the method holds for other material. On my K40 laser with Mini Gerbil controller, I’ve used an engraving speed of 1500 mm/min, gray shades, 400 dpi, power range $30=1500 and 7.5 % power. Other speeds and dpi resolutions produce different results. Slightly older or newer CO2 tubes change the results. So replicating our results requires some ‘dialing in’. Also, plywood has minor imperfections which are visible in the results.
Here’s the image we want to engrave:
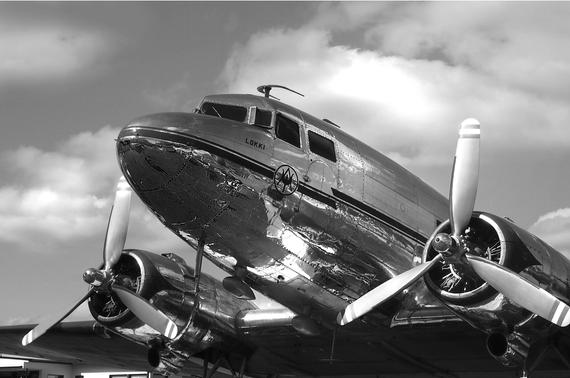
It’s a challenging image for laser engraving, containing a wide range of shades and bright reflections. But we’re up for the challenge !
The theory, and practice
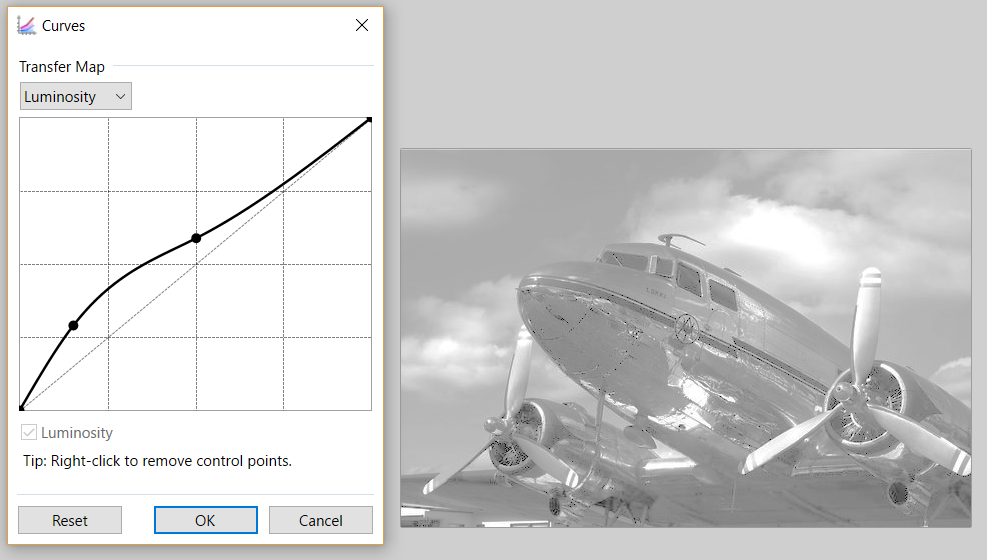
Let’s start with a gray scale test image, and see how it looks when engraved. The image is:
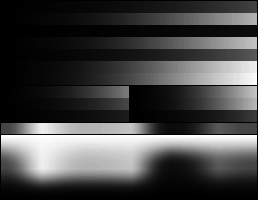
And how does it look when engraved ?
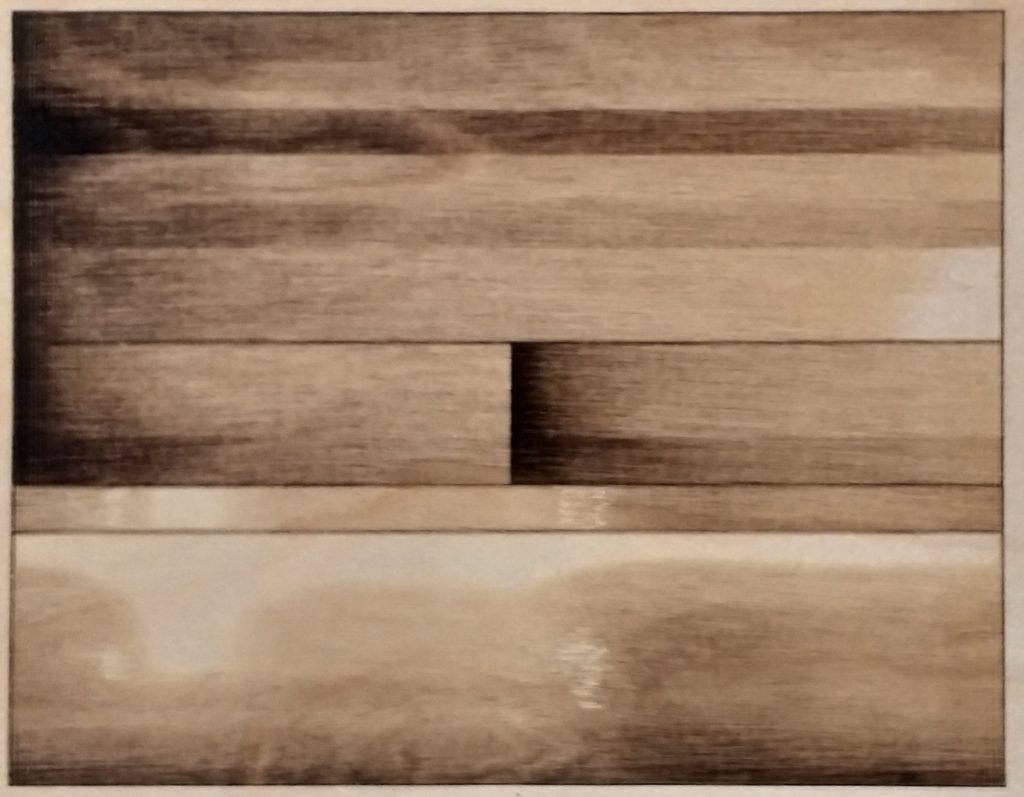
Notice the dark areas are really only coming out as dark at the extreme end of the range ? The mid-range darkness is pretty much non-existant.
Engraving strategies
Two key strategies are available to uplift your engravings. Either one alone helps, together they transform engravings into eye-popping photographs:
1 use Gamma correction to adjust your image to suit your laser engraver and material, and,
2 upgrade your K40 laser controller to 16 bit PWM
Strategy 1 – Gamma Correction
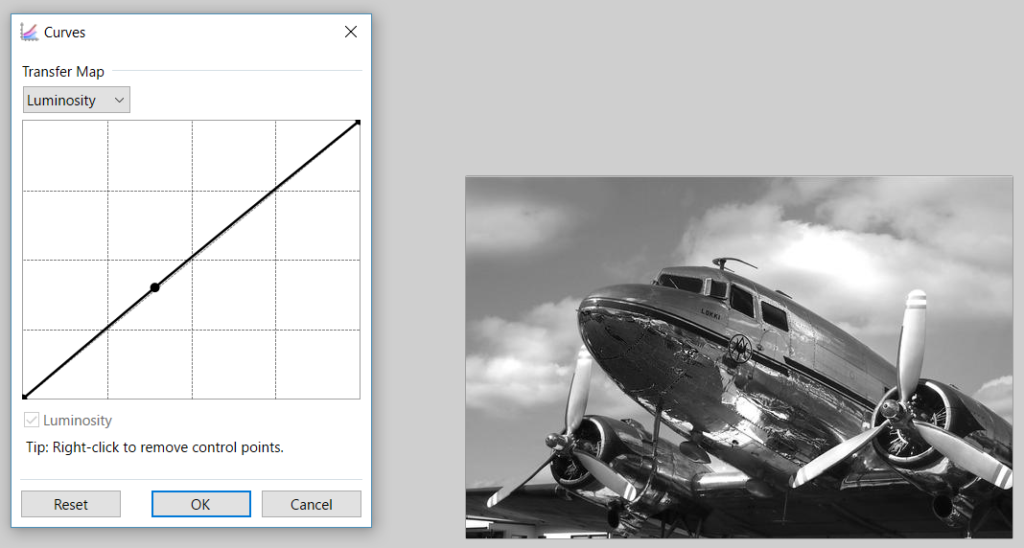
Gamma correction shifts the levels of light/dark in an image. Most image software allows separate gamma changes for red, green and blue, but for laser engraving, only gray scale gamma correction is relevant. You can change levels (Gamma correct) via photo shop software or Laserweb, but our favourite is paint.net.
Gamma correction doesn’t simply change overall brightness, it uses ‘curves’ to emphasize the relationship between input and output brightness. Check paint.net instructions.
Here’s our image, followed by two gamma corrections.
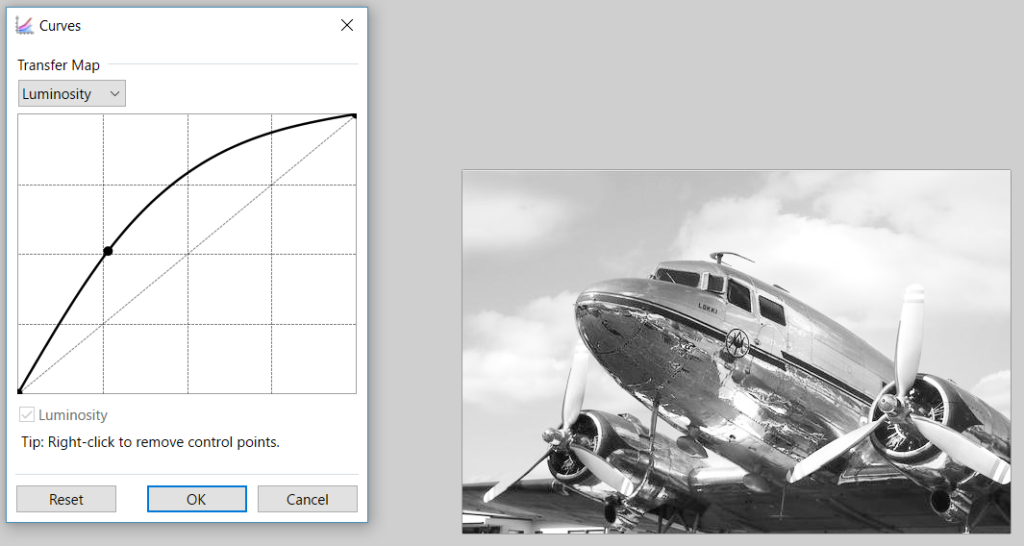
Notice how the gamma changes affect the levels of different shades ? The very lightest (‘highlights’) and very darkest shades (‘shadows’) are unchanged, while everything else changes according to the curve. Given the Birch plywood results above, which image will engrave best ? The test pattern’s dark engraving areas are too light, so we must darken the dark areas…
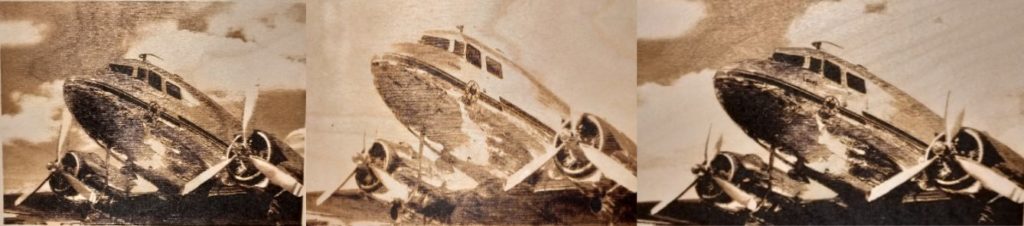
The original looks ok. The brighter image is washed out – too many grays have been brightened so much they’re in the laser performance zone that doesn’t show up at all. Meanwhile the third option’s darker midtones are in the laser performance zone which comes up completely dark.
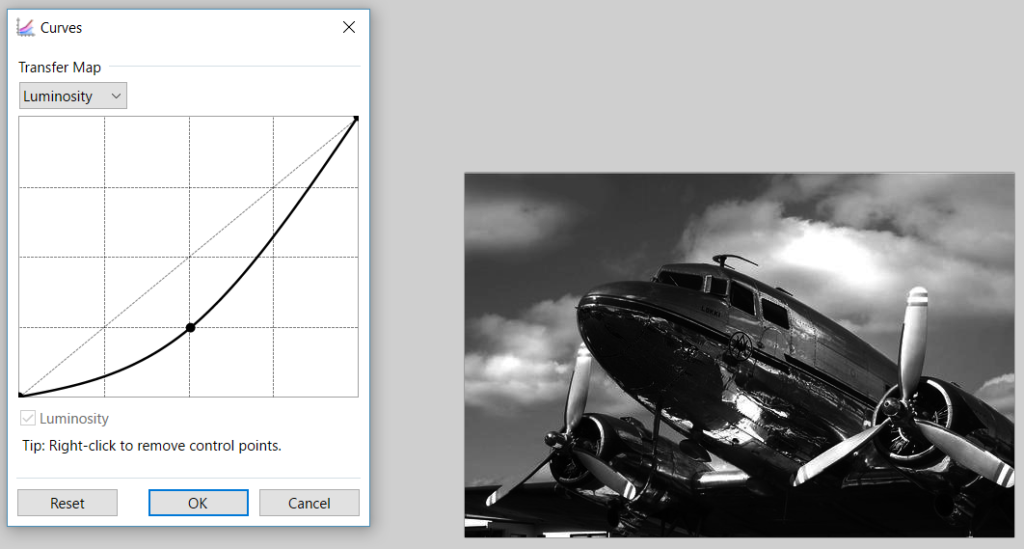
So where to from here ? We need more sophisticated curve changes. Simply click and drag curve points to adjust towards the shadow end, while leaving highlights unchanged. Here’s the recommendation and results:

Now the clouds and propellers are visible, and dark areas aren’t overdone.
Strategy 2 – Upgrade your K40 Laser controller
Firstly, let’s recap on terminology. PWM stands for Pulse Width Modulation, but in this blog we can simply understand it as the laser power level.
The K40 laser’s standard Nano controller is 8 bit PWM and thus spans the entire grey scale with only 256 power levels. Even with a gamma-corrected image, the electronics only produces several discrete power levels in the critical zone where darkness rapidly changes. The result ? Banding.
Banding is most easily seen in the sky in landscape photos, where the smooth gradient shows as a number of shaded bands. I’m sure you’ll agree shaded bands don’t correspond to best possible laser engravings !
Note that the banding is very visible in the image above, but it’ll be lurking around degrading quality in many 8 bit PWM engravings.
To avoid banding, replace your K40 laser’s Nano controller with a 16 bit PWM controller. This ensures plenty of laser power levels in the critical laser performance zone where darkness changes rapidly. For example, Awesome.Tech’s Mini Gerbil has 16 bit PWM. While 8 bit PWM produces 256 levels, 16 bit PWM produces 16,384 power levels, so you get 256 times more levels of gray. No more banding !
Engraving Success Summary
1 Decide on your requirements and constraints.
- If quality is more important, choose a speed, resolution and power level
- (e.g. the Mini Gerbil has a setting $30 configuration ) and run a test engraving. Then iterate the gamma adjustment to reach your goal
- If time is more important, consider a high DPI dither. While it doesn’t look as good as a well done gray scale, it requires less dialing in.
If you want both, create an engraving test pattern and handwrite on the laser settings for future reference (will differ by material).
2 Invest in a high performance K40 laser controller with 16 bit PWM to ensure you get all the laser power levels, and thus gray scale levels you need.
Conclusion
Understanding how the image, laser controller, material, speed and power combine to produce your engraving is a lot to ask. We hope you share the spirit and shoot for the best possible laser engravings rather than choosing to dither!
Please let us know how this blog’s strategies work for you – share your results on the K40 laser forum.
Our Mini Gerbil laser controller with 16 bit PWM is available here. Our shiny new web store is SuperGerbil.com
Note: K40’s resolution is about 254-300 DPI (0.1mm beam) which widens when using high levels of power. Also the material does matter. Try marine plywood which is tough as nails… Beech, Birch and Popular are the best choice for laser cutting and engraving.