Gamma correction
Quote from Paul on January 28, 2018, 11:41 pmI have extended the raster plugin with a basic gamma correction. Let me know whether it's useful...
I have extended the raster plugin with a basic gamma correction. Let me know whether it's useful...
Uploaded files:
Quote from Paul on January 29, 2018, 8:06 pmhttps://awesometech1.wpengine.com/download/beta-2-plugin-updates/
https://awesometech1.wpengine.com/download/beta-2-plugin-updates/
Quote from davegalesr on January 30, 2018, 6:46 amWhat do the offset and compression options do? I tried a few adjustments with both and I don't see a difference in the preview - is that something I would only see in the engraved image? Can you give an idea of what you adjusted for these examples?
What do the offset and compression options do? I tried a few adjustments with both and I don't see a difference in the preview - is that something I would only see in the engraved image? Can you give an idea of what you adjusted for these examples?
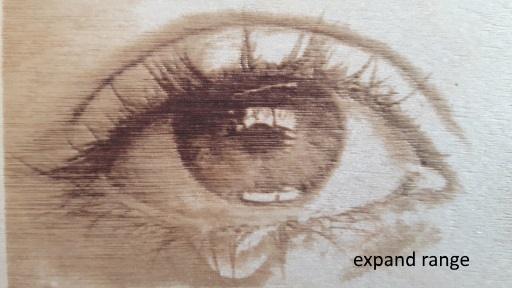
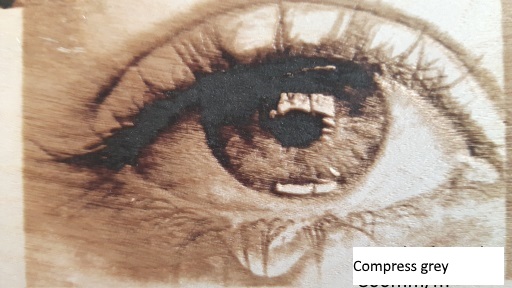
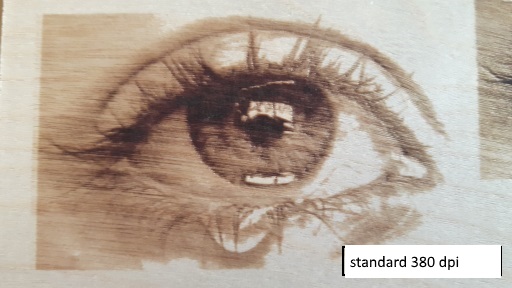
Quote from Paul on February 3, 2018, 3:05 amHi Dave, basically it is an offset that allows you to move the zero to minus (-30, further into white) or positive direction (towards black). The multiply factor 0.9 or 1.1 does shrink or expand the laser range. The preview does not show you any details since it is very light but in rastering on wood those small changes do pop up. I tried to create a picture to explain it but I don't think it does do explain it well. So my worked example below:
Say offset = -18 shifts the white zero to -18, so engraving with original value 100, becomes S88 instead of S100. The multiply factor set to 0.9 than turns that into (100-18)*0.9 = S79 so it becomes lighter. Multiply with say 1.2 turns it into (100-18)*1.2 = S105 so much darker while white is e.g. (20-18)*1.2 = S2 much lighter than S20. It's primitive but output looked promising especially with b/w photos. Give it a try with small values like -18 offset and multiply with 1.1. I saw some pictures revealing more details in the engraving.
Hi Dave, basically it is an offset that allows you to move the zero to minus (-30, further into white) or positive direction (towards black). The multiply factor 0.9 or 1.1 does shrink or expand the laser range. The preview does not show you any details since it is very light but in rastering on wood those small changes do pop up. I tried to create a picture to explain it but I don't think it does do explain it well. So my worked example below:
Say offset = -18 shifts the white zero to -18, so engraving with original value 100, becomes S88 instead of S100. The multiply factor set to 0.9 than turns that into (100-18)*0.9 = S79 so it becomes lighter. Multiply with say 1.2 turns it into (100-18)*1.2 = S105 so much darker while white is e.g. (20-18)*1.2 = S2 much lighter than S20. It's primitive but output looked promising especially with b/w photos. Give it a try with small values like -18 offset and multiply with 1.1. I saw some pictures revealing more details in the engraving.
Uploaded files:Quote from davegalesr on February 3, 2018, 6:41 amI think I understand now - thanks. I will play around with a couple of prints that I have had trouble dialing in and see if this helps. By the way, I have been practicing with LightBurn and it is nice but your plugin's greyscale gives me better detail and sharpness.
I think I understand now - thanks. I will play around with a couple of prints that I have had trouble dialing in and see if this helps. By the way, I have been practicing with LightBurn and it is nice but your plugin's greyscale gives me better detail and sharpness.
Quote from davegalesr on February 4, 2018, 2:01 pmI tried the latest plugin and I see a couple of issues. First, the feature to speed past white space works fine when going left to right on the x axis, but it does not seem to speed past it when going right to left. Also, I see the laser staying on and leaving streaks to the end of the canvas when going right to left - something that another user reported but I don't think he mentioned that it only happens when going right to left, at least that's when I see it. Also, I have $30 set to 1000 which is what LightBurn recommends so that might contribute to the streaks. I haven't tried raising the $30 yet to see if the streaks go away (have you given any thought to adding the $30 to the plugin panel yet?).
I tried the latest plugin and I see a couple of issues. First, the feature to speed past white space works fine when going left to right on the x axis, but it does not seem to speed past it when going right to left. Also, I see the laser staying on and leaving streaks to the end of the canvas when going right to left - something that another user reported but I don't think he mentioned that it only happens when going right to left, at least that's when I see it. Also, I have $30 set to 1000 which is what LightBurn recommends so that might contribute to the streaks. I haven't tried raising the $30 yet to see if the streaks go away (have you given any thought to adding the $30 to the plugin panel yet?).
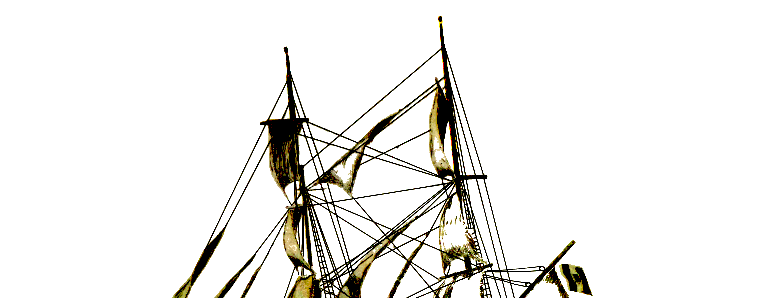
Quote from davegalesr on February 6, 2018, 9:33 amThanks - here is a file where I see this happening. It is a gimp output where the brightness, contrast and levels have been adjusted to erase any pixels and that works for all whitespace to the right of the rightmost mast. I see the streaks to the left of the leftmost mast and a little to the left of the rightmost mast.
Thanks - here is a file where I see this happening. It is a gimp output where the brightness, contrast and levels have been adjusted to erase any pixels and that works for all whitespace to the right of the rightmost mast. I see the streaks to the left of the leftmost mast and a little to the left of the rightmost mast.
Uploaded files:Quote from davegalesr on February 6, 2018, 3:08 pmHad a bit more time to play with this and I now see that the streaks occur in both directions but more in the reverse scan than the forward scan. The speed up only occurs in the forward direction though.
Had a bit more time to play with this and I now see that the streaks occur in both directions but more in the reverse scan than the forward scan. The speed up only occurs in the forward direction though.
Quote from Paul on February 12, 2018, 7:28 pmThanks Dave, I will have another look at it next weekend. It seems to be related to the conversion of the image to to grayscale. (png.py)
Thanks Dave, I will have another look at it next weekend. It seems to be related to the conversion of the image to to grayscale. (png.py)


