
Installing the AVR Controller
Tools: All you need is a pair of pliers to cut one wire (optional), a screw driver to connect one wire. Tips: Take photo’s of the existing NanoM2 board/endstop so you know what and how it was connected. Note: The barrel jack op the AVR board is not being used. It’s for those who want to use the AVR as an Arduino standalone and program it. The K40 Shield is powering the AVR board below it. The hardware conversion consists of 4 easy steps designed for easy installation and for non-tech savvy people. The connectors go straight into the board and uses a lock mechanism to keep the connection steady. The diagram below depicts the set up of the connections: 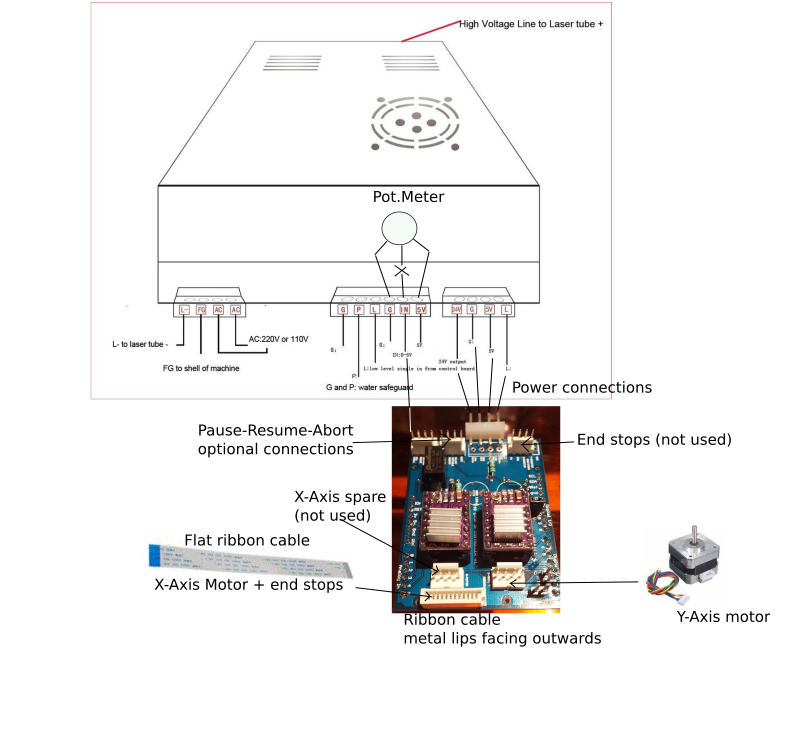
- Plugs: Unplug the existing controller plugs one by one and plug them over into the new controller as depicted in the diagram above (the ‘Y axis motor’ connector and ‘power connector’ labeled ‘24V/Gnd/5V/Lo’ on the K40 shield which is a 4 wire connector). The flat ribbon cable (which contains the ‘X,Y end stops’ and ‘X axis motor’ connections) goes into the ribbon female connector only in one way. The metal lips of the ribbon cable are facing outwards, away from the controller PCB.

- (Optional)Switches: This is an optional step and you can skip it until everything is working nicely. Install the push buttons for pause/resume and reset and plug in the wire connectors into the controller. You can add safety door switches (NO normally open) in parallel with the pause button. So, when you open the access lid, the machine stops and when you close the lid, the machine can resume via a push on the resume button. All switches or push buttons have a common ground (normally open).
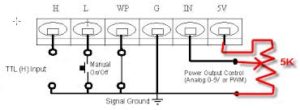
- (Analogue & Digital control version K40) Power control (PSU): Remove/disconnect the pot meter / digital control middle wire from the ‘IN’ terminal and use a new wire to connect IN into the controller (far out most terminal as depicted with a white wire in the photo below). From this laser power supply strip, only the IN connection is modified the rest just stays as is in the K40. On some PSUs the ‘H’,’L’ and ‘WP‘ is a separate connector block as are ‘G‘, ‘IN‘ and ‘5V‘ while the most common K40 PSU uses one screw terminal strip.
- Test: Test it all out with manual jog movements X,Y axis, homing and send a g-code file via the CNCjs software tool (See link https://github.com/cncjs/cncjs for overall info).
Warning: The power plug can only go into the Gerbil controller in one direction (interlock lip/catch) and makes sure you don’t insert it 180 degrees or shifted in pins since it will damage the laser power supply!!!
Note*: The stock K40 laser power supply does not have builtin current protection. When drawing more than 1 Amp current, the output rectifier Schottky diode will short and the whole unit shuts down. You can confirm this short by measuring the diode in opposite directions with an Ohm Multimeter. When 0 Ohm in both directions, its broken. This rectifier diode sits next to the 7805 power regulator and can be easily replaced (~$2 component that can be cut out and bridged with a new one).
The software installation
The installation of the Open software is straightforward. Install Inkscape 0.92 if you don’t have it already see https://inkscape.org Install Inkscape plugins by moving the files from the usb key or download from sites into the inkscape/share/extensions folder (Windows) or … (MAC). Laser cutting plugin can be downloaded here:
The orginal/unaltered version can be downloaded from https://jtechphotonics.com/?page_id=2012 and both source codes can be found at https://github.com/paulusjacobus/Inkscape
Both Inkscape plugins can stream gcode directly to Gerbil. However you can stream the saved g-code files via separate g-code senders. Next to this you need a g-code sender to send one off config commands to Gerbil when you want to calibrate the engraving or setting the laser mode/machine range (A4 default)/step rate etc.
Optional: Install the G code sender(s) (CNC Cheton or streamer.py script) by clicking on the exe file which installs in on your PC or Mac. For Install CNCjs see: https://github.com/cncjs/cncjs/releases it is a desktop app install which is easier than a node.js installation.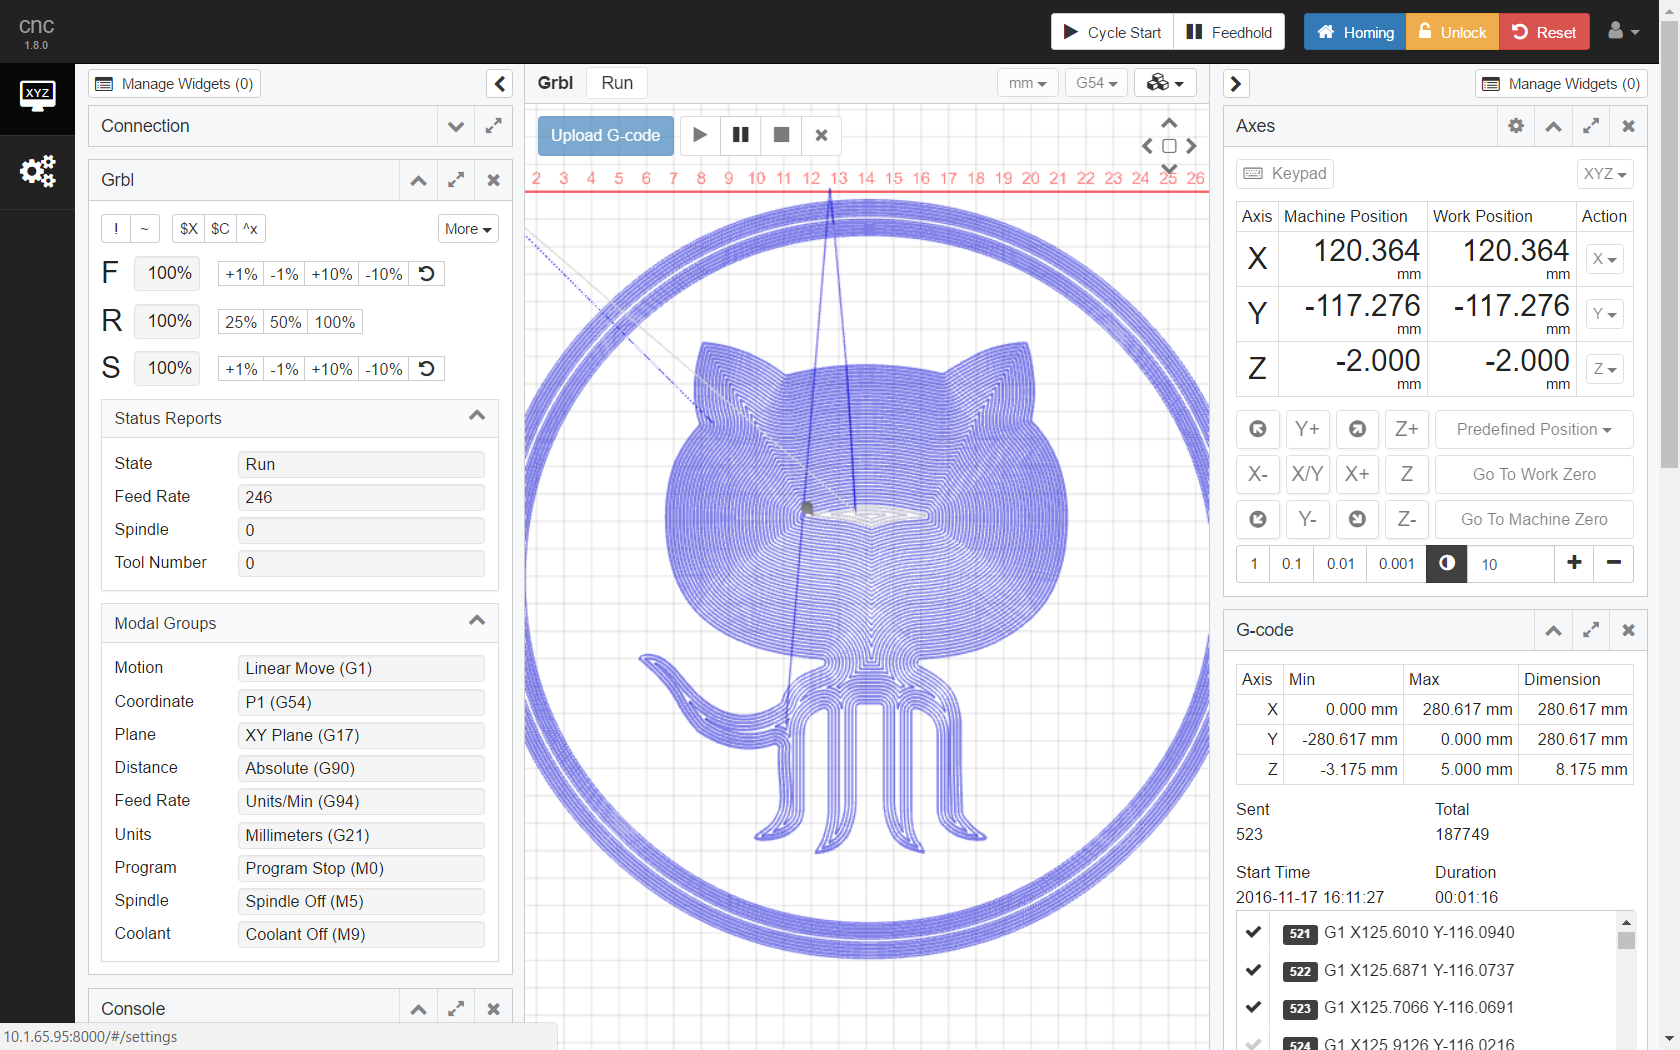 Connect the controller to the G-code sender through selecting the com port and baudrate (115200) of the USB connection, upload a g-code file and start streaming g-code (click start button depicted by an arrow symbol). Or download the streamer.py script from Grbl Github site. Example: ‘Streamer.py c:\filename.gcode com16’ See https://github.com/gnea/grbl/tree/master/doc/script In case the usb port is not recognised by your machine, you might need to download the usb drivers at http://www.ftdichip.com/Drivers/VCP.htm
The laser head can be configured with an offset so it starts at working position that covers the work area. You can do this while CNCjs is connected to Gerbil. Click on the number within the work position X or Y axis field and enter a proper offset i.e -2.20 that moves the head 2.2 mm into the working area. Alternatively you can while the K40 is not powered, move the head manually into the desired spot and power up the machine. It will use that as position zero so don’t ‘home’ the machine otherwise you have lost your desired starting point. Take care to move the laser head slowly by hand since the stepper motors can induce spikes into the stepper electronics and damage them although that has never happened to me.
And that’s it, you are on your way! Experiment a lot and get to know the Inkscape and CNCjs software. There are only a few things to remember to be productive (cut: inkscape object to path, inkscape mirror, plugin speed, power. Engrave: inkscape canvas size, plugin speed, power settings).
Inkscape learning curve accelerator
Engrave or cut in Inkscape: set the canvas to the size of the work: Menu ‘document properties’, ‘page size’, ‘resize to page content’ and use the engrave or cut plugin to complete.
Combine cut and engrave: Still two separate actions via the appropriate plugins but both can be nicely aligned by using the layers in Inkscape. For example you want to make logos and cut them out after engraving. Create the logos on layer 1 and lay them out aligned in a fixed grid so when you mirror the Y axis the cut still aligns. Copy the logos into a second layer and remove the engraving components so you’re left with only the cutout lines. Goto document properties and set the canvas to fit the object. Now we have the work are fixed and save the Inkscape file. Now generate the cut and engrave g-code files and stream them to Gerbil (first engrave then cut of course). That’s it.
Crop or cut out a part of a picture in Inkscape: That’s called ‘Clip, set and release’ in Inkscape. Use the rectangle tool to select your area from a bigger area like a picture and hold shift and click on the big picture or item you want to clip from. Two dashed rectangles are visible now. Select Menu ‘Object’, ‘Clip’, ‘Set’. Use ‘Release’ to undo the crop.