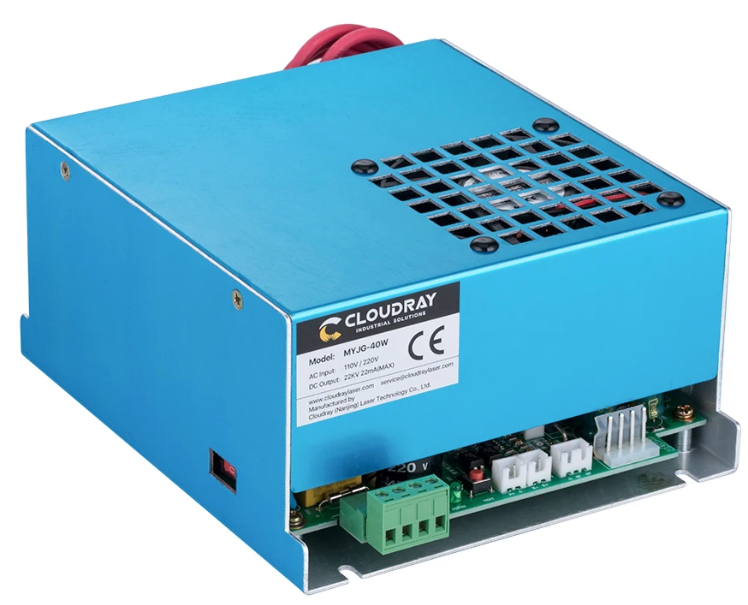
If your K40 power supply is the one shown below, you’re in the right place! You can tell by looking at the mix of different terminal block types.

Step 0 – Turn off your K40 at the wall
Step 1 – Physical mounting
| Mini Gerbil Mounting Options | Instructions |
| Install alongside the Nano controller using the adhsesive PCB standoffs – fast and convenient for an initial installation | Push the PCB standoffs through the MG’s corner holes until the small tab engages. Rotate the standoff untill the tab faces the nearest corner (enabling easy removal later). Wipe mounting plate clean. Remove adhesive backing and push onto mounting plate. |
| Re-use the existing Nano mounting place – great for a long term solution | With a permanent marker, label the white plugs going into the Nano controller. Photograph the Nano controller including labelled plugs before unplugging the cables from the Nano. Unbolt the K40’s existing controller mounting plate and remove the Nano. Screw the Mini Gerbil to the Nano’s mounting place. Plug the labelled cables as described in instructions |
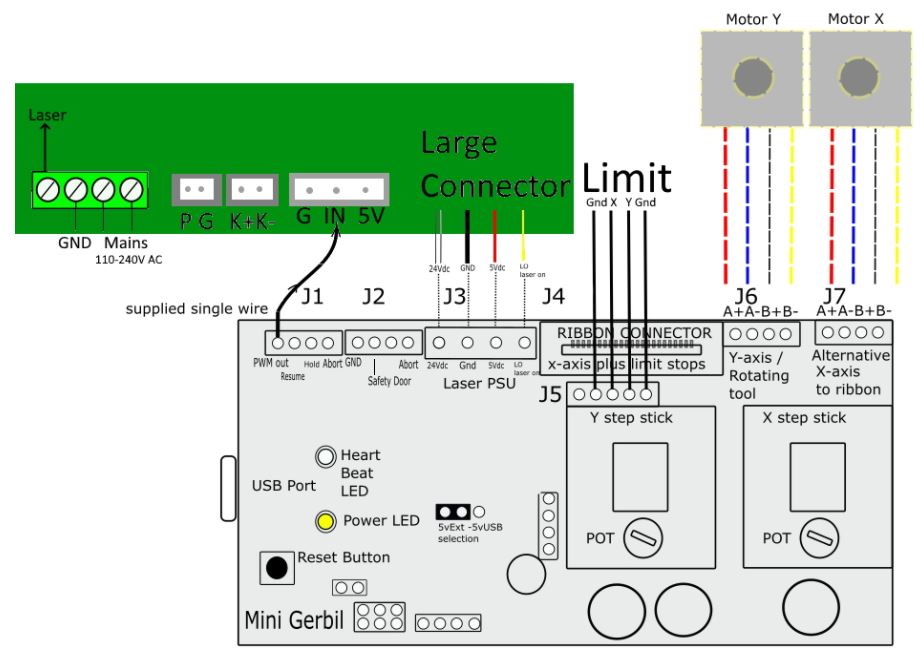
Step 2 – Review installation diagram and plug in. NOTE: images shown are illustrative – your wire colors may differ. The wiring connections is what matters.

The following steps guide you through the diagram above
- Move the Large 4 pin Connector plug from the Nano controller to the Mini Gerbil (J3)
- Move the X and Y motor plugs from the Nano controller to the Mini Gerbil controller (J6, J7)
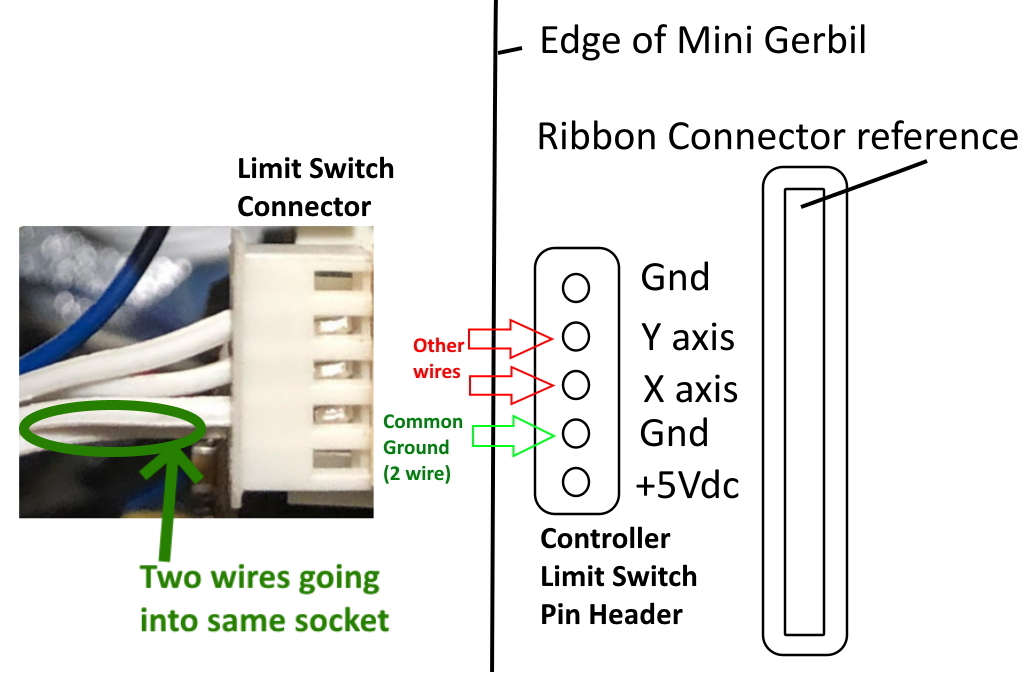
- Move the Limit Switch plug from the Nano controller to the Mini Gerbil controller (J5). Make sure you use this orientation:

- Unplug the small 3 pin connector labelled (G IN 5V) from the K40 power supply, wrap in electrical insulation tape and tuck away from other wires. Now plug the provided single wire from the corner PWM pin of the Mini Gerbil to the center pin of the 3 pin terminal on the K40 power supply.
- Plug your USB cable into the Mini Gerbil and your computer
Return to Installing the Mini Gerbil
