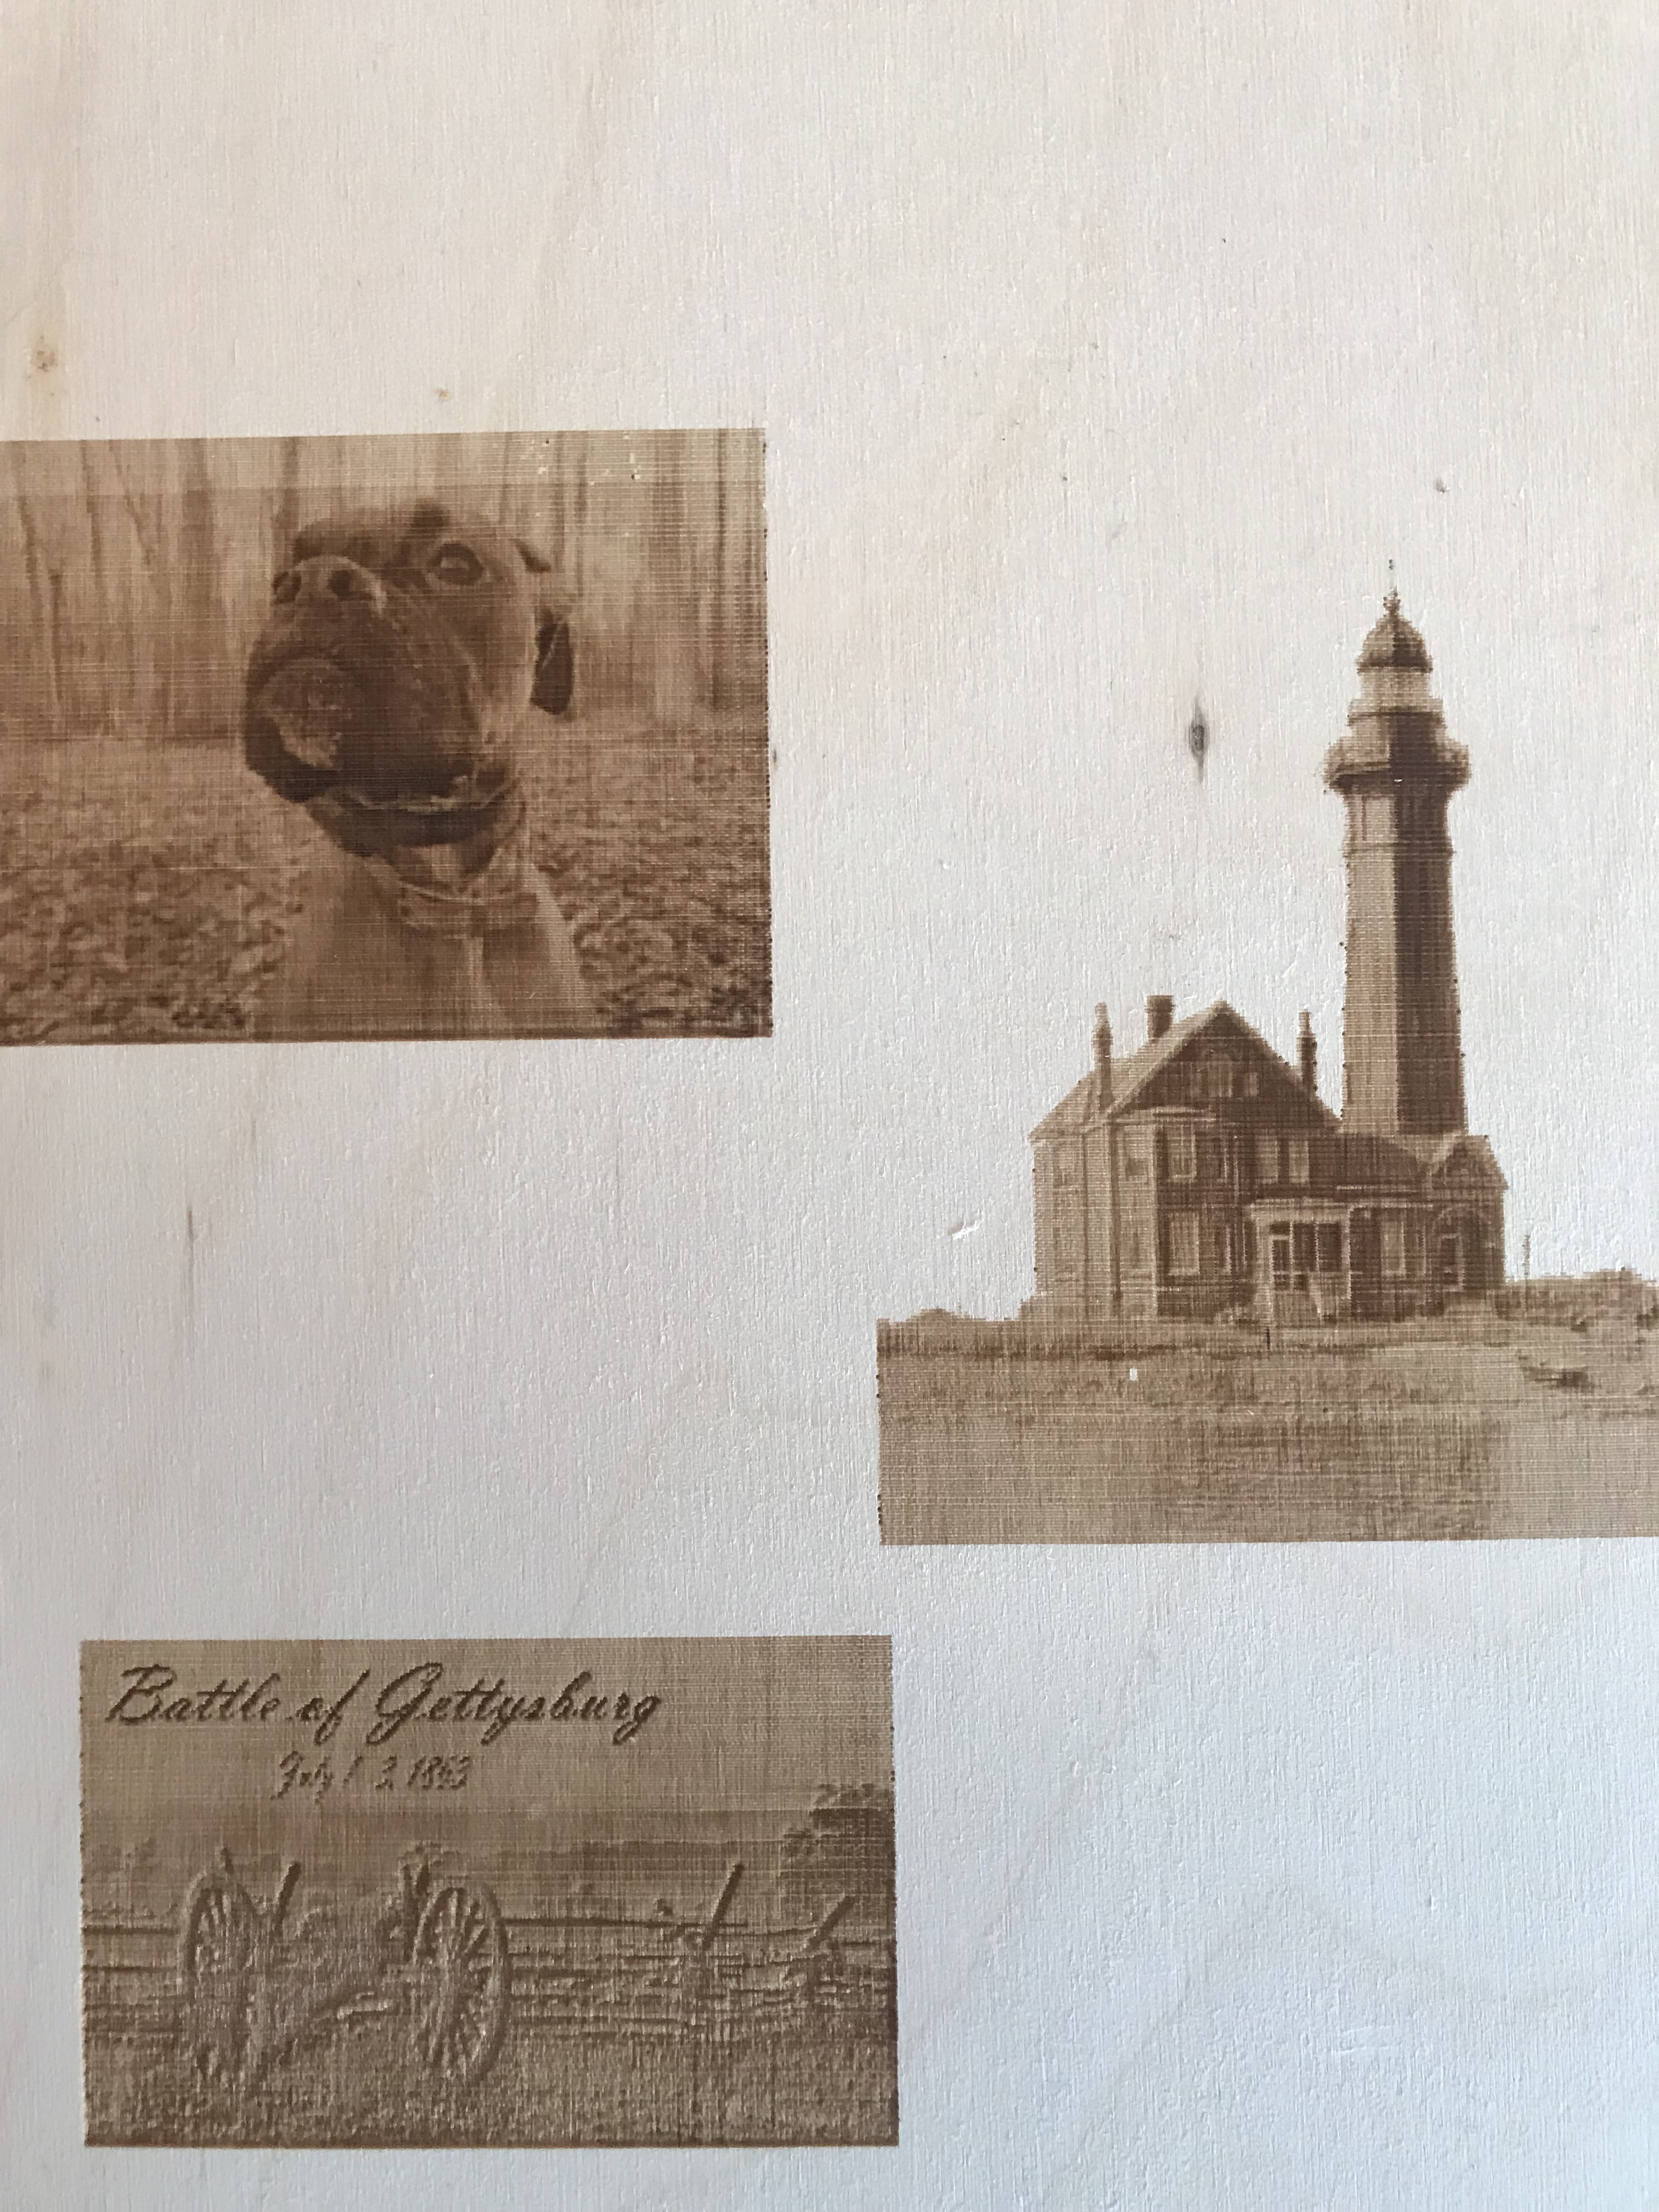
First Sample Prints
Quote from BlazinLazin on January 18, 2018, 1:51 pmSo... Still dialing in settings but overall very pleased with this setup.. Stock K40 with cutting lens (not the most fine point). Little back story, this is my first introduction to Audrino anything, so the start was a bit rough. while wiring the K40, and trying to make the thing even move, I ended up burning 4 driver boards before realizing my issue was in the POT adjustment. My servos would not even move at the start, and just make horrible noises.. After getting the POTS dialed in, I could start printing. Currently I still have no endstops, but more to come...
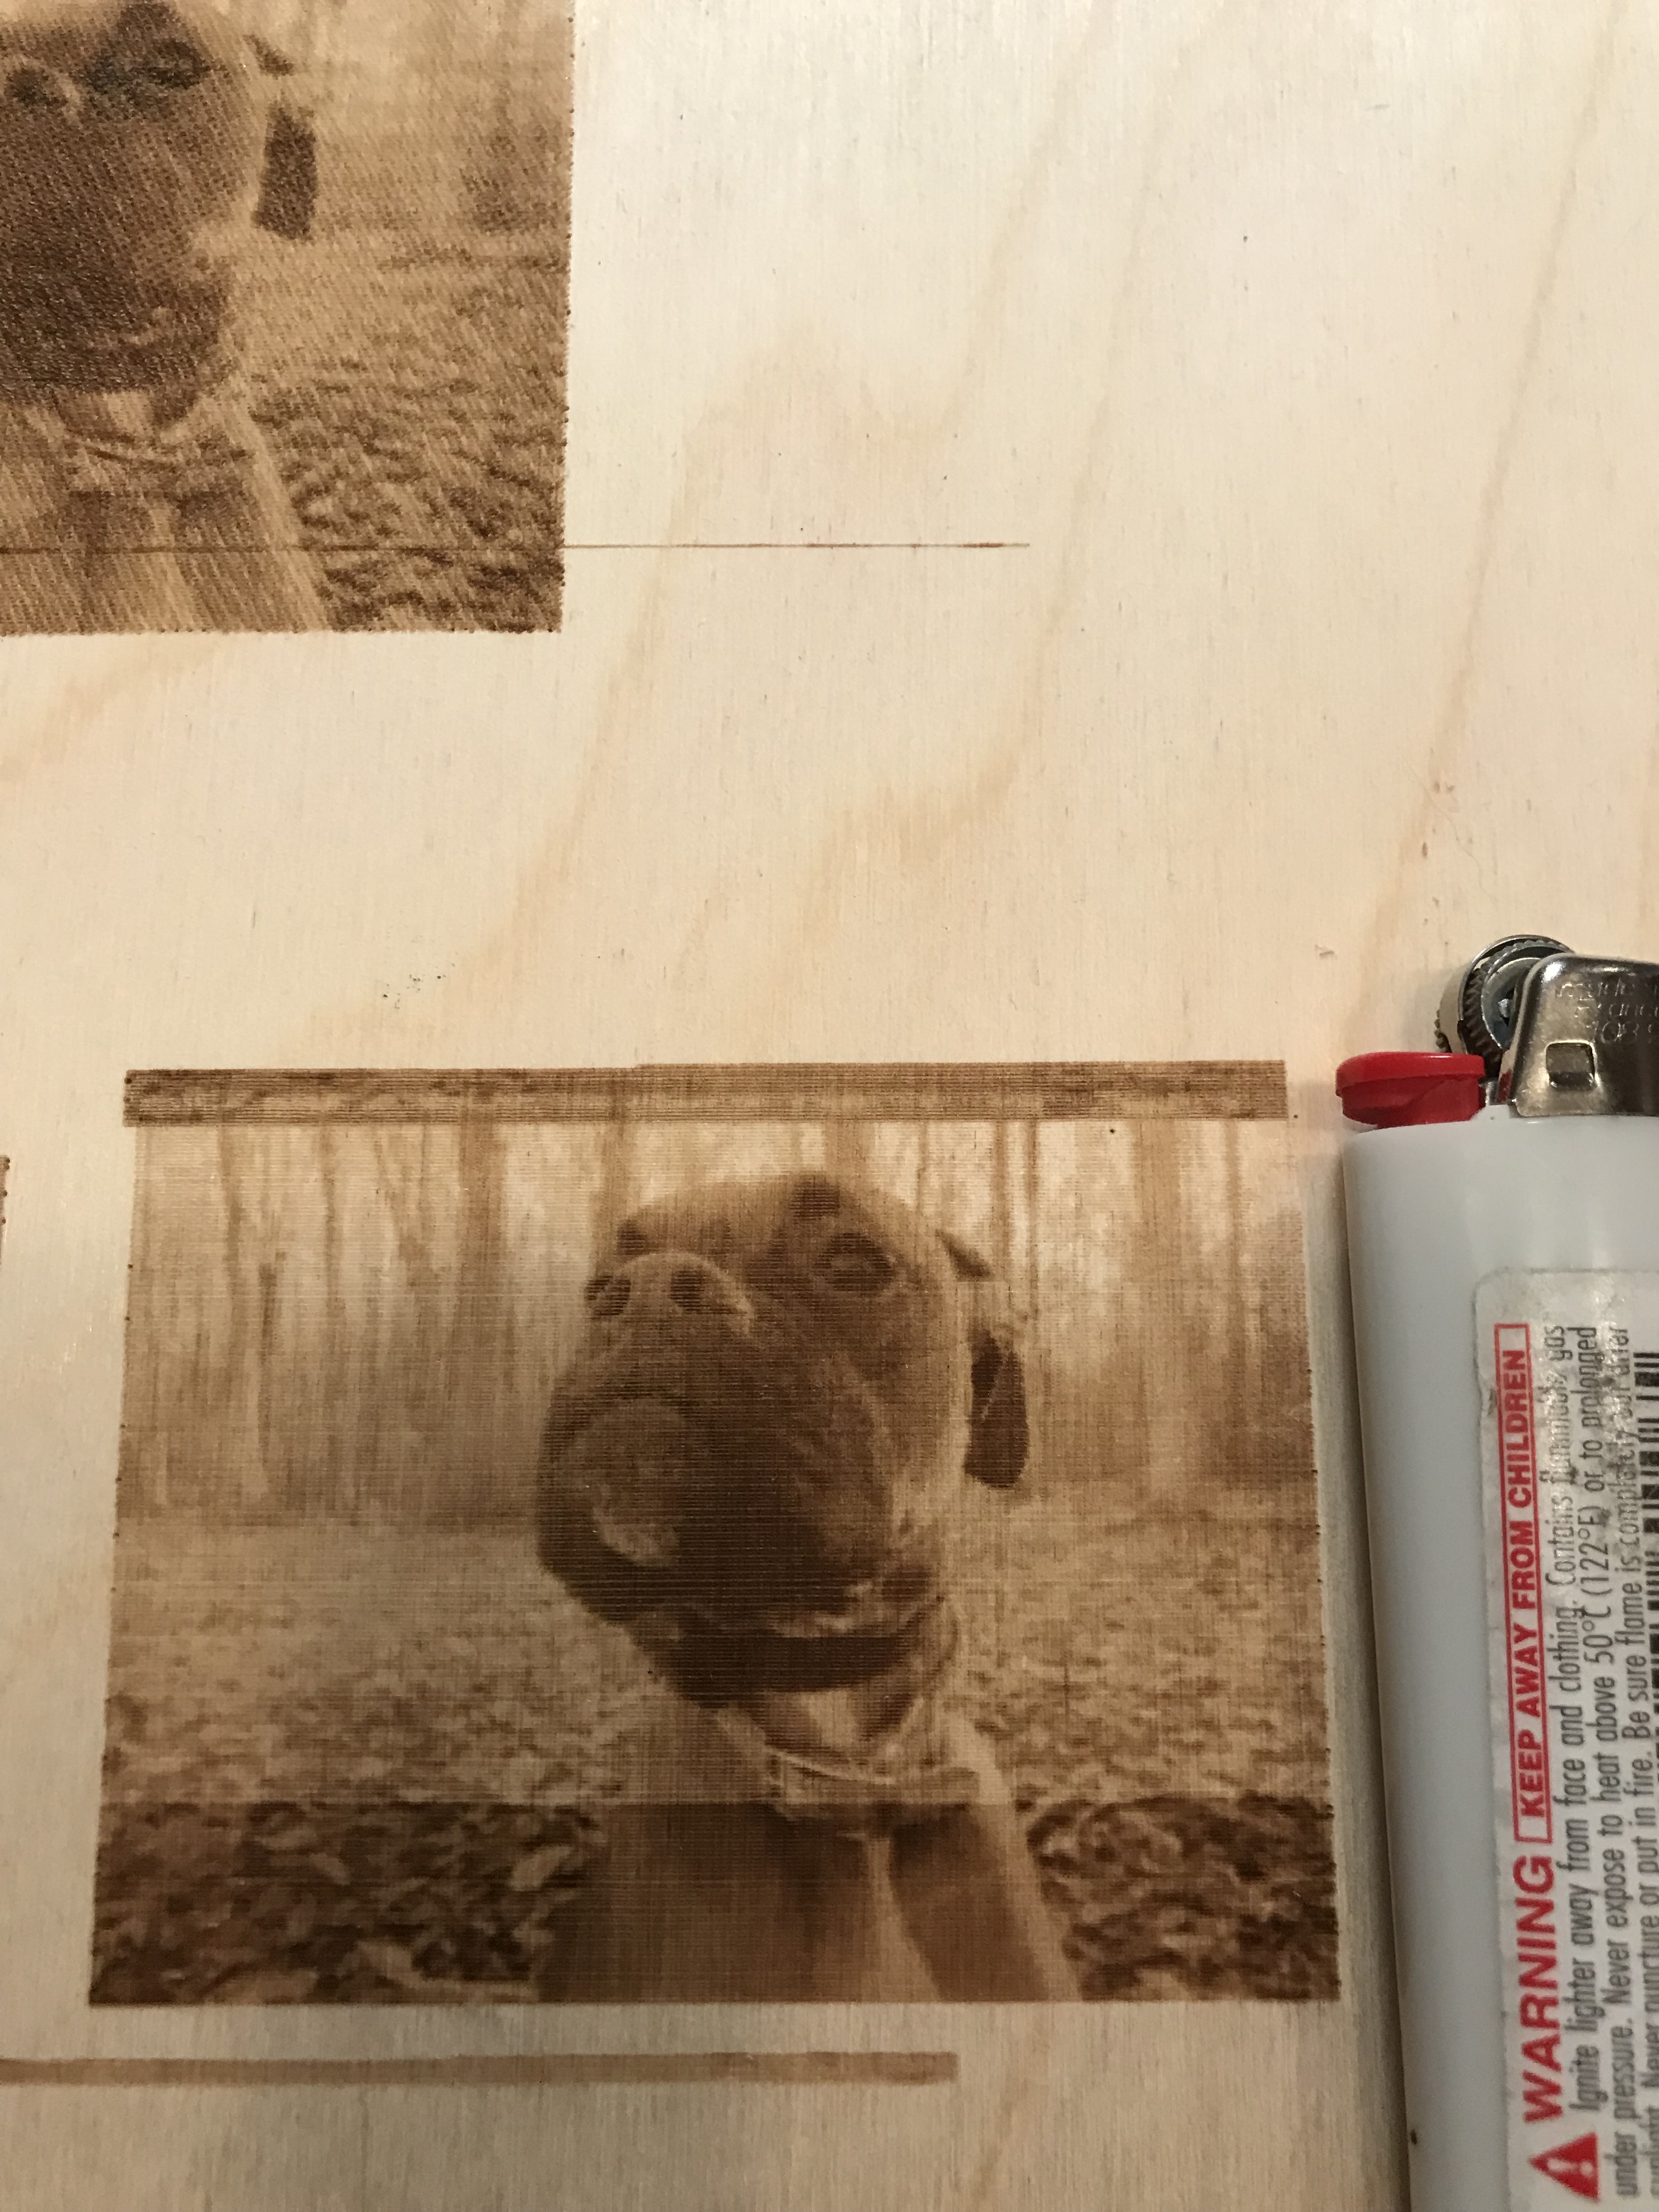
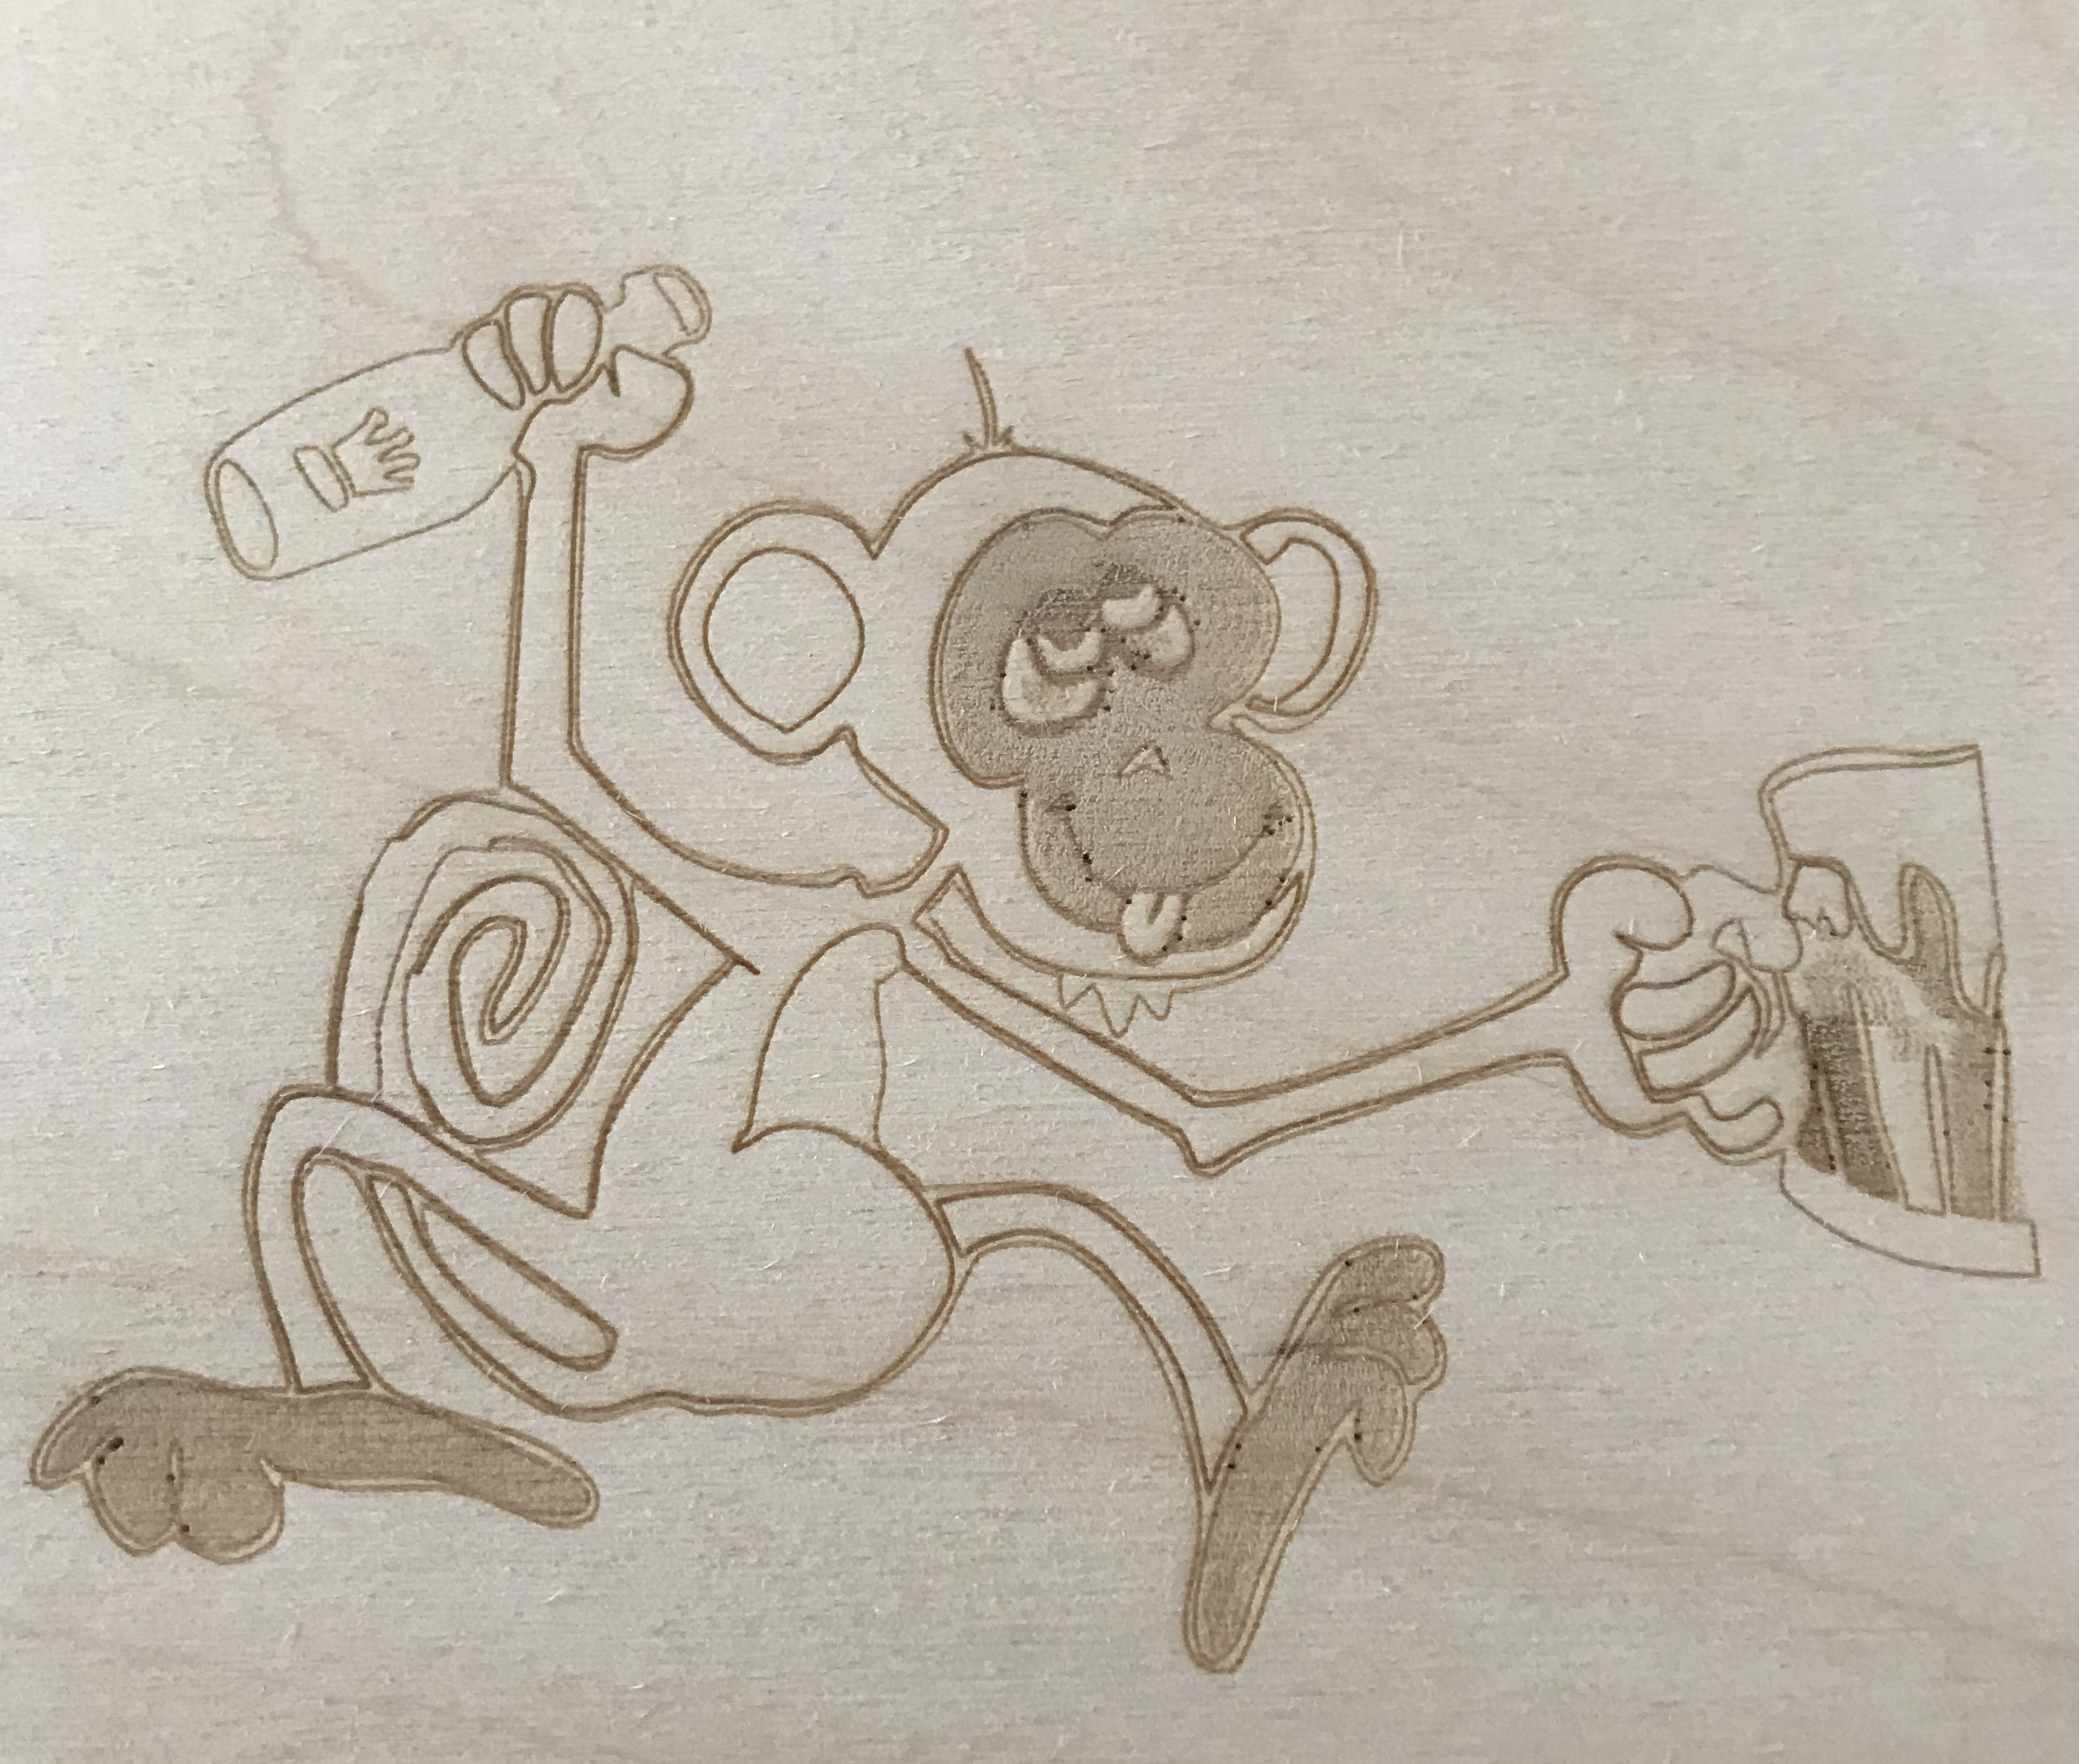
-Monkey pic is a simple DXF layered file I built in corel, and then changed up power and speed to get the "shade" changes.
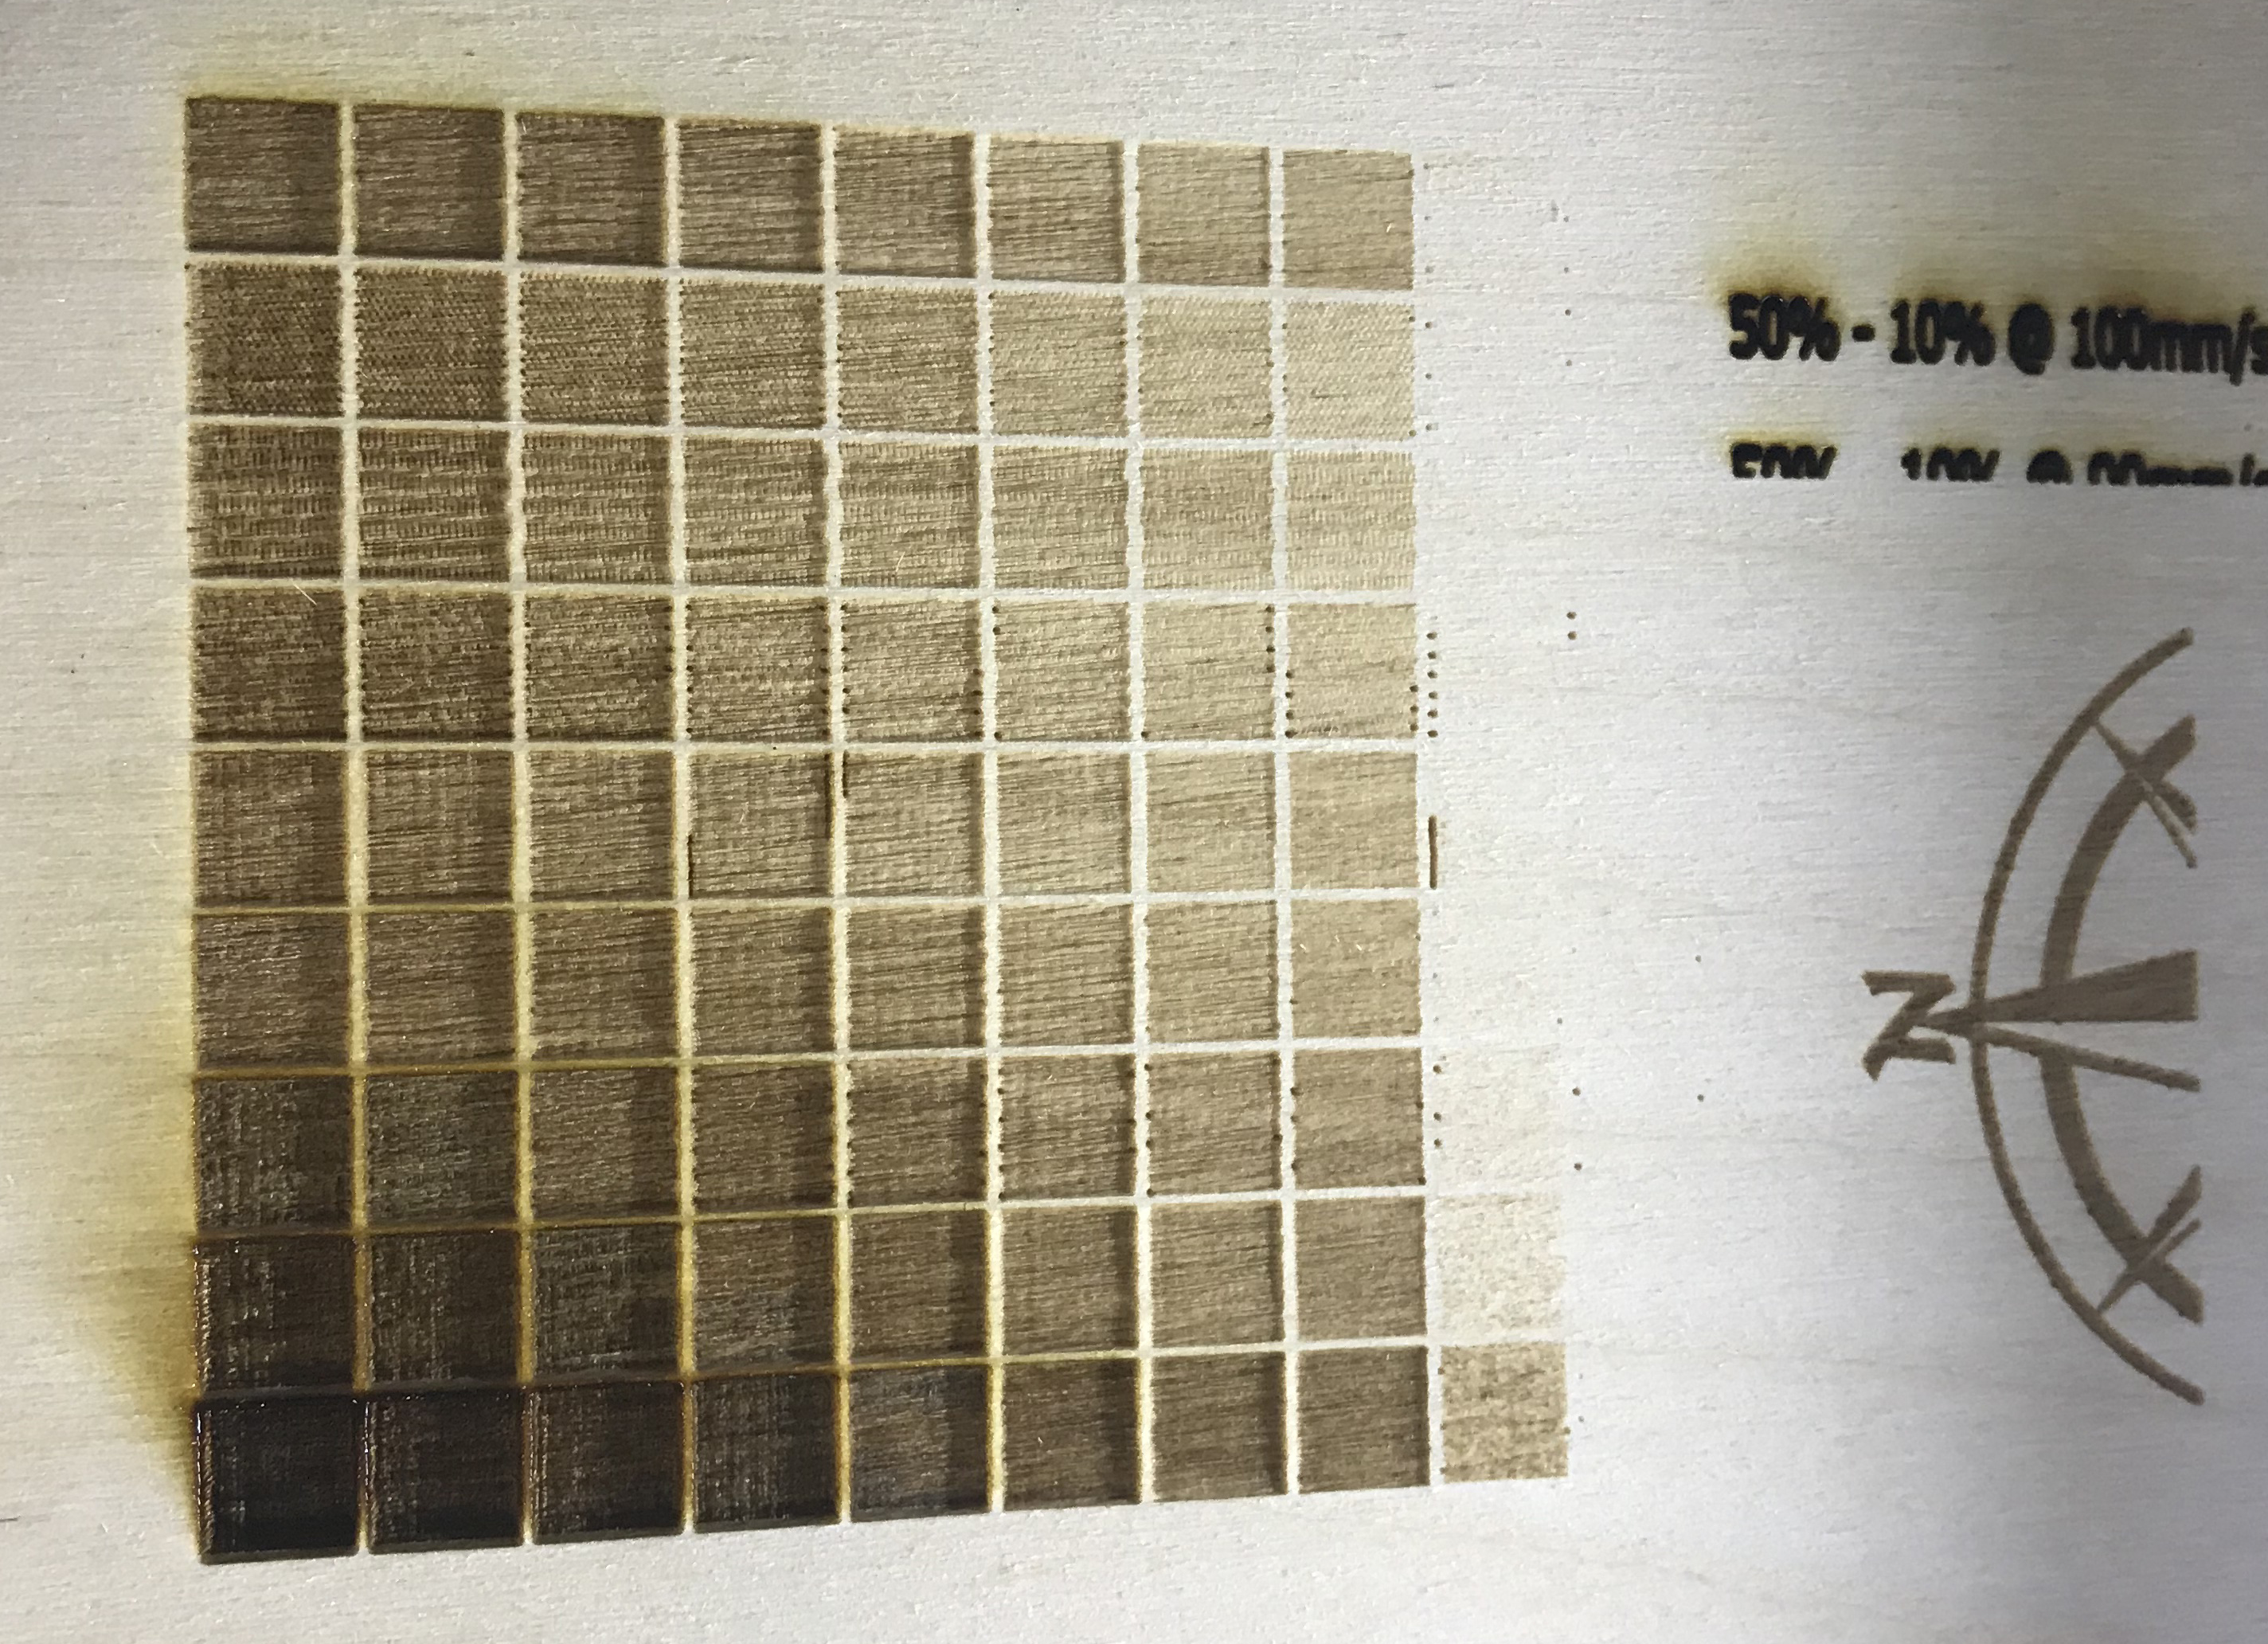
-The grid pic is a file I made which runs from 50% Max power, and then breaks that 50% power into 10% increments (within) that 50%.. if that make sense.. so 90% OF 50%, 80% of 50%, 70% of 50%...etc.. all the way down the 10%. Left to right values.. As your progress down the rows, I changed the speed starting at top is 100mm/s and the bottom row is 10mm/s.. and everything else in-between.
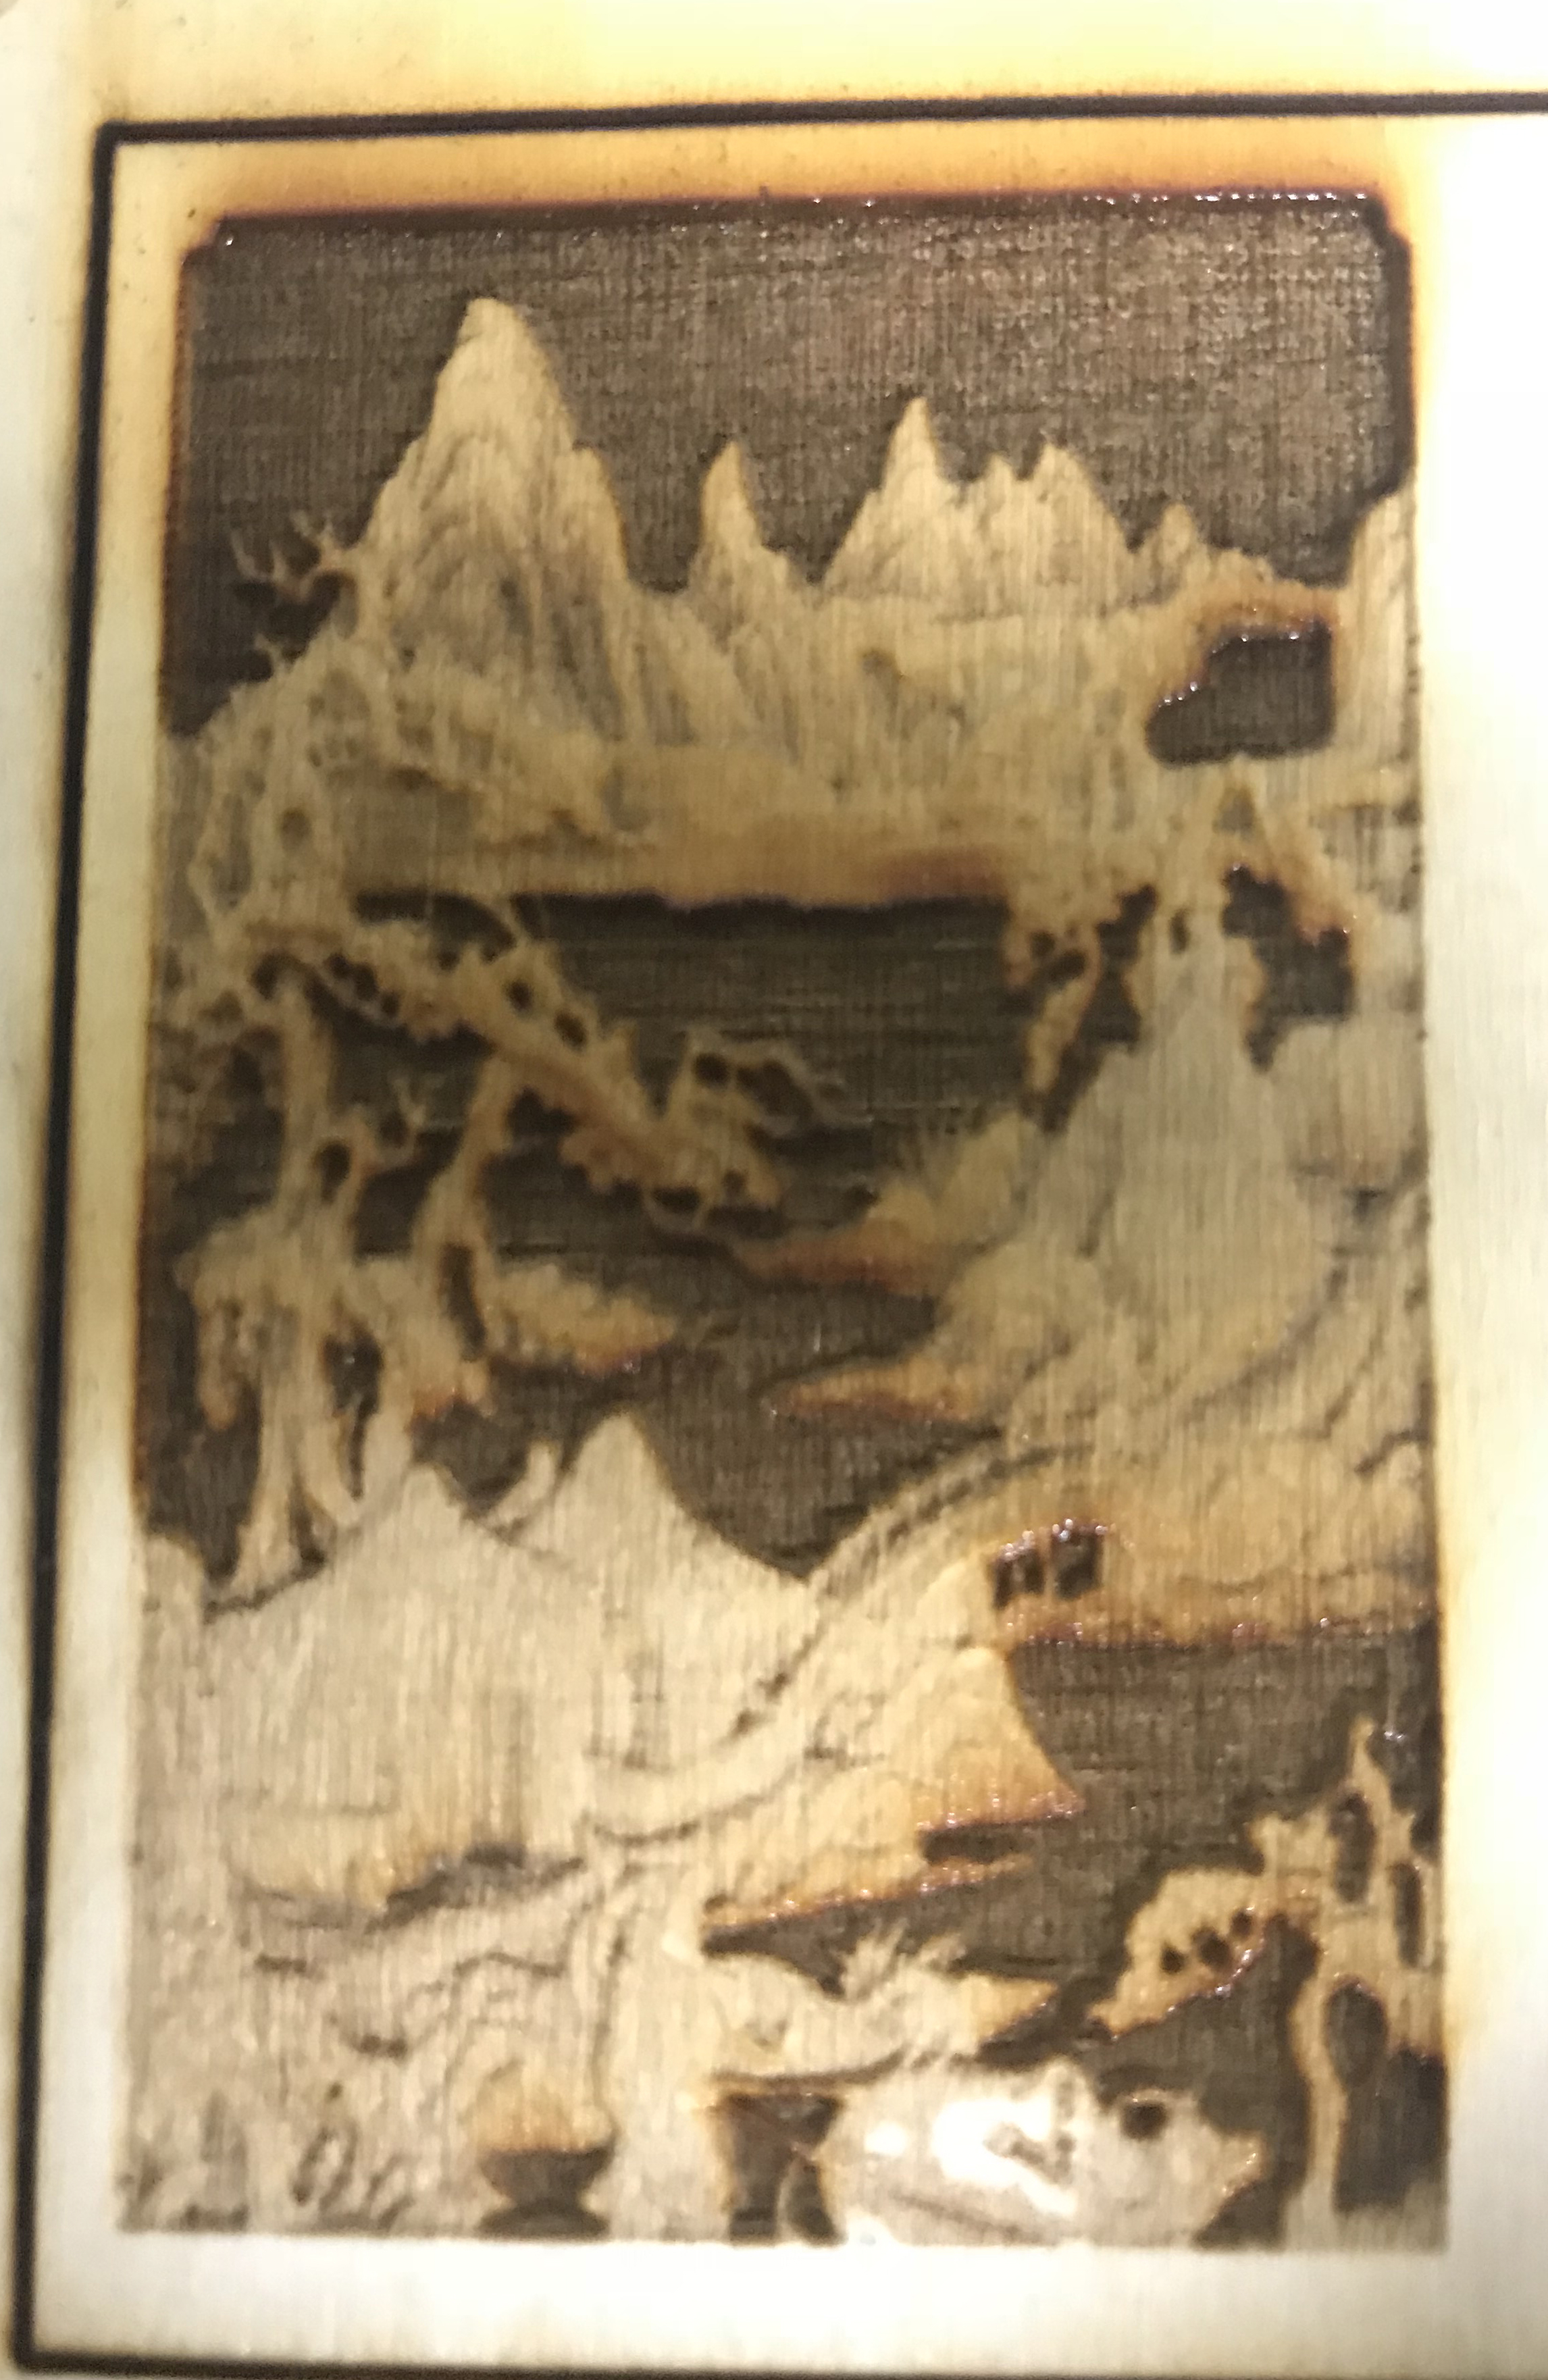
-The goofy looking pic is an actual STL type file that I ran as a "3D" engraving. power based on grey scale level. this actually came out very nice, although I made it very small, so hard to tell.. the engraving is smaller than a business card. If I was to make bigger, detail should be impressive..
-Finally the eye pic was done with 4 passes @ 50% max and 11% min grey scale print.
All on 1/8" birch ply...nothing fancy
Considering these are my first prints, I hope I can only get better from here. Stay Tuned!
(if anyone know why i get specks, or noise, on random points of higher laser output, let me know.. you can see what I mean in the grid pic. Random dots of higher power, usually on the edges of a print)
-Derek @ BlazinLazin LLC
So... Still dialing in settings but overall very pleased with this setup.. Stock K40 with cutting lens (not the most fine point). Little back story, this is my first introduction to Audrino anything, so the start was a bit rough. while wiring the K40, and trying to make the thing even move, I ended up burning 4 driver boards before realizing my issue was in the POT adjustment. My servos would not even move at the start, and just make horrible noises.. After getting the POTS dialed in, I could start printing. Currently I still have no endstops, but more to come...
-Monkey pic is a simple DXF layered file I built in corel, and then changed up power and speed to get the "shade" changes.
-The grid pic is a file I made which runs from 50% Max power, and then breaks that 50% power into 10% increments (within) that 50%.. if that make sense.. so 90% OF 50%, 80% of 50%, 70% of 50%...etc.. all the way down the 10%. Left to right values.. As your progress down the rows, I changed the speed starting at top is 100mm/s and the bottom row is 10mm/s.. and everything else in-between.
-The goofy looking pic is an actual STL type file that I ran as a "3D" engraving. power based on grey scale level. this actually came out very nice, although I made it very small, so hard to tell.. the engraving is smaller than a business card. If I was to make bigger, detail should be impressive..
-Finally the eye pic was done with 4 passes @ 50% max and 11% min grey scale print.
All on 1/8" birch ply...nothing fancy
Considering these are my first prints, I hope I can only get better from here. Stay Tuned!
(if anyone know why i get specks, or noise, on random points of higher laser output, let me know.. you can see what I mean in the grid pic. Random dots of higher power, usually on the edges of a print)
-Derek @ BlazinLazin LLC
Uploaded files:

Quote from davegalesr on January 18, 2018, 3:08 pmI get noise in many of my prints and I found the only I can compensate is to use gimp to reduce the levels in the specific area where the noisy dots are. The gerbil still sees them and fires a dot so weak it does not show on the print.
I get noise in many of my prints and I found the only I can compensate is to use gimp to reduce the levels in the specific area where the noisy dots are. The gerbil still sees them and fires a dot so weak it does not show on the print.
Quote from BlazinLazin on January 18, 2018, 4:16 pmI'll have to look into that.. Its really random on my end, and as far as I can tell its mostly near locations the laser starts, or stops engraving. I'm not sure if I can compensate but may play with some over scan settings to give the tube more time to fire on/off. I'm only actually using Paul's controller hardware, and not the Inkscape software or plugin. I have more prints line up tonight and will continue to look into this random. Good news is the Eye print only took about 20 mins to print including the 4 passes.
I'll have to look into that.. Its really random on my end, and as far as I can tell its mostly near locations the laser starts, or stops engraving. I'm not sure if I can compensate but may play with some over scan settings to give the tube more time to fire on/off. I'm only actually using Paul's controller hardware, and not the Inkscape software or plugin. I have more prints line up tonight and will continue to look into this random. Good news is the Eye print only took about 20 mins to print including the 4 passes.
Quote from BlazinLazin on January 19, 2018, 7:22 pmQuote from davegalesr on January 18, 2018, 3:08 pm"reduce the levels in the specific area where the noisy dots are"
By reduce levels, do you mean "smooth" out the black to white/grey gradient? Or change the power level? No experience with Gimp myself, but use Photoshop typically.
Only reason I ask is I get the "dot spike" wheather its near a 100% black mark, or lightest to where the laser wont fire at all. Maybe my power setting is to close to the threshhold, and im better off bumping it up, or lowering it down.
Or adjusting my images to have a hint of grey instead of white, or pure white/black..etc. to avoid a laser fire command, or if it DOES fire, fire, and make it count!
Quote from davegalesr on January 18, 2018, 3:08 pm"reduce the levels in the specific area where the noisy dots are"
By reduce levels, do you mean "smooth" out the black to white/grey gradient? Or change the power level? No experience with Gimp myself, but use Photoshop typically.
Only reason I ask is I get the "dot spike" wheather its near a 100% black mark, or lightest to where the laser wont fire at all. Maybe my power setting is to close to the threshhold, and im better off bumping it up, or lowering it down.
Or adjusting my images to have a hint of grey instead of white, or pure white/black..etc. to avoid a laser fire command, or if it DOES fire, fire, and make it count!
Quote from davegalesr on January 20, 2018, 6:50 amAnd I am not familiar with Photoshop but I will assume there is a brightness and contrast adjustment and maybe an intensity adjustment. In gimp I can adjust a small selected area of a picture and I max out the brightness and contrast to create pure white. It's tedious but it works.
And I am not familiar with Photoshop but I will assume there is a brightness and contrast adjustment and maybe an intensity adjustment. In gimp I can adjust a small selected area of a picture and I max out the brightness and contrast to create pure white. It's tedious but it works.
Quote from BlazinLazin on January 20, 2018, 10:53 amPerfect, you answered my question, I adjust brightness, contrast, and tweak the levels in between. Sometimes ill also run "unsharp mask" which will darken edges and make a more contrast between transitions in a photo. This was very helpful before I had the ability to control via pwm.
Perfect, you answered my question, I adjust brightness, contrast, and tweak the levels in between. Sometimes ill also run "unsharp mask" which will darken edges and make a more contrast between transitions in a photo. This was very helpful before I had the ability to control via pwm.
Quote from davegalesr on January 20, 2018, 11:32 amI am guessing you are using LightBurn - if so, how did you get it to connect - I don't see a way to assign a port to LightBurn and it doesn't find the Arduino on it's own.
I am guessing you are using LightBurn - if so, how did you get it to connect - I don't see a way to assign a port to LightBurn and it doesn't find the Arduino on it's own.
Quote from davegalesr on January 20, 2018, 11:36 amNever mind - I found it...
Never mind - I found it...
Quote from BlazinLazin on January 23, 2018, 5:15 pmMore Sample prints done on small scale... I have learned the importance of DPI vs Speed vs Power.. To be honest, I have found that the most important thing to nail down is how these settings interact wit material. Higher density = higher DPI.. which totally makes sense when you really think.. This is very apparent when you try to engrave on Oak. Hard and soft wood grain mix which nearly impossible to engrave a greyscale onto. the images below (the nice ones) were done on back side of Pergo flooring.. basically super dense glue filled MDF. All dpi in these images are from 70-150? I think, but all around 30-50mm/s
-derek
More Sample prints done on small scale... I have learned the importance of DPI vs Speed vs Power.. To be honest, I have found that the most important thing to nail down is how these settings interact wit material. Higher density = higher DPI.. which totally makes sense when you really think.. This is very apparent when you try to engrave on Oak. Hard and soft wood grain mix which nearly impossible to engrave a greyscale onto. the images below (the nice ones) were done on back side of Pergo flooring.. basically super dense glue filled MDF. All dpi in these images are from 70-150? I think, but all around 30-50mm/s
-derek
Uploaded files: